
Laminated Flooring Installation Steps
Record product requirements, verify substrate and moisture conditions, plan rows and transitions, then assemble the floating floor.
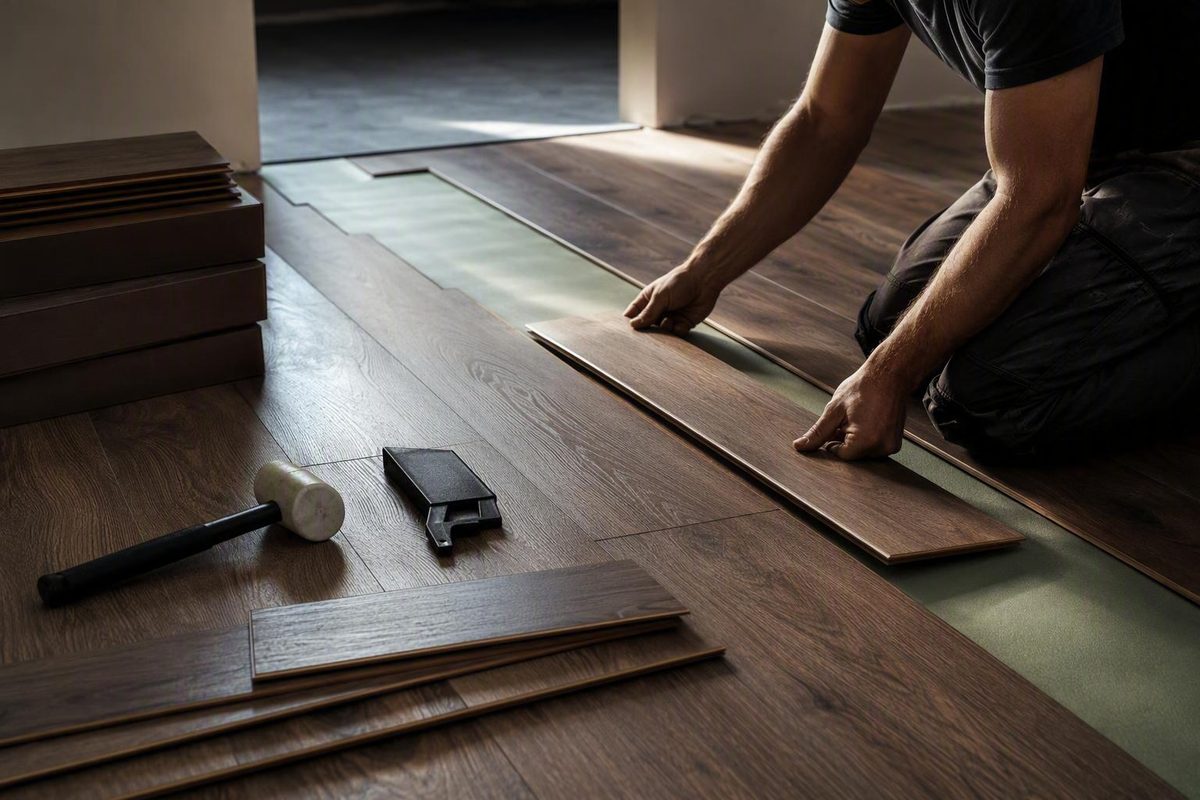
A reliable laminate flooring installation starts with the current manual for the exact collection and locking profile in your cartons—not a generic expansion gap, stagger, or acclimation period. Record the product requirements, verify the substrate and moisture conditions, plan the rows and transitions, and only then assemble the floating floor. This guide covers laminate flooring installation, sometimes phrased as laminated flooring installation.
Start here: the installation sequence and stop-work checks
Most modern click-lock laminate is installed as a floating floor. The planks lock together but are not fastened to the subfloor. Do not nail, staple, or glue the field unless the product instructions specify another method.
Use this sequence:
- Identify the product. Match the collection, model, plank dimensions, attached pad, and locking profile to the current manual.
- Inspect and document the site. Record the substrate type, visible defects, room temperature, relative humidity, and moisture results.
- Correct moisture and structural problems. Do not cover leaks, damp slabs, deflection, loose panels, or unexplained readings.
- Acclimate as directed. Follow the required packaging, stacking, location, environmental conditions, and duration.
- Prepare the substrate. Make it structurally sound, clean, dry, smooth, and compliant with the stated flatness tolerance.
- Plan the layout. Calculate row widths, locate transitions, map expansion space, and establish a straight starting line.
- Install and inspect. Use the prescribed starting side, locking motion, stagger, starter length, and tools.
- Finish without restricting movement. Remove spacers, install transitions, and fasten trim to the wall rather than through the floor.
Stop work if you find:
- Active leakage, dampness, mold-like growth, or unresolved water entry
- Concrete that has not cured for the product’s required period
- Moisture readings above the stated limit or results you cannot explain
- Structural movement, deflection, loose panels, or damaged framing
- Subfloor variation beyond the product’s flatness tolerance
- Indoor temperature or humidity outside the approved range
- Chipped locks, damaged surfaces, incorrect material, or visible manufacturing defects
- Conflicting instructions in the manual, carton literature, or warranty
Ask the manufacturer’s technical department for written clarification when instructions conflict. Locking direction, expansion clearance, vapor control, and stagger may affect movement, seam engagement, or warranty compliance.
Allow more time than the plank-laying estimate suggests. Lowe’s describes the work as intermediate and estimates one or two installation days for a standard room, excluding at least two days of acclimation and possible floor removal. Demolition, leveling, moisture correction, trim, and difficult cuts add time (Lowe’s laminate installation guide).
Complete a manufacturer-first worksheet before installation
Fill in this worksheet from the manual for the exact collection. A blank or unclear field does not establish that no requirement exists.
| Requirement | Product-specific answer |
|---|---|
| Manufacturer, collection, model, and SKU | |
| Plank dimensions and locking profile | |
| Required starting wall, side, and direction | |
| Approved and prohibited substrates | |
| Acclimation period and carton storage method | |
| Installation temperature and humidity | |
| Subfloor flatness tolerance | |
| Wood-subfloor moisture test and limit | |
| Concrete test methods, limits, and cure time | |
| pH or emission limit, if specified | |
| Required underlayment and attached-pad restrictions | |
| Vapor barrier or retarder assembly | |
| Perimeter expansion gap | |
| Larger-room expansion requirement | |
| Minimum first- and final-row width | |
| Minimum starter and cutoff length | |
| End-joint stagger | |
| Transition and room-size limits | |
| Wet-area approval and sealing method | |
| Radiant-heat approval and surface-temperature limit |
Acclimation requirements vary. General guides include 24- and 48-hour recommendations, while Provenza MaxCore requires at least 72 hours in closed cartons at the installation site (Provenza MaxCore 5G guidelines). Forty-eight hours may be common, but it is not a universal rule.
Select Surfaces specifies 48 hours with unopened cartons cross-stacked in the installation area. Its Spill Defense guide also gives a 16-inch stagger in one section and an 8-inch stagger later. That contradiction calls for written technical clarification rather than choosing whichever number is easier (Select Surfaces Spill Defense guide).
Create an installation and warranty record before starting:
- Receipt and order confirmation
- Carton ends, product labels, lot or batch information, and SKU
- Installation manual and warranty in effect at purchase
- Photographs of the complete substrate and corrected defects
- Temperature and relative-humidity records
- Moisture-test methods, locations, dates, and results
- Photographs of vapor-control and underlayment installation
- Photographs of representative planks before installation
- Written manufacturer clarifications
- Progress photographs showing expansion clearance and transitions
Inspect planks under good light. Set aside boards with visible surface defects, damaged edges, or chipped locks. Manufacturer terms may exclude visibly defective material after installation, so resolve questionable pieces before they become part of the floor.
Mix acceptable planks from several cartons as you work. Distribute repeated print patterns and tones rather than creating obvious clusters.
Measure the room and assemble the tools and materials
For a rectangular room:
Room area = length × width
Measure in feet to obtain square feet. Divide an irregular room into rectangles, calculate each section, and add the results. Include closets, alcoves, and connected areas.
About 10% extra flooring is commonly recommended for a straightforward room. Diagonal layouts, irregular perimeters, numerous doorways, damaged boards, and selective pattern placement can require more. Confirm the coverage per carton and round up to whole cartons (Lowe’s laminate installation guide). Keep labeled spare planks for possible future matching.
Measuring and layout tools
- Tape measure, pencil, and carpenter’s square
- Straightedge, chalk line, and long level
- Product-compliant spacers
- Paper or cardboard for irregular-cut templates
Assembly and cutting tools
- Approved tapping block and pull bar, if permitted
- Rubber or specified mallet, if permitted
- Utility knife
- Laminate cutter or a saw approved for the material
- Jigsaw for notches and irregular cuts
- Jamb saw or oscillating multi-tool
- Stable cutting station and secure work supports
Blade type and face-up or face-down cutting orientation depend on the saw, blade, and laminate. Follow both the flooring instructions and the tool manufacturer’s directions. Support narrow cutoffs so they cannot shift, bind, or fall into the blade path.
Preparation and finishing materials
- Scraper, broom, and vacuum
- Approved patching or leveling materials
- Required acoustic underlayment
- Required moisture-barrier underlayment or polyethylene
- Specified seam tape
- Transitions and reducers
- Baseboard, shoe molding, or quarter-round
- Product-required silicone, joint sealant, or backer material
Safety equipment
Use eye and hearing protection when cutting, gloves when handling sharp edges, and knee pads for floor work. Control airborne dust with collection or extraction and use respiratory protection appropriate to the material, tool, and exposure.
Do not assume every installation needs a tapping block. Some locking systems require controlled tapping; others can be damaged by it.
Use a substrate decision table: wood, concrete, or existing flooring
Every accepted substrate must be structurally sound, clean, dry, smooth, and within the exact product’s flatness tolerance. Appearance alone does not establish dryness, flatness, or structural adequacy.
| Substrate | Acceptance and preparation | Moisture question | Stop when |
|---|---|---|---|
| Plywood or OSB | Secure loose panels, correct movement, replace damaged areas, set protruding fasteners, and flatten with approved methods. | Which meter, test depth, and maximum reading apply? | Panels flex, framing moves, damage is extensive, or readings exceed the limit. |
| Concrete | Verify cure time; remove contaminants; evaluate cracks; use compatible grinding, patching, or leveling systems. | Which RH, emission, pH, or other tests and limits apply? What vapor-control assembly is required? | The slab is uncured, wet, contaminated, moving, severely uneven, or outside a stated limit. |
| Adhered resilient flooring | Leave it only if its type, number of layers, adhesion, condition, and flatness are approved. | Can the structural substrate be tested accurately, and is another barrier required? | The floor is cushioned, loose, damaged, multilayered beyond approval, or of uncertain composition. |
| Tile | Confirm that it is approved and firmly bonded; repair loose areas and flatten grout joints where required. | What testing and vapor control apply beneath the tile? | Tile is loose, movement-cracked, highly uneven, or unapproved. |
| Carpet or another floating floor | Remove carpet, pad, tack strip, and existing floating flooring. Inspect the exposed substrate. | What are the moisture conditions at the structural substrate? | Soft material remains or the substrate cannot be inspected. |
| Radiant-heated substrate | Obtain written approval for the flooring, heating system, underlayment, and installation method. | What vapor retarder, separation layer, startup sequence, and temperature limit apply? | Compatibility is undocumented or required conditions cannot be maintained. |
Materials beneath laminate perform different jobs:
- Attached pad is bonded to the plank and may provide cushioning or sound control.
- Acoustic underlayment is a separate layer intended primarily for sound management and specified support.
- Moisture-barrier underlayment combines an underlayment with a qualified vapor-control layer.
- Standalone polyethylene provides vapor control when the manufacturer specifies its thickness, overlap, and seam treatment.
These layers are not interchangeable. Attached padding may eliminate separate acoustic underlayment but still leave a polyethylene requirement over concrete. Conversely, adding unapproved soft material can allow excessive movement at the joints.
Concrete instructions are especially product-specific. Cure time, test method, acceptable reading, pH range, and polyethylene placement can all differ. Never transfer one collection’s limits to another merely because both products are laminate.
Correct active moisture, structural deflection, severe unevenness, and unapproved existing-floor assemblies before proceeding. A floating floor cannot repair the structure beneath it.
Plan plank direction, balanced rows, expansion space, and transitions
Planks are often run parallel to the longest wall or toward a focal point, but appearance is not the only consideration. A straight starter line, workable locking direction, manageable doorways, and sensible transition locations are more important than a universal direction rule.
Measure the usable room width perpendicular to the plank direction:
Usable room width ÷ plank face width = full rows plus a remainder
Compare the remainder and proposed first-row width with the product’s minimum row widths. Measure at several points because walls may bow or run out of square.
Illustration—not a universal rule: A 144-inch room with 7.5-inch planks accommodates nineteen full plank widths with a 1.5-inch remainder. The Home Depot’s general guide recommends redistributing a final row narrower than 3.5 inches. In this example, ripping 2 inches from the first row creates approximate first- and final-row widths of 5.5 and 3.5 inches. Substitute your product’s actual minimums (Home Depot laminate installation guide).
Mark a reference line instead of following the wall blindly. If the starting wall is uneven, scribe and rip the first row while keeping its room-facing edge straight.
Map expansion clearance around:
- Perimeter walls and thresholds
- Door jambs and casings
- Pipes and floor penetrations
- Columns, posts, hearths, and fixed masonry
- Cabinets, islands, and vanities
- Fixed rails, tracks, and heavy fixtures
- Transition channels and movement breaks
The required gap comes from the product manual and may increase in larger uninterrupted areas. T-moldings or other transitions may be required at doorways, long runs, large open rooms, or changes in floor type.
To undercut a door casing, place a scrap plank over the approved underlayment or vapor assembly and use it as the height reference. Cut only enough casing for the plank to pass underneath while preserving clearance around the fixed framing.
Do not trap the floating floor beneath fixed cabinets, islands, vanities, or heavy fixtures unless the manufacturer expressly permits it.
Install the click-lock planks without damaging the joints
Before assembly, confirm the required starting wall, whether the work proceeds left-to-right or right-to-left, and whether the tongue or groove faces the wall. Lock geometry can determine the correct starting side.
Place compliant spacers around the perimeter and establish a straight first row. The first two or three rows create the working base; if they curve, shift, or contain partially engaged seams, later rows become harder to install correctly.
Use this cycle:
- Select and inspect a plank.
- Cut the starter piece when required.
- Engage the long and short joints using the prescribed motion.
- Confirm that both seams are closed and flush.
- Verify the required end-joint offset.
- Maintain clearance at walls and obstructions.
- Recheck the working line regularly.
Common locking methods include:
- Angle-and-angle: Long and short joints engage through angling and repositioning.
- Angle-and-tap: The long side is angled into place, followed by controlled tapping where specified.
- Fold-down: A mechanical end lock engages as the plank is lowered.
- Angle-and-lower: The plank enters the receiving profile and lowers without tapping.
These labels describe broad methods, not interchangeable instructions. REALock ATS uses an angle-and-tap process and calls for checking long and end seams, while Select Surfaces tells installers not to tap its named collection (REALock Angle Tap guide).
Published starter and stagger examples vary widely. Use the value for the flooring in your cartons rather than adopting that range as a rule (FlooringInc installation guide, Provenza MaxCore 5G guidelines).
A cutoff may start a later row only if it meets the minimum starter length and preserves the required stagger. Avoid short pieces and repetitive stair-step patterns unless the layout is approved.
Never strike the decorative edge directly. Use a tapping block or pull bar only where the locking instructions permit it and only against the approved part of the profile.
Inspect every long and short seam for:
- Open gaps or raised edges
- Height differences
- Chipped or crushed locks
- Misalignment
- Debris in the joint
- A plank moving independently of its neighbors
If a joint is wrong, stop and disassemble back to it. Forcing additional rows against a defective seam can damage more locks.
The installed field normally remains floating. Do not fasten it to the substrate or add joint adhesive unless the product instructions prescribe adhesive for that exact location and profile.
Cut the final row and finish without pinning the floor
Measure the distance to the wall at several locations. Subtract the required expansion clearance, transfer the measurements to the final-row planks, and rip them to width. Confirm that the narrowest point meets the minimum final-row requirement.
Where the wall prevents normal angling, use the specified final-row method or an approved pull bar. Do not hammer the exposed decorative edge.
After completing the field:
- Remove all temporary spacers.
- Recheck clearance around the room.
- Install required transitions and movement breaks.
- Add or reinstall baseboard, shoe molding, or quarter-round.
- Check doors and appliances for unrestricted operation.
- Inspect the floor under good light.
Fasten trim to the wall or existing molding, not through the laminate. It should conceal the gap without pressing down hard enough to bind the planks. Secure transition tracks according to their instructions without driving fasteners through the floating field.
Use silicone or joint sealant only as part of the exact product’s approved wet-area system. Perimeter sealing is not a universal laminate requirement.
Check for open seams, raised edges, missing movement space, restricted doors, pinched transitions, and trim that binds the floor. Retain labeled spare planks and the installation records.
Check special conditions: concrete, basements, wet rooms, and radiant heat
Room names alone do not establish suitability. A water-resistant surface claim, a sealed installation system, and explicit bathroom approval are different things.
| Location | Approval to verify | Moisture question | Principal disqualifier |
|---|---|---|---|
| Dry living area | Interior use, substrate, traffic, and room-size approval | Are ambient and substrate readings within limits? | Active moisture, movement, or an unsuitable substrate |
| Kitchen | Explicit kitchen approval and any sealing system | How are spills, plumbing penetrations, and appliance leaks addressed? | Product exclusion or exposure beyond stated coverage |
| Bathroom | Bathroom approval, sealing details, and fixture clearances | How are standing water, toilet leaks, tub edges, and subfloor moisture handled? | No written wet-room approval |
| Laundry room | Appliance-area approval and sealing details | How are washer leaks, drains, and supply connections addressed? | Excluded appliance leaks or room use |
| Basement | Below-grade approval and slab vapor-control assembly | Which concrete tests and limits apply? | Failed or missing tests, water entry, or an unapproved assembly |
| Radiant heat | Written flooring and heating-system approval | What vapor control, separation, startup sequence, and surface limit apply? | Direct heat contact, incompatible layers, or uncontrolled temperature |
Water resistance at the top surface does not make laminate a moisture barrier. Coverage may exclude flooding, prolonged standing water, appliance leaks, and moisture entering through the slab or wood substrate.
For basements and on-grade or below-grade slabs, complete the product-approved concrete tests and install the specified vapor-control assembly. Surface appearance is not a substitute for testing.
For radiant heat, verify:
- Written compatibility with the exact collection
- Approved underlayment and vapor-control layers
- Required separation from heating components
- Pre-installation operation or stabilization procedures
- Gradual temperature adjustment after installation
- Maximum subfloor or finished-surface temperature
Manufacturer examples differ: Select Surfaces limits its named product to 80°F, while Provenza MaxCore states a maximum floor-surface temperature of 85°F. These are collection-specific limits, not a general radiant-floor standard (Select Surfaces Spill Defense guide).
Thicker or softer underlayment is not automatically better over radiant heat. The complete assembly must provide adequate support for the click joints while remaining within the approved thermal requirements. Community comments may suggest questions, but they do not establish vapor-control, emissions, or thermal-performance standards.
Avoid common failures and know when to hire a professional
A symptom can have several causes. Evaluate the substrate, moisture, joints, clearances, and underlayment together rather than treating one visible effect as proof of one error.
| Symptom | Possible contributors | Immediate response |
|---|---|---|
| Open seams | Incomplete engagement, damaged locks, debris, movement, poor flatness, or wrong locking motion | Stop adding rows and inspect the affected joint. |
| Raised or peaked joints | Restricted movement, moisture, debris, profile damage, or forced assembly | Document the condition; check accessible clearances and moisture. Do not hammer it flat. |
| Buckling | Trapped flooring, inadequate clearance, moisture, or missing movement breaks | Stop further work or use; document conditions and obtain guidance before cutting or removing components. |
| Bounce | Low substrate areas, excessive underlayment, deflection, or unsupported joints | Locate the movement and evaluate the underlying assembly. |
| Chipped locking edges | Direct hammering, wrong tool placement, forced seams, or damaged material | Replace the affected plank and confirm the locking method. |
| Squeaks or popping | Deflection, debris, unsuitable underlayment, joint movement, or product-specific floating-floor behavior | Map the sound and inspect support before assigning a cause. |
| Rows will not engage | Wrong starting side, curved starter rows, damaged locks, debris, or wrong motion | Check the product diagram and rebuild a straight starting section. |
Frequent preventable errors include:
- Using the wrong collection guide
- Skipping required acclimation
- Omitting moisture tests or vapor control
- Installing visibly defective planks
- Failing to balance the first and final rows
- Applying a generic expansion gap or stagger
- Tapping a no-tap locking system
- Forcing a misaligned seam
- Adding unapproved soft underlayment
- Running flooring beneath fixed fixtures
- Fastening trim or transitions through the floor
- Omitting required movement breaks
Warranty coverage can depend on compliance with the written installation terms and retention of test results or other records. Installer, notice, documentation, and remedy provisions vary, so check the warranty for the exact product rather than assuming that every error has the same consequence (CALI installation-mistake guidance).
Hire a qualified flooring, concrete, moisture, or building professional when the project involves:
- Active or unexplained moisture
- Structural movement or significant deflection
- Major concrete grinding, patching, or crack evaluation
- Extensive wood-subfloor replacement
- Stairs and stair-nose systems
- Complicated transitions or floor-height changes
- Numerous jambs and detailed cuts
- Large connected areas with difficult movement planning
- A warranty requiring licensed installation
- Uncertain old resilient flooring
Lowe’s warns that vinyl flooring installed before 1980 may contain asbestos. If such material is uncertain, do not cut, sand, scrape, drill, or remove it; obtain qualified assessment and handling instead.
Proceed as a DIY project only if the exact manual is clear, the substrate is sound and within specification, moisture control is resolved, you can use the required tools safely, and the layout is manageable. You should also be prepared to document the work and stop when a substrate or joint defect appears.
Return to the worksheet before declaring the job ready. If the installation matches the product’s substrate, moisture, acclimation, movement, locking, transition, wet-area, and radiant-heat requirements—and the records are retained—the project is on firmer ground. If a requirement remains unclear or the substrate has an unresolved defect, stop before installing more planks and obtain product-specific technical or professional guidance.