
Flooring Installation From the Subfloor Up
For plank floors, match the exact product to the room, substrate, moisture conditions and grade level, then choose a manufacturer-approved method.
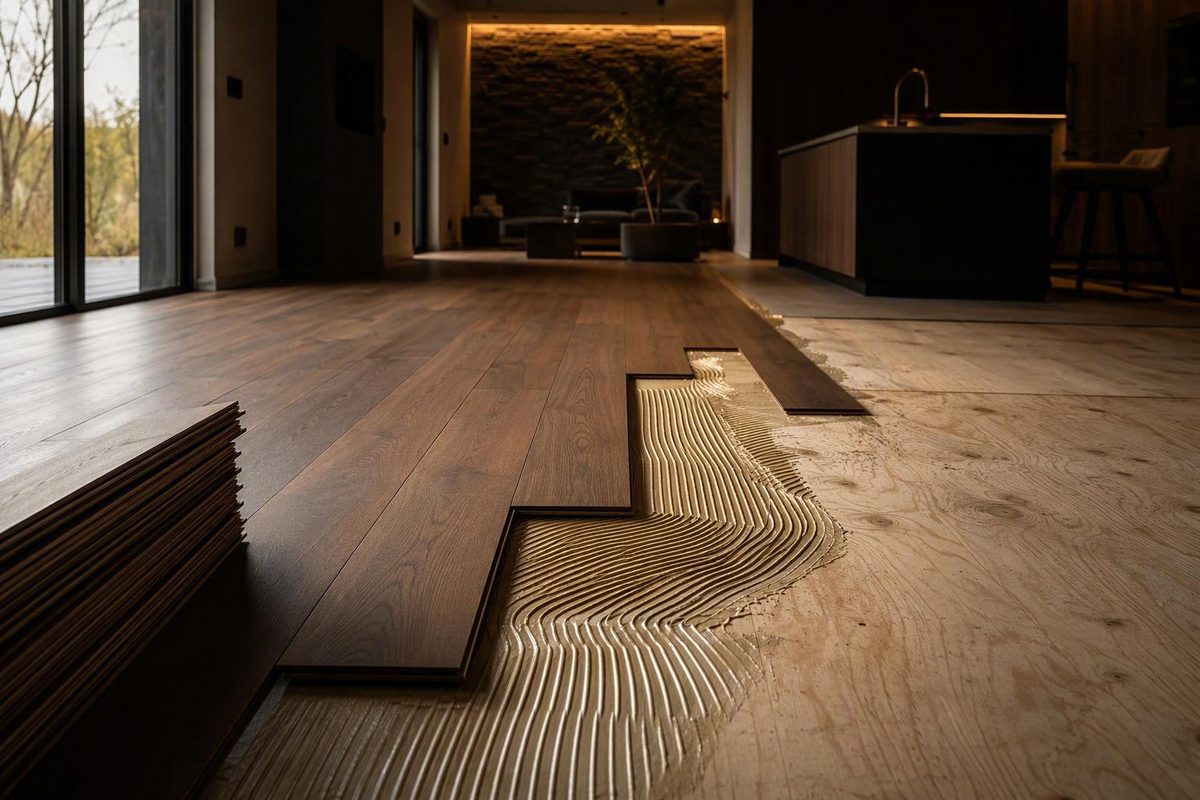
For plank flooring—hardwood, engineered wood, laminate, and luxury vinyl—a reliable installation starts by matching the exact product to the room, substrate, moisture conditions, grade level, and a manufacturer-approved installation method. Then prepare the subfloor, plan the layout, install the approved assembly, add trim and transitions, clean up, and inspect the work.
This is a planning guide, not a universal installation manual. General preparation principles apply across many plank floors, but the current instructions for the exact model control acclimation, moisture limits, expansion space, underlayment, adhesives, fasteners, and return-to-use timing. Tile, stone, sheet vinyl, and carpet require different material-specific procedures.
Start here: make five decisions before installing anything
Before ordering flooring or removing the old surface, write down these five decisions:
- Exact flooring product: Record the manufacturer, collection, model or SKU, construction, thickness, plank width, and lot numbers.
- Substrate: Identify concrete, plywood, OSB, an approved existing floor, or another assembly—not merely what is visible at the surface.
- Grade level: Confirm whether the room is above, on, or below grade.
- Moisture exposure: Consider slabs, crawl spaces, plumbing, exterior doors, seasonal humidity, and the room’s normal use.
- Approved attachment method: Verify whether that exact product may float, be glued down, or be nailed or stapled to that substrate.
Use those answers as a decision flow:
- Is the exact product approved for the room and grade level? If not, choose another product.
- Is it approved over the identified substrate? If not, determine whether an approved substrate assembly can be built.
- Are the substrate and environmental conditions acceptable? If not, correct the condition before selecting accessories or scheduling installation.
- Which installation methods does the product permit in that combination? Choose only among those methods.
- Are all components compatible? Confirm the flooring, adhesive or fasteners, underlayment, vapor-control system, trim, and transitions as one assembly.
Obtain the current instructions before buying those components or beginning demolition. Search by exact SKU or collection, verify the document’s product scope and revision date, and save a copy with the job records. The National Wood Flooring Association says manufacturer instructions supersede its general wood-flooring guidelines; applicable codes and site conditions also matter. Some manufacturers warn that improper installation, unsuitable conditions, or unapproved materials can affect warranty coverage. Review the NWFA Wood Flooring Installation Guidelines.
If instructions for the flooring, adhesive, or underlayment appear to conflict, stop and obtain written clarification from the manufacturer or system supplier rather than choosing the most convenient requirement.
Stop work if you find unresolved moisture, structural movement, unacceptable unevenness, contamination, incompatible materials, or visibly defective flooring. Do not cover the problem and assume the new floor will stabilize it. This guide does not replace the product manual, applicable codes, or qualified assessment and removal of hazardous materials.
Choose the installation method that matches the product and subfloor
“Floating,” “glue-down,” and “nail- or staple-down” describe how a floor is supported or attached. They are not interchangeable choices. The final two rows below are product-specific examples of floating systems, not additional attachment methods.
| Method or system | How it works | Common compatibility and substrate considerations | Reject it when |
|---|---|---|---|
| Floating | Planks join to one another without being fastened or glued to the subfloor. | Common for approved click-lock laminate and luxury vinyl; some engineered wood may float over approved wood, concrete, or existing surfaces. | The product forbids floating, the substrate is unstable or outside flatness limits, fixed objects would pin the floor, or room dimensions require transitions that are not provided. |
| Glue-down | Approved flooring is bonded directly to a prepared substrate with a compatible adhesive system. | Often permitted for specified engineered wood and glue-down vinyl over prepared concrete or wood. Moisture testing and compatible vapor control may be required. | The flooring, substrate, adhesive, or measured moisture conditions are incompatible, or contamination could prevent bonding. |
| Nail or staple down | Approved flooring is mechanically fastened to a suitable wood subfloor. | Common for solid hardwood and permitted engineered wood over qualifying plywood or OSB assemblies. | The substrate is unsuitable for fasteners, or the flooring dimensions and construction do not match the specified fastening system. |
| Click-lock laminate | Usually assembled as a floating floor with locking edges. | A plausible DIY system over an approved, clean, dry, flat, stable substrate. Separate underlayment may or may not be required. | The locking profile is damaged, site moisture is unacceptable, or the substrate or proposed underlayment is not approved. |
| Click-lock luxury vinyl | Usually floats, with planks mechanically locking together. | Potentially approachable for DIY work when the room, existing surface, flatness, moisture, and product instructions permit it. | The substrate has unresolved movement or unevenness, the product is unsuitable for the room, or fixed work would restrict required movement. |
Solid hardwood is commonly mechanically fastened over a suitable wood subfloor. Engineered wood is more variable: depending on its construction, it may permit fastening, glue-down, or floating, but not every engineered board allows all three. For example, one manufacturer permits floating for one listed product size while rejecting it for several other listed thicknesses. That product-specific matrix illustrates why thickness, width, construction, and fastening requirements cannot be generalized. See Johnson Hardwood’s method matrix.
Over concrete, an approved glue-down or floating engineered product may be an option. The slab still needs the prescribed moisture test, surface preparation, and any compatible vapor-control system. Grade level and radiant heat can further restrict the choice.
Tile, stone, sheet vinyl, and carpet use different installation systems. Do not transfer plank-flooring underlayments, tolerances, or attachment methods to them.
Use a jobsite-readiness checklist before laying the first row
Treat readiness as a pass-or-fail inspection, not a cleanup session immediately before installation.
Room and storage
- [ ] The building is enclosed and protected from weather.
- [ ] Drywall, plaster, paint, masonry, and other wet work are complete and dry.
- [ ] Permanent HVAC is operating as the product requires.
- [ ] Temperature and relative humidity are stable within the required range.
- [ ] The room is clear, with safe access for carrying, cutting, and laying material.
- [ ] Flooring is stored in the required position and protected from moisture and damage.
- [ ] The required in-service conditions can be maintained after installation.
Substrate
- [ ] The substrate is clean, dry, flat, stable, structurally sound, and compatible.
- [ ] Wood panels are securely attached where applicable.
- [ ] Cracks, loose panels, squeaks, raised fasteners, and damaged areas have been assessed and corrected appropriately.
- [ ] Dust, debris, paint, oil, drywall compound, old adhesive, sealers, and other contaminants are removed as required.
- [ ] High and low areas have been measured with the prescribed straightedge and corrected by an approved method.
- [ ] Floor height, door clearance, transitions, and appliance clearance have been checked.
Do not assume “level” and “flat” mean the same thing. Numerical tolerances vary by product: a Johnson engineered-wood guide specifies 3/16 inch over 10 feet, while Artisan requires 1/8 inch over 10 feet. These are manufacturer-specific examples, not competing universal standards. Artisan’s installation guide documents the stricter example.
Moisture and acclimation
- [ ] The approved test method was used for the substrate.
- [ ] Readings were taken in enough locations to represent the room.
- [ ] Flooring moisture was measured where required.
- [ ] Results, date, test method or meter, temperature, and humidity were recorded.
- [ ] Slab, crawl-space, drainage, or plumbing concerns have been resolved.
- [ ] Acclimation or conditioning followed the exact product instructions.
Wood and concrete require different moisture tests. A wood moisture meter does not replace an approved concrete test, and a surface scan may not satisfy a manufacturer requiring in-slab relative-humidity or calcium-chloride testing. The flooring or adhesive manufacturer may dictate both the method and the acceptance limit.
Acclimation is likewise not a universal waiting period. One vinyl guide reports 24–48 hours as typical for many products, while Artisan specifies at least 72 hours for its engineered flooring and 96 hours for its solid flooring, or longer until moisture equilibrium is reached. Compare the vinyl example with Artisan’s product-specific wood requirements.
Underlayment, padding, and vapor protection are conditional. An attached pad may mean a second layer is prohibited; a vapor-control layer may be required over one substrate but unsuitable over another. Treat the floor, attachment method, underlayment, adhesive, and moisture control as one approved assembly.
Finally, inspect the flooring before installation. Check visible damage, color and finish, milling, tongue-and-groove or locking fit, and expected natural variation. Set questionable pieces aside until the seller or manufacturer resolves them. Some manufacturer terms treat installation as acceptance of visible defects or site conditions, so complete this inspection before material is attached. Somerset’s installation guidance describes that acceptance and documentation requirement.
Plan the layout, cuts, expansion space, and material quantity
Measure the room before opening every carton. Map walls and fixed obstacles, including doorways, vents, pipes, cabinets, islands, stairs, hearths, floor outlets, thresholds, and changes in floor height. Determine where transitions are required and whether the added floor height will interfere with doors, appliances, or trim.
Establish a straight reference line instead of trusting a wall to be straight. Choose plank direction using the product requirements, room geometry, desired sightline, and joist orientation where the flooring and subfloor system make joists relevant.
Calculate the widths of the first and final rows before making the first cut. If the last row would become a narrow sliver, rip the first row narrower to distribute the difference. As a guide-specific example, Home Depot’s laminate instructions recommend redistributing the width when the final row would be under 3½ inches. The same procedure specifies a ⅜-inch perimeter expansion gap. See the laminate layout instructions.
Expansion space allows the flooring system to move without being trapped against walls and fixed objects. Staggered end joints avoid continuous seam lines. Use the exact dimensions in the product manual: the laminate example above uses ⅜ inch, while cited Artisan hardwood products require ½ inch for engineered flooring and ¾ inch for solid flooring. See Artisan’s product-specific expansion requirements.
Test-fit pieces around door casings, pipes, vents, corners, and transitions before cutting or fastening. Recheck the working line every few rows because small alignment errors compound across a room. Where permitted, draw boards from several cartons to distribute natural color and grain variation rather than creating obvious patches.
Several plank-floor guides use 5–10% extra as a planning range, not a guarantee. For a concrete product example, Bruce instructions call for 5% extra for cutting and grading or 10% for diagonal installation. Complex cuts, irregular rooms, mistakes, selective board placement, and retained repair stock can increase the requirement. Review the Bruce allowance and product limitations.
Follow a controlled installation and finishing sequence
Once every readiness check passes, use this general order:
- Clear the room.
- Remove only the existing materials and trim required by the selected system.
- Repair, prepare, and clean the substrate.
- Install approved moisture protection or underlayment, if required.
- Establish and verify the starting line.
- Lay, connect, glue, or fasten rows by the approved method.
- Make test-fitted cuts around obstacles.
- Rip and complete the final row.
- Install transitions, thresholds, baseboard, or shoe molding.
- Clean the floor and work area.
- Inspect and document the completed installation.
For click-lock laminate or vinyl, place spacers to preserve the specified perimeter gap, join boards without fastening them to the subfloor, and stagger seams according to the manual.
For hardwood, keep the procedure tied to the manual. Inspect boards as you work, maintain the reference line and required spacing, and use only the approved adhesive or fastener type, gauge, length, spacing, and equipment. First and final rows may require a different approved fastening technique because the flooring nailer cannot reach them.
Trim should conceal expansion space without immobilizing the floor. Attach base shoe or quarter round to the wall or baseboard—not through the flooring—so required movement remains possible.
Do not guess when the room can return to service.
Before closing the job, check:
- [ ] No unexplained open seams, chipped edges, or damaged boards
- [ ] Expansion areas remain clear and are not pinned by trim, cabinets, or fasteners
- [ ] Transitions and thresholds are secure
- [ ] No adhesive residue remains on the face
- [ ] Doors and appliances operate with the new floor height
- [ ] Debris, spacers, and temporary protection are removed as appropriate
- [ ] Labeled repair material is retained in suitable storage
Decide whether the project is realistically DIY
DIY suitability depends on product approval, substrate condition, room complexity, tools, skill, safety, and the consequences of an error—not on whether the carton says “easy install.”
A rectangular room with a sound, acceptably flat substrate and an approved click-lock laminate or vinyl product is a more plausible first DIY project. Typical tools include a tape measure, pencil, straightedge or level, spacers, utility knife or manufacturer-approved saw, tapping block, pull bar, rubber mallet, and task-appropriate protective equipment.
Before committing, answer these questions honestly:
- Can I perform and document the required moisture tests?
- Can I diagnose and prepare the substrate rather than conceal defects?
- Can I plan row widths, transitions, and floor-height changes?
- Can I make accurate rip cuts and fitted cuts safely?
- Can I operate the required cutting, fastening, or adhesive tools?
- Can I follow the current manual when it conflicts with a familiar shortcut?
- Will I stop if I discover damage, contamination, movement, or defective material?
Consult a qualified professional for unresolved moisture, major flattening or structural work, stairs, intricate patterns, specialized fastening, glue-down systems, hazardous-material concerns, or warranty-sensitive work. Some wood-floor manufacturers recommend or require professional installation for particular products; that condition is manufacturer-specific. Artisan, for example, states that a professional hardwood installer should install its covered products.
Compare professional quotes by scope, not headline price
Two quotes are comparable only when they cover the same work. Use a line-item worksheet:
| Scope item | Quote A | Quote B | Notes or exclusions |
|---|---|---|---|
| Flooring and delivery | Product, quantity, lots | ||
| Installation labor | Method and rooms | ||
| Demolition | Materials included | ||
| Disposal or dump fees | Weight or quantity limits | ||
| Subfloor preparation | Flatness correction allowance | ||
| Moisture testing or mitigation | Test and system | ||
| Underlayment or padding | Exact product | ||
| Adhesives or fasteners | Exact system | ||
| Base, shoe, transitions, thresholds | Material and finishing | ||
| Furniture or appliance handling | Disconnect or reconnect excluded? | ||
| Stairs and specialty cuts | Per stair or lump sum | ||
| Travel or mileage | Service radius | ||
| Cleanup | Haul-away included? | ||
| Taxes and other fees | Itemize | ||
| Permits, if locally required | Verify local applicability |
Retail programs provide one useful model of the process: measurement, quote, approval, scheduling, installation, cleanup, and a final walk-through. Offers such as free measurement, financing, starting rates, or labor warranties are program-specific, so verify geography, exclusions, expiration, and contract terms.
For example, Lowe’s says its quote includes flooring and labor, while installation includes applicable underlayment or padding, light surface preparation, cleanup, and a final walk-through. It also says independent installers perform the work and that furniture moving, excess mileage, dump fees, or additional preparation may cost extra. Check Lowe’s current installation process and local terms.
Ask who is responsible for licensing where required, insurance, site protection, moisture testing, test records, product acceptance, change orders, labor-warranty claims, and callbacks. “Retailer-managed” does not necessarily mean retailer employees will perform the work.
The contract should define a hidden-condition process: work pauses when demolition reveals moisture damage, rot, an unsuitable slab, inadequate structure, or suspect material; the condition is documented; and no added work proceeds until the homeowner receives and authorizes a written scope and price.
Protect safety and warranty records
Match protective equipment to the task: eye protection for cutting and fastening; hearing protection around loud tools; knee protection during layout and installation; appropriate footwear; and respiratory protection selected for the actual dust, adhesive, solvent, or finish hazard. Follow the instructions for saws, cutters, compressors, nailers, electrical equipment, and adhesive handling.
A disposable particulate respirator filters particles but does not protect against gases or vapors. Tight-fitting half-facepiece and full-facepiece elastomeric respirators require fit testing, and selection must match the hazard and applicable workplace requirements. The NWFA guideline also calls for an ABC-rated dry-chemical extinguisher on hardwood jobsites and recommends placing oil-based finishing rags in an airtight metal container because of combustion risk. Review the NWFA safety guidance.
Do not sand, scrape, drill, or demolish older resilient flooring or asphaltic adhesive until asbestos risk has been assessed. Age and appearance do not prove asbestos is present, but they are not a safe basis for ruling it out. Product instructions for the cited Bruce flooring direct installers to presume existing resilient flooring and asphaltic adhesives contain asbestos unless confirmed otherwise and prohibit dust-producing disturbance. Review the manufacturer’s hazardous-material warning.
Keep a project file containing:
- [ ] Current instructions for the exact flooring, adhesive, and underlayment
- [ ] Product name, SKU, lot or run numbers, and carton labels
- [ ] Receipts, quote, contract, change orders, and warranty documents
- [ ] Room temperature and relative-humidity readings
- [ ] Flooring, wood-subfloor, and concrete moisture results
- [ ] Test locations, dates, methods, meter models, and calibration details where applicable
- [ ] Dated photos of the room, substrate, tests, repairs, and installation stages
- [ ] Records of cracks, flattening work, panel fastening, or moisture mitigation
- [ ] Installer company, crew contact, and qualification or insurance information
- [ ] Delivery, acclimation, installation, and return-to-use dates
This paperwork is part of installation quality. Some manufacturers treat installation as acceptance of visible flooring defects or jobsite conditions, making inspection and documentation important before material is attached and difficult to remove.
Can new flooring be installed over an existing floor?
Sometimes. The exact product may permit installation over certain existing surfaces if they are securely bonded, clean, dry, flat, stable, compatible, and within floor-height limits. Other assemblies require removal. Carpet, perimeter-glued vinyl, damaged surfaces, and existing floors that move underfoot can disqualify an overlay for particular floating systems.
Approval also depends on the attachment method. A floating product may tolerate an approved existing surface that would be unsuitable for mechanical fastening or direct bonding. Check the flooring and adhesive manuals, then determine what lies beneath the visible layer before deciding.
Does every floor need underlayment or a vapor barrier?
No. Underlayment, padding, and vapor control depend on the flooring, attached backing, attachment method, substrate, grade level, moisture results, and manufacturer-approved assembly. A second pad can be unnecessary or prohibited when one is attached to the plank, while some concrete or below-grade installations require a specified vapor-control system.
Do not add generic plastic or foam merely for “extra protection.” An unapproved layer can affect joint support, adhesive bonding, floor movement, or finished height.
How much extra flooring should I order?
A 5–10% allowance appears in multiple plank-floor guides, but it is only a starting point. A vinyl guide uses that general range, while the cited Bruce instructions specify 5% for cutting and grading and 10% for diagonal installation. Compare the general allowance with the product-specific Bruce example.
Measure the net area, then account for room shape, plank dimensions, pattern direction, grading or color selection, damaged pieces, cutting errors, and repair stock. Simple straight installations may stay near the lower end; diagonal layouts, stairs, many doorways, irregular rooms, or pronounced visual variation can require more.
Proceed only when the exact product is approved for the substrate and room, moisture and site conditions meet its instructions, the layout and accessories are settled, and safety measures and records are in place. If any check fails, correct it or obtain qualified help before installing material that may be difficult to remove or replace.