
Engineered Hardwood Installation: Prep and Methods
A method matrix and stop-or-go checklist cover product and subfloor fit, moisture, flatness, acclimation, layout, and movement space.
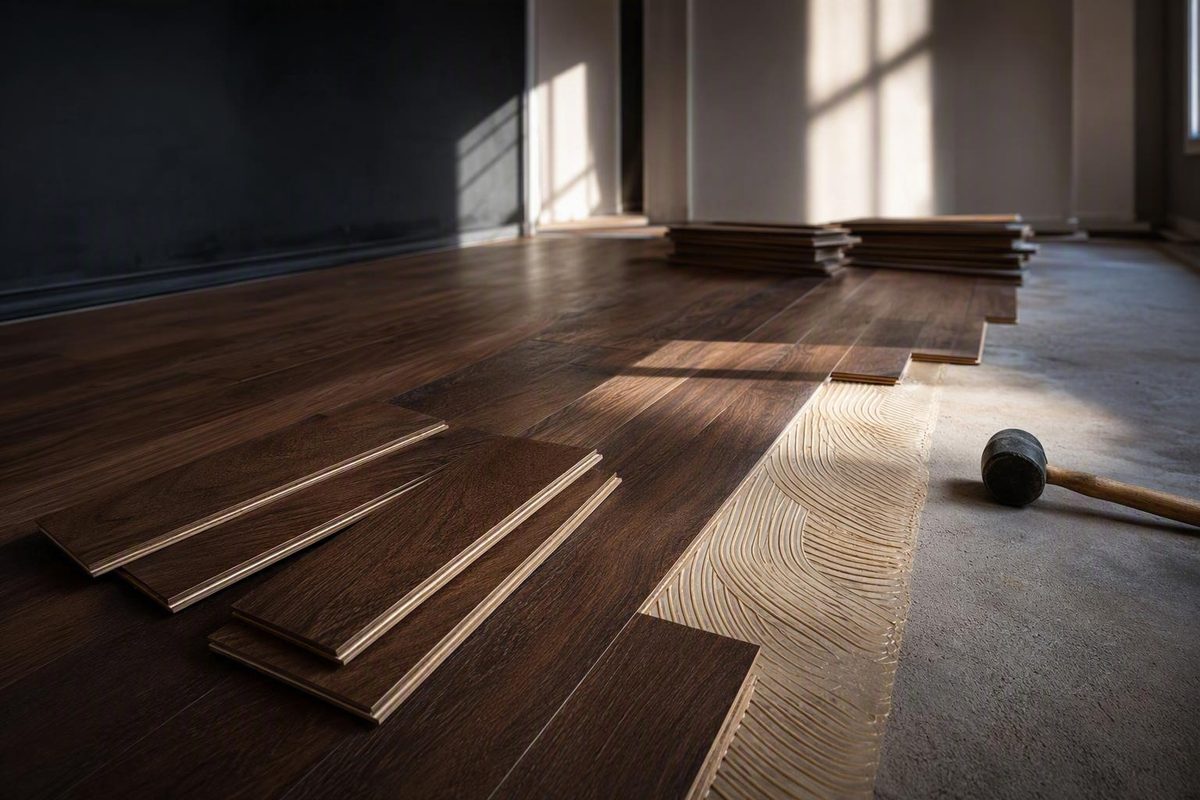
Successful engineered hardwood installation starts with diagnosis, not plank laying. Proceed only when the flooring manufacturer’s current instructions approve the exact product, substrate, grade level, and installation method—and when moisture, flatness, climate, movement space, and component compatibility have been documented. If the complete assembly cannot be verified, stop and consult the manufacturer or a qualified hardwood installer rather than improvising.
Start here: match the method to the product and subfloor
Engineered hardwood may be floated, glued, nailed, or stapled, but those methods are not interchangeable. The flooring manufacturer’s current instructions and warranty terms control, together with the requirements for the adhesive, underlayment, moisture-control products, radiant-heating system, and local codes. Somerset, for example, permits multiple methods for its SolidPlus flooring but states that its product instructions supersede conflicting general guidance (see Somerset’s engineered installation guide).
Use the two-part matrix below only for initial screening. “Generally possible” and “commonly restricted” describe common configurations; neither label replaces written approval for the exact flooring and components.
Method matrix, part 1: floating installations
| Substrate or condition | Click-lock floating | Glued T&G floating |
|---|---|---|
| Plywood or OSB | Generally possible when the flooring and underlayment approve it | Generally possible when the product specifies joint-glued floating installation |
| Concrete | Requires explicit flooring, underlayment, and vapor-control approval | Requires explicit flooring, underlayment, and moisture-control approval |
| Particleboard | Sometimes allowed; verify the product instructions | Sometimes allowed; do not assume compatibility |
| Approved existing flooring | Possible only over a secure, flat, compatible surface | Possible only when both the flooring and existing surface are approved |
| Below-grade room | Requires below-grade and complete-assembly approval | Requires below-grade and complete-assembly approval |
| Radiant heat | Requires approval from every system manufacturer | Requires approval from every system manufacturer |
Method matrix, part 2: bonded and mechanically fastened installations
| Substrate or condition | Full-spread glue-down | Nail or staple |
|---|---|---|
| Plywood or OSB | Generally possible when flooring, adhesive, and panels are compatible | Commonly possible over a suitable wood subfloor |
| Concrete | Common for approved products, subject to moisture and adhesive requirements | Generally unsuitable unless an approved wood-subfloor assembly is built above it |
| Particleboard | Commonly restricted or prohibited | Commonly prohibited |
| Approved existing flooring | Requires explicit flooring and adhesive approval | Restricted; depends on the existing floor and structure below |
| Below-grade room | Requires below-grade, slab, adhesive, and moisture-system approval | Requires an approved wood-subfloor assembly and product approval |
| Radiant heat | Requires complete-system approval | Requires explicit approval and a verified tubing-protection plan |
A floating floor is joined into one surface but is not attached to the substrate. A click-lock product may connect without seam adhesive. A traditional tongue-and-groove floating product may require a specified adhesive bead in the side joints, end joints, or both. Never transfer the joint-gluing instructions from one profile to another.
A glue-down floor depends on more than whether the plank can be bonded. The substrate, slab moisture, adhesive chemistry, trowel, spread rate, vapor-control system, cleanup method, and curing conditions must work together.
Nail- and staple-down installation is normally associated with plywood, OSB, or another approved wood subfloor. Flooring thickness, width, species, construction, and surface treatment can change the permitted fastener, tool settings, fastening schedule, or glue-assist requirement.
Use this decision path:
- Identify the exact collection, model, thickness, and joint profile.
- Confirm which installation methods its current instructions approve.
- Identify the substrate and whether the room is above, on, or below grade.
- Review documented flooring, wood-subfloor, or concrete moisture results.
- Confirm radiant-heat approval when applicable.
- Verify every component before selecting the method.
Use a stop-or-go jobsite checklist
Do not deliver or install wood flooring merely because the room appears finished. Check the conditions that will affect the floor after the installation crew leaves.
The jobsite is ready only when:
- The building is enclosed, with exterior doors and windows installed.
- Drywall finishing, painting, masonry, plaster, and other wet work are complete and dry.
- Plumbing, roof, window, foundation, and appliance leaks have been corrected.
- Permanent heating and cooling equipment is operating under stable service conditions.
- Indoor temperature and relative humidity meet the purchased flooring’s requirements.
- Gutters, grading, and exterior drainage direct water away from the building.
- Any crawl space is dry, properly drained, ventilated or conditioned as required, and fitted with the specified ground vapor control.
- The subfloor has been exposed, inspected, tested, and repaired.
- Flooring can be stored exactly as its instructions require.
Do not substitute a generic climate range or HVAC lead time for the manufacturer’s limits. Published instructions use different temperature, humidity, and preinstallation operating periods, so the requirements for the purchased product must control.
Inspect before installation:
- Carton labels, collection, color, species, finish, dimensions, and quantity
- Shipping or water damage
- Plank color and grain range
- Milling and edge condition
- Tongue, groove, or locking-profile integrity
- Bowing, twisting, warping, or dimensional irregularities
- Finish defects and other visible damage
Blend planks from several cartons and approve a small dry layout under good lighting. Continue inspecting each board as installation progresses. Several manufacturer instructions treat installation as acceptance of visible defects or exclude installed defective boards from warranty coverage. Photograph questionable cartons and planks, isolate the material, and obtain written direction before proceeding.
Stop work immediately if you find:
- Active leakage or persistent dampness
- Unstable or nonoperational climate control
- Moisture readings outside the applicable limits
- A weak, loose, damaged, or excessively uneven substrate
- Visible product defects or the wrong product
- An installation method that is not approved in writing
- An unapproved radiant-heating assembly
- Legacy resilient flooring or black adhesive that may contain hazardous material
Do not sand, grind, scrape, saw, or mechanically remove suspected asbestos-containing resilient flooring or adhesive until it has been appropriately assessed. Manufacturer safety guidance warns that older resilient materials and adhesives may contain asbestos or crystalline silica and directs installers to follow applicable regulations (review Shaw’s engineered-hardwood safety guidance).
Prepare and test the subfloor
Every approved substrate must be clean, dry, secure, structurally sound, compatible with the selected installation system, and within the flooring manufacturer’s flatness tolerance.
Preparation may include:
- Vacuuming dust and removing paint, drywall compound, wax, oils, and incompatible residues
- Screwing down loose wood panels and correcting squeaks
- Replacing swollen, water-damaged, delaminated, or weak panels
- Grinding high areas when the substrate and dust-control plan permit it
- Correcting low areas with a patch, leveler, plywood, shims, or another approved method
The repair method must suit the installation system. A leveling compound approved beneath a glue-down floor may not accept flooring fasteners. Layers used to correct a low area beneath a mechanically fastened floor may be unsuitable beneath adhesive.
Flatness limits are product-specific. Artisan requires 1/8 inch over 10 feet for the flooring covered by its guide (see Artisan’s installation requirements). The covered AHF instructions instead specify 3/16 inch over 10 feet and/or 1/8 inch over 6 feet (review the applicable AHF instructions). Neither specification applies universally.
Plywood and OSB: Verify panel type, thickness, condition, joist spacing, fastening, deflection, flatness, and moisture. Do not assume a panel is adequate simply because it is plywood or OSB. Minimum construction can change with joist spacing, plank direction, product profile, and manufacturer requirements.
Particleboard: Treat it as restricted. It is commonly prohibited for nail or staple installation and may be excluded from glue-down assemblies. Some manufacturers permit particular floating floors over it, but that approval does not transfer to another product.
Existing flooring: Resilient flooring, tile, or hardwood may remain only when the engineered-flooring instructions explicitly permit it and the surface is secure, flat, clean, dry, and compatible. Determine whether the existing floor is cushioned, perimeter-glued, loose, damaged, moisture-sensitive, or bonded directly to concrete.
A surface that looks dry has not necessarily been tested adequately. Keep separate records for flooring, substrate, and environmental conditions.
| Date and room | Test location and method | Flooring reading | Substrate reading |
|---|---|---|---|
| Date and room | Temperature | Relative humidity | Notes |
|---|---|---|---|
Also record the instrument manufacturer and model, calibration check, material setting, probe depth where relevant, and a room sketch showing test locations.
Wood moisture meters, concrete in-slab relative-humidity tests, calcium-chloride emission tests, and concrete surface meters answer different questions. Their scales and acceptance limits are not interchangeable. An in-slab RH percentage cannot be compared directly with a moisture-emission result or a surface-meter reading. Use the method and limit required by the complete flooring and adhesive system.
Treat acclimation as a measured readiness decision
There is no universal acclimation period for engineered hardwood.
National Flooring Products specifies at least 48 hours for its covered flooring while emphasizing that moisture equilibrium—not time alone—determines readiness (see its engineered-hardwood guide). Artisan specifies at least 72 hours, with additional time if needed to reach equilibrium (review Artisan’s acclimation instructions). By contrast, the covered AHF engineered products state that timed acclimation is not required when product and site conditions are acceptable (see the covered AHF product instructions).
That disagreement is why “leave it for three days” is not a reliable rule. Elapsed time cannot correct a wet subfloor, unstable HVAC, improper storage, or flooring that remains outside the required moisture relationship.
Store cartons as directed:
- Keep them dry and protected from exterior storage conditions.
- Place them in the installation environment under expected service conditions.
- Elevate them from concrete when required.
- Provide spacing or airflow when specified.
- Keep cartons packaged or open them only as directed.
Do not automatically slit or open packaging. Product instructions differ on whether cartons should remain closed or be opened during acclimation.
For wood subfloors, compare moisture readings from the flooring and substrate using the product’s permitted difference. Somerset allows no more than a 4-percentage-point difference for its covered flooring, while National Flooring Products specifies 3 percentage points for its products. Those are manufacturer-specific limits, not a range that can be applied to any engineered floor.
Readiness means the room is stable, the flooring has been stored correctly, and the measurements satisfy the applicable instructions. The calendar is only one part of that decision.
Plan the layout before fastening or gluing anything
Establish a straight reference or starter line before opening adhesive or loading a flooring nailer. Measure the room at several points, calculate the first and final row widths, and adjust the layout so the last row does not become an accidental sliver.
Choose board direction by considering:
- Room shape and major sightlines
- Hallways, doorways, and connected spaces
- Joist direction and structural requirements
- The approved installation method
- Transitions to adjacent flooring
- Natural light and visible plank variation
Dry-lay representative boards from several cartons. Inspect each plank under adequate lighting immediately before it is installed.
Stagger end joints to avoid repeated stair-step patterns, clusters, and H-joints. Use the product’s required minimum offset rather than adopting a generic dimension. Vary board lengths intentionally so the layout appears balanced without becoming repetitive.
Plan the specified movement space around:
- Walls and base plates
- Columns and posts
- Pipes and floor vents
- Hearths and built-ins
- Thresholds and door frames
- Cabinets, islands, and other fixed construction
A floating floor must move as a connected surface. Check whether long spans, large rooms, changes in direction, or narrow doorways require transition profiles or interior movement breaks.
Undercut door casings to accept the complete flooring assembly while preserving clearance behind the trim. Baseboards and shoe molding may conceal the perimeter gap, but attach them to the wall—not through a floating floor. Cabinetry, track systems, heavy fixed objects, and vertical fasteners must not pin the assembly unless the flooring instructions specifically permit it.
Follow the correct workflow for the approved method
These are method overviews, not complete installation instructions. The product and component documents must provide the exact gaps, joint offsets, fasteners, trowels, adhesives, bead locations, rolling requirements, and curing periods.
Common layout and cutting tools
- Tape measure, straightedge, square, chalk line, and pencils
- Moisture-testing equipment appropriate to the materials
- Miter, circular, jamb, or table saw as needed
- Utility knife, pry bar, hammer, pull bar, and tapping block
- Vacuum or dust-extraction equipment
- Adequate work lighting
Floating-floor equipment
- Approved underlayment and vapor-control materials
- Underlayment seam tape
- Spacers, tapping block, and pull bar
- Approved joint adhesive for glued tongue-and-groove products
- Approved adhesive-cleanup materials
Glue-down equipment
- Approved flooring adhesive and specified moisture-control product
- Correct notched trowel
- Starter-line equipment and spacers
- Finish-compatible cleanup products
- Weighted roller when specified
Mechanical-fastening equipment
- Approved flooring nailer or stapler
- Correct fasteners
- Compressor and regulated air supply where applicable
- Face-nailing tools for starter and finishing rows
- Scrap boards for testing pressure and tongue fit
Wear eye protection, gloves, and knee protection. Use hearing protection around loud tools, connect cutting equipment to effective dust collection, and select respiratory protection for the actual airborne hazard. Manufacturer safety instructions specifically call for task-appropriate eye, hearing, and respiratory protection rather than reliance on one generic mask.
Click-lock floating workflow
- Install the approved underlayment or vapor-control assembly.
- Place spacers for the specified perimeter clearance.
- Establish straight, square starter rows.
- Connect planks at the required angle without crushing the locking profile.
- Maintain the specified end-joint pattern.
- Cut the final row while preserving its movement gap.
- Remove temporary spacers when directed.
- Do not fasten through the floor.
Glued tongue-and-groove floating workflow
Follow the specified joint-glue pattern. Some products require adhesive on every side and end joint; others specify a different bead location. Do not apply click-lock procedures to a glued tongue-and-groove floor. Remove squeeze-out promptly using the cleanup method approved by both manufacturers.
Full-spread glue-down workflow
- Establish and verify the starter line.
- Use the adhesive manufacturer’s specified trowel and spread rate.
- Spread only what can be covered within the adhesive’s working or open time.
- Keep the first courses straight and maintain perimeter clearance.
- Check adhesive transfer as directed.
- Remove contamination before it cures without damaging the finish.
- Roll the floor when required.
- Observe the specified cure, traffic, cleaning, and furniture restrictions.
Nail- or staple-down workflow
Confirm that both the flooring and wood substrate are approved. Set up the tool with the required fastener and pressure, then test it on scrap. Protect tongues, edges, and the finished face from splitting or impact damage. After the first rows are installed, check alignment, movement, and unacceptable noise before continuing. Product construction—not habit—determines the fastening schedule and whether glue assist is necessary.
Incomplete generic directions are not a substitute for the complete flooring, adhesive, underlayment, and moisture-control documents.
Handle concrete, below-grade rooms, and radiant heat as special cases
Concrete requires explicit flooring approval and a complete installation system. Confirm that the slab has cured for the period required by the applicable instructions, perform the specified moisture test, correct flatness, and install the approved vapor-control, adhesive, or underlayment assembly.
Concrete moisture limits belong to the test method and system. Do not mix an in-slab relative-humidity limit with a calcium-chloride emission limit or surface-meter scale. A surface meter may help identify areas for further investigation, but it does not automatically satisfy a requirement for an in-slab or emission test.
Engineered hardwood’s layered construction generally provides greater dimensional stability than solid wood, but it is not waterproof. It cannot overcome an active leak, damp slab, missing vapor control, or exterior drainage problem.
For a below-grade room, verify both the flooring’s below-grade approval and the complete assembly. The word “engineered” on the carton does not establish basement compatibility.
For radiant heat:
- Obtain explicit approval from the flooring manufacturer.
- Confirm compatibility with the adhesive, underlayment, and heating-system manufacturers.
- Correct moisture problems before installation.
- Verify that the substrate is dry, secure, and within flatness tolerance.
- Pressure-test hydronic tubing when applicable.
- Obtain or create an accurate tubing map before fastening.
- Follow the flooring’s product-specific surface-temperature limit.
- Increase and decrease operating temperatures gradually as directed.
- Keep fasteners clear of tubing and heating components.
Radiant-system guidance also emphasizes pressure testing and accurate tubing-layout information, but the instructions for the exact flooring and heating assembly still control (see WBI’s radiant-floor discussion).
Professional involvement is prudent when a project combines below-grade conditions, slab moisture, mitigation coatings, full-spread adhesive, or fastening near radiant tubing. Each additional system introduces another compatibility and warranty interface.
Finish the job without creating a movement or warranty problem
Inspect the completed floor under good lighting. Remove debris and adhesive residue with approved products and methods. Install planned transition profiles, then attach baseboards and shoe molding to the wall without trapping a floating floor.
Follow the flooring, adhesive, underlayment, and moisture-control instructions for:
- Initial foot traffic
- Rolling or weighting
- Adhesive cure
- Cleaning
- Protective covering
- Furniture and appliance return
- Rug placement
There is no universal waiting period. The correct timing depends on the actual flooring and assembly.
Maintain the required indoor temperature and relative humidity after installation. Climate control is part of the floor’s continuing operating environment, not temporary jobsite preparation.
Keep a project file containing:
- Flooring and substrate moisture logs
- Temperature and relative-humidity readings
- Test instrument and method details
- Room and test-location sketches
- Before, during, and after photographs
- Product labels and batch information
- Purchase receipts
- Adhesive, underlayment, and moisture-system records
- The installation instructions in effect on the installation date
Store spare planks flat, dry, and protected under suitable conditions for future repairs.
| Failure risk | Possible result | Preventive check |
|---|---|---|
| Moisture intrusion | Swelling, distortion, staining, or bond failure | Correct the source and document acceptable readings |
| Inadequate movement space | Edge pressure, peaking, or buckling | Verify gaps and required transitions before installation |
| Uneven or weak substrate | Movement, hollow areas, joint stress, squeaks, or poor adhesive transfer | Measure flatness and repair structural defects |
| Unapproved adhesive or fasteners | Bond loss, damaged tongues, surface marks, or warranty conflict | Match every component to the product instructions |
| Pinned floating floor | Restricted movement and lifted or separated areas | Keep trim and fixed construction off the floor surface |
| Misaligned starter rows | Crooked courses and narrow finishing rows | Establish and repeatedly check the reference line |
The final go/no-go test is simple: proceed only when the product approves the method and substrate, the room is stable, moisture and flatness meet the applicable instructions, the movement plan is complete, and every component is compatible. If any check fails, correct the condition, change the approved installation system, or consult the manufacturer or a qualified hardwood installer before laying the first plank.