
Can You Float Engineered Hardwood? What Decides
Floating engineered hardwood is a go only when the exact product, substrate and room assembly all pass. Checklist, substrate matrix and worksheet inside.
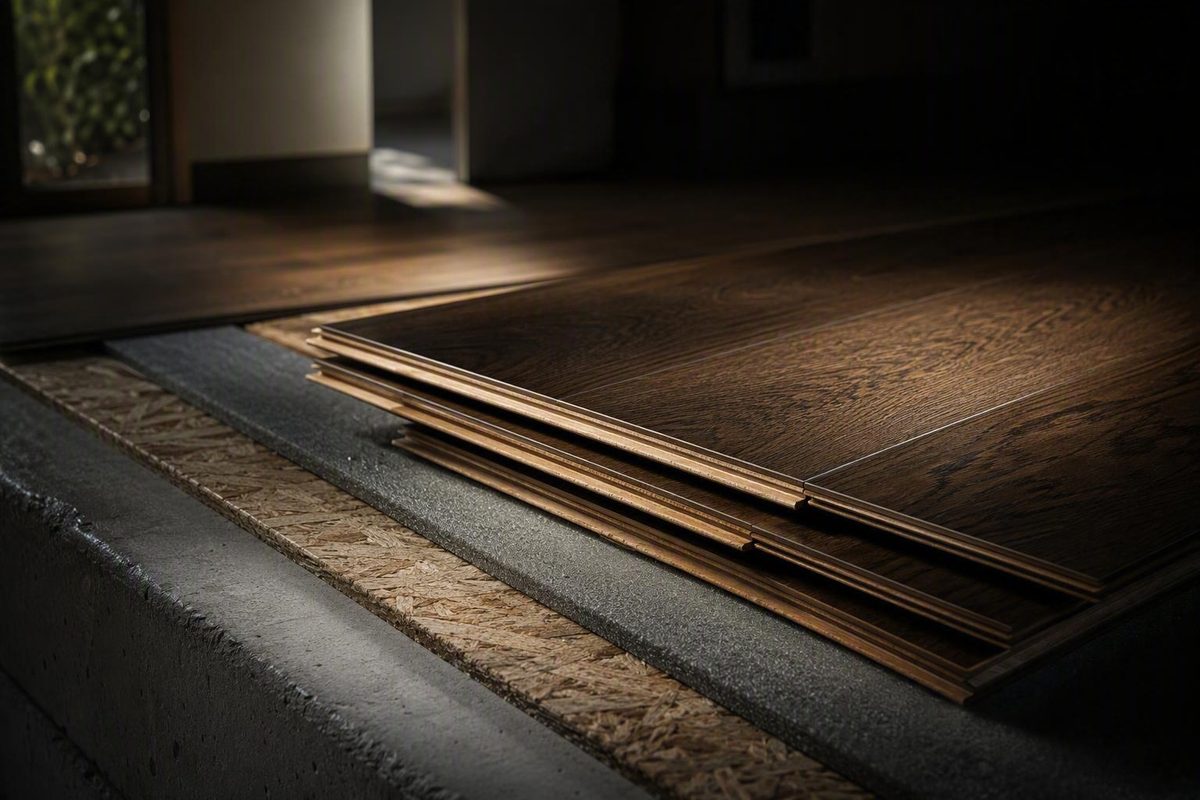
You can float engineered hardwood only when three things are confirmed: the instructions for the exact product permit floating, the substrate is an approved surface that passes moisture and flatness checks, and the room conditions and full assembly (underlayment, vapor control, transitions, radiant heat) comply with that manual. Engineered construction on its own does not make a plank floatable; plenty of engineered collections are nail-down or glue-down only, and the manual for the exact collection, thickness and joint system is the only thing that settles it.
A floating floor connects plank to plank and is never nailed, stapled or bonded to the subfloor. Depending on the product, the joints use a click-lock profile or an approved seam adhesive.
Answer the three checks for your product and room; the verdict updates beside them.
Float Go-or-No-Go Check
Not ready yet
- Answer the three checks. The verdict turns green only when every check is a documented yes and no stop condition is ticked.
Substrate matrix
| Substrate | Can it float? | Must be true |
|---|---|---|
| Concrete | Yes, if product approves | Passes moisture and flatness limits; vapor control installed; no water intrusion |
| Plywood | Usually | Dry, flat, stable, panels secure |
| Tile | Sometimes, as overlay | Secure, dry, flat; floor height workable |
| Vinyl | Only when specifically approved | Secure, clean, dry, flat; material identified |
| Existing wood | Usually | Secure, dry, stable, flat |
| Carpet | No | Remove it, then evaluate what is underneath |
Source: NWFA Installation Guidelines (manufacturer instructions take precedence) and Bruce floating engineered-hardwood guidance. Product-specific limits are not in this tool — copy them from your manual.
The Three Checks That Decide Go or No-Go
Run this before buying underlayment, pulling trim or opening cartons:
- Product approval. The instructions for the exact collection, model, thickness and joint system say floating is permitted. A general brand page does not count.
- Substrate approval. The concrete, plywood, tile, vinyl or existing wood is listed as an approved substrate and meets the stated requirements for cleanliness, dryness, flatness, stability and security.
- Room and assembly approval. Location (including below grade), moisture results, underlayment or vapor-control system, radiant heat, transitions and planned floor area all comply with the manual.
If any answer is unknown, the project is not ready. Unknown is not a yes.
The NWFA Wood Flooring Installation Guidelines cover jobsite conditions, moisture testing, substrates, underlayments, layout and floating installation, and they state that product-specific manufacturer instructions take precedence. Local codes, climate and site requirements still apply on top.
Stop Conditions That End the Project Until They Are Fixed
Stop work if any of these is true:
- Instructions for the exact product are unavailable or unclear.
- There is active leakage, water intrusion or unresolved substrate moisture.
- Existing flooring is loose, damaged, damp or unstable.
- The substrate exceeds the product’s flatness tolerance.
- Carpet remains beneath the proposed installation.
- The room, a below-grade location or the heating system is not approved.
- You cannot identify the required underlayment, vapor control, movement space or transition arrangement.
- Older or unidentified resilient flooring, backing or adhesive would need to be scraped, sanded, ground or otherwise disturbed before its asbestos risk has been assessed.
A floating floor still depends on continuous, firm support. Not fastening the planks does not make substrate defects irrelevant; it just hides them until the floor flexes.
Which Subfloors Can Sit Under a Floating Engineered Floor
| Substrate | Can it float? | What must be true |
|---|---|---|
| Concrete | Yes, when the product approves it | Passes moisture and flatness limits; clean, dry; required vapor control installed; no water intrusion |
| Plywood | Usually | Dry, flat, structurally stable, panels secure |
| Tile | Sometimes, as an overlay | Secure, dry, flat enough; finished floor height still workable |
| Vinyl | Only when specifically approved | Secure, clean, dry, flat; material identified and permitted |
| Existing wood | Usually | Secure, dry, stable, flat enough |
| Carpet | No | Remove it, then evaluate what is underneath |
Bruce, for example, lists plywood, concrete, existing wood, and flat, secure vinyl or tile as possible receiving surfaces for its floating engineered flooring, and its floating engineered-hardwood guidance calls for a clean, dry, flat, properly prepared surface. That is Bruce’s rule for Bruce’s product; it does not transfer to another brand.
Loose tile, vinyl, boards or panels stay stop conditions until they are removed or repaired by a method the flooring manufacturer accepts for that substrate. Reassess the surface afterward, not before.
Build the Product-Manual Worksheet Before Buying Materials
Download the instructions for the exact flooring and fill in every line. Blank lines are unknowns, and unknowns mean stop.
| Specification | Your product’s requirement |
|---|---|
| Approved installation methods | |
| Compatible substrates | |
| Moisture-test method and limits | |
| Subfloor flatness tolerance | |
| Permitted correction methods | |
| Acclimation or conditioning rules | |
| Carton-opening rules | |
| Approved underlayment | |
| Approved vapor-control system | |
| Perimeter and obstruction clearance | |
| Transition requirements | |
| Maximum continuous run or room size | |
| Below-grade approval | |
| Radiant-heat approval and temperature limits | |
| Kitchen, bathroom or wet-area restrictions | |
| Doorway and room-to-room rules | |
| Cabinet, island and fixed-object rules | |
| Trim and molding requirements |
Keep the filled worksheet with your purchase records. Warranty claims tend to turn on whether these items were followed, and the record is your proof.
Identify the joint design while you are at it. Click-lock planks commonly connect without seam adhesive. A tongue-and-groove product designed to float may require manufacturer-approved PVA or another specified adhesive in the joints. “Floating” describes the floor’s relationship to the subfloor; it does not mean no glue anywhere.
Record the whole underlayment assembly, not one marketing label. Underlayment can provide support, comfort, sound control or moisture management, and the product may require a specific combination.
Preparing the Room, Substrate and Layout
Complete the prescribed moisture evaluation before covering the floor. If results exceed the product limits, or if leakage, condensation, recurring dampness or suspected water intrusion is present, correct the cause. Do not bury it under flooring.
Then prepare the receiving surface using only methods allowed for that substrate and flooring:
- Remove dust, debris and protrusions without disturbing suspect resilient flooring or adhesive.
- Have loose or damaged material repaired or removed through an approved method.
- Measure flatness across the room the way the manual directs.
- Correct high and low areas only with permitted processes and compatible materials.
- Recheck repaired areas before laying underlayment.
If testing or specialist handling is needed for old resilient flooring, resolve that first. Then install only the approved underlayment or vapor-control assembly.
Measure the room at several points and calculate the likely first- and last-row widths. Adjust the starting row so the final row meets the product’s minimum-width rule. Snap a working line rather than trusting the wall to be straight.
Follow the packaging and acclimation instructions. Where permitted, blend boards from several cartons as you go to spread color and grain variation. Inspect every plank in good light and set aside visibly defective material.
Plan the required end-joint stagger, including at doorways and around narrow cuts. Offcuts can start later rows when they satisfy the product’s minimum-length and joint-spacing rules.
As one product-specific example, Kährs’ Woodloc guidance recommends adjusting the first row if the last would be narrower than 30 mm and specifies a 500 mm offset between adjacent end joints. Those numbers apply to the Kährs instructions cited, not to floating floors generally.
The Installation Sequence Without Borrowed Measurements
Once the three approvals are documented:
- Establish the starting line and approved board orientation.
- Place the specified underlayment or vapor-control assembly.
- Cut and assemble the first row as instructed.
- Connect later rows with the specified locking or glued-seam procedure.
- Maintain the required end-joint stagger.
- Cut the final row while preserving the specified movement space.
- Follow the manual’s clearance and transition details at walls, pipes, doorways, room changes and obstructions.
- Install baseboard, molding, thresholds and transition profiles per the flooring and trim instructions.
Use the engagement method and tools specified for the joint, and do not transfer techniques between locking profiles. Kährs illustrates engaging its Woodloc boards at a 20–30-degree angle; that is a Kährs measurement, not a general rule.
The manual governs how perimeter space is concealed, where trim fasteners may go, whether transitions are required at doorways, and how the floor meets cabinets, islands and partitions. Doorways, large or irregular rooms, long continuous runs and room-to-room installations are where improvised details fail most often.
Floating Versus Glue-Down: Which Fits Your Room
Neither method is universally better. Compare only the assemblies approved for your flooring, substrate, room and heating system.
| Factor | Floating | Glue-down |
|---|---|---|
| Labor and DIY access | Commonly described as faster and more approachable, especially click-lock | Controlled adhesive placement, working time and cleanup |
| Feel and sound | May feel less firm or sound hollow, depending on support and underlayment | Often described as feeling more directly connected when prep is sound |
| Removal and repair | Disassembly possible, but reaching one board can mean lifting several rows | Removal and board replacement more disruptive |
| Substrate prep | Clean, dry, flat, stable, approved | Clean, dry, smooth, flat, adhesive-compatible |
| Moisture planning | Approved vapor-control or combination underlayment | Approved adhesive plus any specified moisture-control system |
| Radiant heat | Depends on the complete floating assembly | Depends on the approved bonded assembly |
These are qualitative comparisons reported by commercial flooring sources, including Finfloor’s floating-versus-glue-down comparison. Actual performance depends on the product, substrate, preparation, underlayment or adhesive, and installation quality.
Floating avoids spreading adhesive across the subfloor, but it does not remove moisture testing, flattening, layout or transition work. An inadequately supported floating floor flexes or sounds hollow in a way the homeowner did not expect. Glue-down trades that for adhesive that is hard to remove later.
For radiant heat, follow the flooring, underlayment or adhesive, heating-system, temperature and commissioning requirements. Do not pick a method because one is broadly claimed to transfer heat better.
Reading Symptoms After the Floor Is Down
A symptom tells you where to look. It rarely proves one cause.
| Symptom | Conditions to investigate | Next step |
|---|---|---|
| Hollow sound | Assembly acoustics, uneven support, unsuitable underlayment, voids beneath | Compare areas; review flatness and assembly records |
| Flex | Low spots, compressible underlayment, joint damage, substrate movement | Limit traffic; get an inspection before repairing |
| Squeaks | Joint friction, substrate movement, debris, pressure at an edge | Locate the movement source; skip cosmetic fixes |
| Gaps or shifting | Joint damage, installation error, room-condition change, restricted movement | Document locations; review joints, clearances, instructions |
| Buckling | Moisture change, water intrusion, restricted movement, installation error | Investigate moisture and installation before correcting |
A hollow sound does not prove the substrate is uneven; it may be the acoustic behavior of the floor-and-underlayment assembly. Gaps or buckling do not establish moisture damage, inadequate movement space or poor workmanship without inspection. Document the symptom and consult the manufacturer or a qualified installer before altering the assembly.
Engineered hardwood is not waterproof. Kitchens, bathrooms, basements, entries and other moisture-prone locations need explicit approval for the exact product and the complete assembly.
When This Is a DIY Job and When It Is Not
Straight rows of a click-lock product in a simple rectangular room are approachable for a careful DIY installer. Easy plank connection is not the hard part. The hard parts are:
- Selecting and running the prescribed moisture tests and interpreting the results
- Assessing older flooring and adhesive before disturbing them
- Correcting substrate irregularities
- Planning first- and last-row widths
- Cutting around jambs, pipes and irregular walls
- Managing doorway transitions and movement space
- Meeting documentation and warranty requirements
Hire a qualified installer, or a moisture, substrate or hazardous-material specialist, when water intrusion or abnormal moisture is unresolved; when older or unidentified resilient flooring may need disturbance; when the substrate needs substantial flattening or repair; when the room is large, irregular or split by several doorways; when radiant heat is involved; when existing tile, vinyl or wood has questionable stability; or when the product instructions conflict with what you see on site.
NWFA guidance identifies suitable tools, jobsite conditions, substrate conditions and installation skill as parts of wood-floor installation and recommends following the flooring manufacturer’s instructions.
Common Questions, Answered by the Manual
Floating Over Concrete Needs Product Approval and a Passing Slab
Possible when the exact flooring permits floating over concrete and the slab meets the prescribed moisture, flatness, cleanliness and preparation requirements. Install the approved vapor-control or underlayment assembly where required, and correct water intrusion or failed test results first.
Glue Is Sometimes Required in the Joints
Click-lock systems commonly assemble without seam adhesive. Some tongue-and-groove floating systems require approved PVA or another specified joint adhesive. Either way, the floor is not bonded to the subfloor.
Cabinets and Islands Follow the Fixed-Object Rule for Your Product
The manual states how flooring is treated around cabinets, islands, partitions and other fixed objects. Do not assume the floor can run under them, or that they must go in first, without product-specific direction.
The Expansion Gap Is Whatever the Manufacturer Specifies
There is no universal figure. Use the movement space stated for the exact product, at every wall, pipe and fixed object the manual names.
Float engineered hardwood only when the exact product, the prepared substrate and the room conditions all qualify. Fill in the worksheet first, and stop if any moisture, flatness, underlayment, movement-space, transition or fixed-object requirement is still blank.