
Choose and Install Glue-Down Vinyl Flooring
Patch edges, cracks, adhesive deposits and debris can telegraph through or interfere with adhesive contact. Check prep, timing, rolling and cure limits.
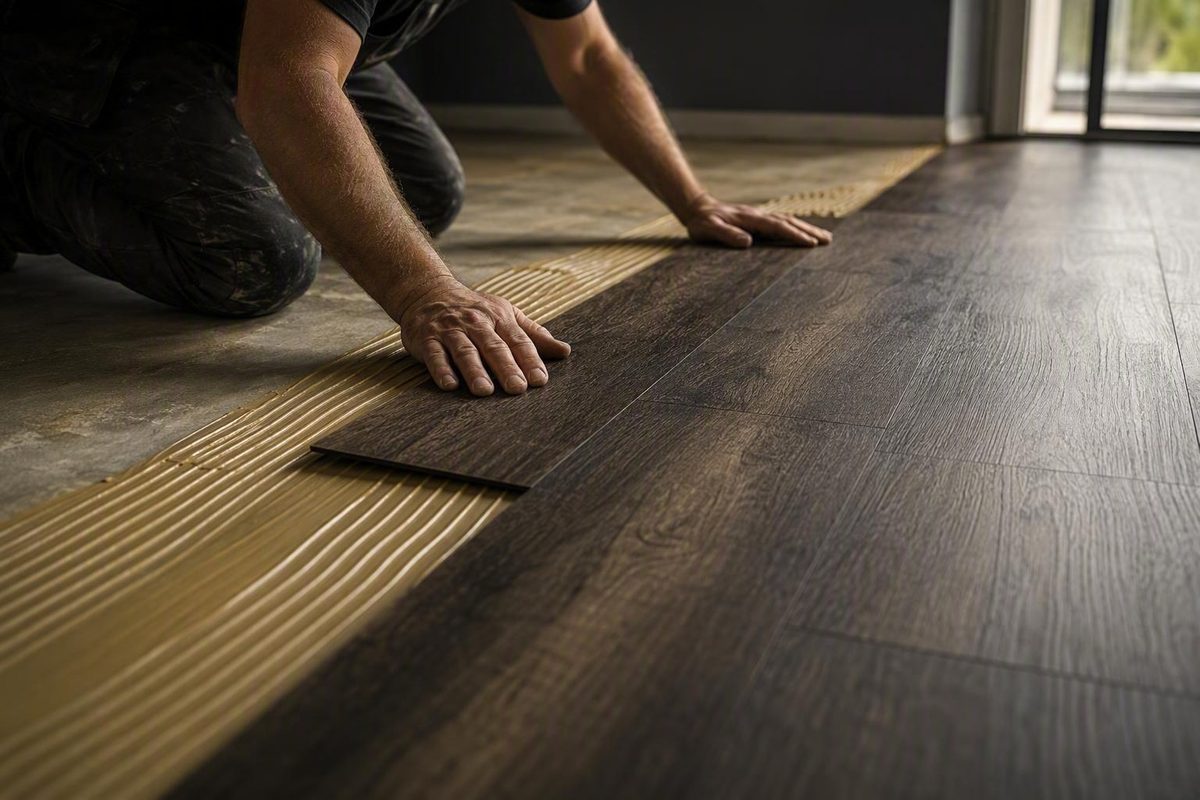
Glue down vinyl flooring succeeds or fails as a complete system. The visible flooring matters, but so do the adhesive, substrate, moisture conditions, expected traffic, layout, preparation, rolling procedure, and cure schedule.
Broad labels such as “waterproof,” “commercial grade,” or “easy to install” are not enough to make a buying decision. Before ordering, obtain the current technical data sheet, installation instructions, warranty, and approved-adhesive documentation for the exact product number. Those documents—not a retailer category or a general how-to guide—should control the project.
This guide explains how to compare bonded and floating floors, inspect the substrate, select a documented adhesive system, calculate the complete material requirement, and install modular glue-down flooring as a sequence of quality-control checks. The installation workflow focuses primarily on dryback LVP and LVT.
What Glue-Down Vinyl Is—and What Retailer Categories May Include
Glue-down vinyl is flooring bonded directly to a prepared substrate with an adhesive system. Unlike a floating floor, its pieces do not depend on mechanical edge locks to form a self-supporting assembly.
“Glue-down” describes the installation method, not one uniform product construction. Retail catalogs may group several different materials under that label:
- Luxury vinyl plank (LVP): Usually plank-shaped and commonly sold with wood visuals.
- Luxury vinyl tile (LVT): Commonly square or rectangular, with stone, marble, concrete, terrazzo, textile, or patterned visuals.
- Sheet vinyl: Supplied in rolls and cut to fit the installation area.
- Vinyl composition tile (VCT): A commercial tile format that must be installed and maintained according to its own product documentation.
For scale, one retailer’s glue-down category includes 6-by-48-inch luxury vinyl planks, 12-by-12-inch commercial VCT, and sheet products supplied 12 feet wide. Those products may appear under one shopping filter, but they are not interchangeable systems in Lowe’s glue-down vinyl catalog.
Retail filters can also produce ambiguous results. A category selected for glue-down flooring may expose products whose titles do not clearly state the installation method, along with facets for click-lock, floating, loose-lay, or other constructions. Verify the individual product number instead of assuming that every search result matches the category heading.
What to confirm on each listing
Before comparing colors, record:
- Exact manufacturer and collection
- Product or style number
- LVP, LVT, sheet vinyl, VCT, or another construction
- Glue-down, self-adhered, loose-lay, or floating installation
- Product dimensions and carton or roll coverage
- Residential or commercial approval
- Approved substrates
- Required adhesive, primer, or substrate treatment
- Technical-data, installation, maintenance, and warranty documents
The available visual range includes wood, stone, marble, concrete, terrazzo, and patterned looks. That variety is useful for design, but appearance alone says nothing about indentation resistance, rolling-load performance, adhesive compatibility, maintenance, or warranty coverage.
Likewise, do not treat assortment size, customer ratings, promotional language, or a room filter as proof of performance. A product placed under “bathroom,” “school,” “healthcare,” or “commercial” still needs product-level documentation showing that the flooring, adhesive, substrate, warranty, and maintenance requirements fit the actual project.
Glue-Down vs. Click-Lock: A Project-Based Decision
Glue-down flooring attaches each plank or tile to the substrate. Click-lock flooring joins mechanically at its edges and floats as an interconnected surface above the substrate, normally without being bonded to it.
Neither method is automatically better. The decision should follow the room, substrate, moisture conditions, loads, expected service, installer skill, and manufacturer approvals.
When glue-down deserves consideration
A bonded floor can be a candidate for:
- Permanent installations
- Large uninterrupted areas
- Heavy foot traffic
- Approved rolling-load applications
- Low-profile transitions
- Borders, diagonals, herringbone, or other precise layouts
- Areas where a firm, directly bonded feel is preferred
- Projects in which targeted plank or tile replacement is supported by the adhesive system
These are reasons to investigate glue-down, not guarantees of performance. The exact product still needs appropriate load data, substrate approval, adhesive compatibility, and warranty coverage. A generic “commercial” label does not establish that rolling carts, concentrated furniture legs, display fixtures, or other demanding loads are permitted.
Where click-lock may be more practical
Click-lock is generally faster, cleaner, and more approachable for DIY installation. There is no field of wet or tacky adhesive creating a time-sensitive placement window, and rows can usually be adjusted as assembly progresses.
A floating system may also suit a rental, a shorter-term renovation, or a project in which future removal is important. Complete removal of a firmly bonded floor can involve lifting the flooring, removing adhesive residue, and preparing the substrate again before another finish can be installed.
Click-lock does not eliminate substrate preparation. It may tolerate minor irregularities better than thin bonded vinyl, but the surface must still satisfy the selected product’s requirements for flatness, rigidity, cleanliness, dryness, and structural condition.
Feel, sound, and visible imperfections
A bonded floor generally feels firm because it rests directly against the substrate. A floating product with attached backing or separate underlayment may feel more cushioned, but it can also sound hollow in some rooms.
Where sound performance matters, compare test data for the proposed assembly rather than relying on broad claims that one installation method is always quieter.
Thin glue-down flooring is also less able to disguise the surface below it. Ridges, patch edges, cracks, old adhesive deposits, debris, and abrupt changes in elevation can telegraph through or interfere with adhesive contact. A floating floor may bridge minor surface texture, but it cannot compensate for a moving, damaged, or substantially uneven base.
Repairability is system-dependent
Sources differ on whether glue-down or click-lock is easier to repair. Both claims can be true under different conditions.
A bonded plank may be removable without dismantling surrounding rows, particularly when the approved adhesive system supports targeted replacement. Releasing the bond, removing residue, fitting a replacement, and restoring contact can still require considerable care.
A click-lock plank may release cleanly, but reaching it can require disassembling several rows. Cutting out and replacing a plank in place may alter its locking mechanism and should not be attempted unless the manufacturer provides an approved method.
Manufacturer guidance commonly presents glue-down as a candidate for permanent or demanding installations and click-lock as a faster option for DIY or temporary projects, while emphasizing that substrate, moisture, use, and warranty determine suitability in Parterre’s installation comparison.
Decision matrix
| Project factor | Glue-down may fit when… | Click-lock may fit when… |
|---|---|---|
| Substrate condition | The base can be corrected to the bonded product’s smoothness and flatness criteria | Remaining minor irregularities are within the floating product’s limits |
| Concrete moisture | Testing passes the flooring-and-adhesive limits, or approved mitigation is specified | The floating system is approved for the documented slab conditions |
| Traffic | The exact flooring and adhesive are approved for expected traffic | Expected traffic fits the product’s documented rating |
| Rolling loads | The complete bonded system has documented approval | The floating product expressly permits the loads |
| Room size | A permanent, controlled installation is desired | Required transitions and maximum run limits can be observed |
| Pattern | Fixed pieces support the planned border, diagonal, or herringbone layout | A simpler plank or tile layout is acceptable |
| Permanence | Difficult future removal is acceptable | Easier future removal is a priority |
| Installer skill | The installer can manage substrate preparation and adhesive timing | A slower, glue-free assembly is preferred |
| Warranty | Flooring, substrate, adhesive, and intended use are covered | Floating installation and all room conditions are covered |
How to Compare Products by Specifications Instead of Marketing
Start with a worksheet, not a color sample. For each candidate, record:
- Format and construction
- Width, length, and carton coverage
- Intended residential or commercial use
- Total product thickness
- Wear-layer thickness
- Waterproof or water-resistant classification
- Approved rooms and exclusions
- Approved substrates
- Required adhesive and primer
- Load or indentation information relevant to the project
- Maintenance requirements
- Residential and commercial warranty terms
- Current technical-data and installation documents
Total thickness and wear layer are different specifications
Catalogs commonly report total flooring thickness in millimeters and wear-layer thickness in mils. These values describe different parts of the product and should not be compared as if they were equivalent. A thicker overall product does not necessarily have a thicker wear layer.
Catalog examples demonstrate the variation. One commercial collection provides filters spanning 6 to 30 mil for wear layers and 2 to 8 mm for total thickness in Commercial Floorzz’s catalog. Another catalog groups products under 2 mm and 3 mm thickness filters while displaying a 2.5 mm product with a stated 28 mil wear layer in Soho Studio’s catalog.
These figures illustrate available specifications; they do not establish universal buying targets. There is no single wear-layer number that proves a product is suitable for every home, office, store, school, or healthcare setting.
Match the complete specification to:
- Expected foot traffic
- Rolling and concentrated loads
- Abrasive soil exposure
- Cleaning and maintenance practices
- Replacement expectations
- Relevant product test data
- Warranty classification and exclusions
A thick wear layer cannot correct an unsuitable adhesive, unstable substrate, failed moisture test, or unapproved load.
Waterproof does not describe the whole assembly
“Waterproof” and “water-resistant” are product classifications or marketing labels that need context. A vinyl plank may resist damage from topical water, but that label alone does not prove that:
- Water cannot pass through seams
- The perimeter is watertight
- The adhesive will tolerate prolonged exposure
- Water cannot become trapped below the flooring
- Concrete vapor is within acceptable limits
- The substrate is protected
- The warranty covers the room or incident
Surface water and moisture vapor rising through concrete are separate risks. A bathroom can expose flooring to splashes from above, while an on-grade slab can expose the system to vapor from below. Flooring, seams, perimeter details, adhesive, substrate, and slab conditions must be evaluated separately.
Room labels such as “bathroom,” “kitchen,” “office,” “retail,” “school,” or “healthcare” are useful shopping filters, not technical approvals. Confirm the intended use in the manufacturer’s current installation documents and warranty.
Before purchasing, save copies of the technical data sheet, installation manual, warranty, maintenance instructions, and adhesive-compatibility information. Retaining the documents used for selection can also help with future repairs or warranty questions.
Inspect the Subfloor Before Buying Adhesive
A substrate for glue-down vinyl must be structurally sound, rigid where required, clean, dry, smooth, and sufficiently flat under the selected system’s criteria. Verify these conditions before choosing adhesive because porosity, contamination, residual adhesive, patching materials, and moisture results can change the required installation system.
Thin bonded flooring follows the substrate closely. A proud patch edge can become visible in grazing light. Debris can create a raised point. Dust can prevent the adhesive from bonding to the substrate. Cracks or movement can transfer stress into the finished floor.
A practical inspection sequence
1. Identify the substrate. Determine whether the floor is concrete, plywood, another approved wood underlayment, existing resilient flooring, patched material, residual adhesive, or a mixed substrate. Do not assume that all wood or concrete bases are equivalent.
2. Check structural condition and movement. Look for deflection, loose panels, weak surfaces, crumbling concrete, hollow patches, damaged underlayment, and movement at seams. Flooring adhesive cannot stabilize a structurally deficient base.
3. Measure flatness. Use the method and measurement span specified by the flooring manufacturer. Map high and low areas rather than relying on visual inspection alone.
4. Inspect cracks, joints, and transitions. Distinguish stable surface defects from active movement and structural or control joints.
5. Identify contamination. Check for paint, oil, grease, sealers, curing compounds, wax, dust, incompatible patch, and residual adhesive. A surface can look clean while still preventing a dependable bond.
6. Confirm concrete testing requirements. Identify the required moisture-test method, number and location of tests, acceptance limits, pH range, slab-conditioning requirements, and any required primer or mitigation.
Correct the surface with compatible materials
General correction may include:
- Vacuuming and removing loose debris
- Removing suitable contaminants by an approved method
- Filling approved low areas
- Grinding suitable high areas in concrete
- Patching holes and minor defects
- Applying an approved smoothing or leveling product
- Priming porous or nonporous surfaces when specified
Do not assume that a patch approved under one floor covering is automatically acceptable under another.
One manufacturer’s demonstrated system requires flatness within 3/16 inch over 10 feet and lists concrete limits of 85% relative humidity and pH 5–9. Those figures show how specific a documented system can be; they are not universal requirements for glue-down vinyl in Urban Surfaces’ preparation instructions.
Concrete moisture is not a spill problem
Water spilled on a finished floor comes from above. Concrete moisture originates within or below the slab and moves toward the surface. A vinyl product that tolerates topical water may still be installed over unacceptable concrete conditions.
Use only the test methods and acceptance limits required by the exact flooring and adhesive documents. If results exceed those limits, obtain a written, approved response. That response may specify a compatible mitigation system, a different adhesive, another flooring system, or a delay in installation.
Moisture tolerance may identify only the conditions under which the adhesive can maintain its bond.
Stop-work conditions
Do not proceed when you encounter:
- Moisture or pH results outside approved limits
- Unresolved or active cracks
- A weak, moving, or unstable substrate
- Unknown or incompatible residual adhesive
- Unapproved patching or leveling material
- Missing flooring or adhesive documentation
- Old vinyl flooring that may present an asbestos hazard if disturbed
Do not sand old vinyl flooring until the potential asbestos hazard has been appropriately assessed. Home Depot’s general preparation guidance likewise warns that old vinyl may contain asbestos and should not be sanded in its vinyl-plank installation guide.
If identification or safe handling is uncertain, stop and obtain an appropriate professional assessment rather than creating dust.
Choose a Compatible Adhesive System
Pressure-sensitive, hard-set, and wet-set describe general adhesive behavior. They are not interchangeable recommendations, and the category name alone does not establish suitability.
Pressure-sensitive adhesive
In some applications, pressure-sensitive adhesive is spread over the substrate and allowed to develop tack before flooring is placed. Its continuing tack may make positioning or targeted replacement more manageable than a firm-setting bond.
Terminology is not consistent across general guidance. Some sources discuss pressure-sensitive adhesive spread over the substrate; others describe a pressure-sensitive layer supplied on the flooring. The exact product and adhesive documentation must resolve which construction and method are intended.
Hard-set adhesive
A hard-set adhesive develops a firm bond. When specifically approved, it may be considered for applications involving concentrated loads, heavy fixtures, or rolling traffic.
That does not mean every hard-set adhesive is suitable for every commercial project. Verify flooring compatibility, substrate approval, moisture conditions, load limits, trowel requirements, spread rate, placement method, and warranty coverage.
Wet-set installation
Wet-set installation means placing the flooring while the adhesive remains wet. Placement control is critical because installing too early or too late can affect transfer, stability, cleanup, and bond development.
Do not choose among these systems based only on which method sounds easiest. The flooring manufacturer and adhesive manufacturer must approve the exact flooring–substrate–adhesive combination for the documented site conditions.
Adhesive worksheet
Complete this record before opening a pail:
| Item | Project requirement |
|---|---|
| Adhesive manufacturer and product | |
| Approved flooring and style number | |
| Approved substrates | |
| Required primer or coating | |
| Moisture-test method and limit | |
| Permitted pH range | |
| Required trowel notch | |
| Expected spread rate | |
| Open or flash time | |
| Working time | |
| Wet-set or tack-set placement | |
| Required transfer checks | |
| Roller type and weight | |
| Cleanup product and timing | |
| Foot-traffic restriction | |
| Furniture and rolling-load restriction | |
| Washing restriction | |
| Temperature-control requirement |
Record actual batch numbers and site conditions as well. If the instructions provide a spread-rate range, calculate adhesive quantity using the conservative end of the range and account for the actual substrate condition.
Avoid substituting a multipurpose floor adhesive because it is locally available or appears in generic advice. Without documented approval for the flooring, substrate, moisture conditions, loads, and intended use, the substitution leaves compatibility unverified.
Plan the Layout, Materials, and Tools
Complete the layout before spreading adhesive. A control line that is slightly wrong can produce tapered rows, narrow borders, or a pattern that drifts across a large area.
Core tools and materials
A typical modular glue-down plank or tile project may require:
- Tape measure
- Pencil or approved marking tool
- Chalk line
- Straightedge or carpenter’s square
- Utility knife or manufacturer-approved cutter
- Vacuum
- Level or flatness-checking tool
- Specified notched trowel
- Approved adhesive
- Required floor roller
- Approved patch, leveler, primer, and cleanup materials
Verify the exact trowel notch and roller requirement.
Calculate flooring quantity
For a rectangular room:
- Measure its length and width.
- Multiply those measurements to calculate floor area.
- Add closets, alcoves, and connected areas.
- Subtract exclusions only if they truly will not receive flooring.
- Add layout and cutting waste.
- Add separately identified repair stock.
- Convert the result to cartons or pieces.
- Round up to whole purchasable units.
For an irregular room, divide the plan into manageable shapes, calculate each area, and combine the results. Do not calculate waste solely from square footage. Room shape, plank dimensions, pattern direction, doorways, columns, borders, and the usefulness of offcuts all affect yield.
Published allowances vary by source and system. Urban Surfaces recommends 5% to 10% extra material for its demonstrated installation, together with 48 hours of conditioning at 65–85°F. That same system uses a 45-degree trowel position, a 45- to 90-minute tack period, and a 75- to 100-pound roller; every figure is specific to that manufacturer’s example rather than a general glue-down rule in its installation guide.
Home Depot’s general plank guide suggests approximately 10% to 20% extra material for cuts and future replacement and uses about 6 inches as general end-joint staggering guidance. Both figures remain subordinate to the selected product’s layout instructions.
Straight rows in a simple rectangle may create less waste than diagonal, bordered, or herringbone layouts. Complex patterns usually produce more cuts and fewer reusable offcuts. Calculate retained repair stock separately rather than assuming every leftover piece will be suitable.
Check dye lots, run numbers, or batch numbers when the product uses them. If the instructions recommend mixing pieces from multiple cartons, stage the material so visual variation is distributed rather than concentrated.
Dry-fit and establish control lines
Measure the room at several points because opposite walls may not be parallel. Identify the main sightline and decide whether the layout should follow a wall, corridor, doorway, architectural centerline, or another reference.
To estimate balanced plank rows:
- Measure the room perpendicular to the plank direction.
- Divide that measurement by the exposed plank width.
- Note the remaining width.
- If the final row would be too narrow, add its width to one full plank width.
- Divide the combined width between the first and last rows.
- Confirm that both borders meet the product’s minimum-width requirement.
For example, if the calculation leaves a 2-inch final row and the plank is 7 inches wide, the combined width is 9 inches. Dividing it produces approximate 4½-inch border rows. Actual placement may require adjustment for walls, thresholds, cabinets, and pattern alignment.
Dry-fit representative rows before adhesive is spread. Confirm border widths, doorway cuts, seam positions, transitions, and the view from the main entrance.
Stagger plank end joints according to the product instructions. Do not assume that a general offset applies to every collection, and check whether repetitive stair-step or H-pattern layouts are prohibited.
Patterns require additional controls. A diagonal needs a dependable reference angle. A border must remain square and dimensionally consistent around the field. Herringbone magnifies small alignment errors, so establish centerlines and manageable working sections before opening adhesive.
Acclimation is also manufacturer-dependent. Follow the selected product’s packaging, storage, conditioning, temperature, and environmental-control requirements rather than applying another manufacturer’s schedule.
Install, Roll, Clean, and Protect the Floor
Treat installation as a quality-control sequence. Do not spread more adhesive than can be covered correctly within its documented working time.
1. Confirm site conditions
Before starting, verify and record:
- Substrate preparation is complete
- Moisture and pH results are acceptable
- Patch, primer, or mitigation has cured
- Room and material temperatures are within the required range
- Environmental controls meet the instructions
- Correct flooring, adhesive, trowel, and roller are on site
- Product and adhesive batch numbers are recorded
- Layout and pattern direction are confirmed
- Cure restrictions have been communicated
2. Establish final layout lines
Snap the required control lines and check them for square. Protect those lines from adhesive or use another approved reference method that remains visible while working.
Plan an exit path. Avoid installing yourself into a corner or having to cross newly placed flooring to reach the door.
3. Spread the approved adhesive
Use the specified trowel notch in good condition. Maintain the angle required by the adhesive manufacturer and create consistent ridges. Replace or re-notch the trowel when wear changes the opening.
Trowel angle, notch, coverage, substrate porosity, open time, working time, and placement method all come from the selected adhesive instructions. Work in sections small enough to cover within the permitted window. Avoid puddles, skipped areas, doubled ridges, and spreading over dusty or contaminated surfaces.
4. Observe the required timing
Some flooring must be placed while the adhesive is wet. Other systems require the adhesive to flash or become tacky.
Record when each section was spread. If the adhesive moves outside its permitted placement window, stop and follow its instructions rather than installing into a questionable field.
5. Place flooring from the control lines
Set the first pieces accurately because later rows will reproduce early errors.
Continue checking:
- Alignment with control lines
- Closed seams
- Correct pattern and orientation
- Required end-joint staggering
- Consistent visual distribution
- Adhesive contamination at edges
- Movement caused by walking or rolling
Do not force damaged, bowed, or misshapen pieces into the field. Set them aside and use suitable material.
6. Make controlled cuts
Some flexible dryback planks can be marked with a square, scored with a utility knife, and snapped. Other products require a guillotine cutter or another approved tool.
Use templates for complicated doorjamb, column, and pipe cuts. Avoid ragged edges, overcut corners, or marks that will remain visible after trim is installed.
7. Check adhesive transfer
Lift a piece at the frequency required by the instructions and inspect its back. The objective is the specified adhesive contact, not merely visible ridges on the substrate.
Correct the cause before continuing.
8. Roll at the required time
Timely rolling presses the flooring into the adhesive and helps establish transfer. Roll in the directions and sequence specified for the system, paying attention to seams, edges, and fitted pieces.
Use the exact roller type and weight stated in the flooring or adhesive documentation. Do not treat another manufacturer’s roller requirement as a universal standard.
9. Resolve the perimeter requirement
Expansion guidance for bonded vinyl is product-specific.
Follow the exact flooring manual. Do not assume that every glue-down floor requires no gap, and do not automatically copy a floating-floor expansion rule onto a bonded installation.
10. Clean adhesive residue promptly
Inspect hands, tools, seams, and the flooring surface continually. Remove residue only with the method and cleaner approved by the adhesive manufacturer.
11. Protect the cure
Restrict foot traffic, furniture, rolling loads, washing, and temperature changes for the periods documented by the selected flooring and adhesive manufacturers. Do not substitute a generic cure time for the actual system schedule.
Use only approved protective materials. Protect access points and transitions without shifting newly installed pieces or interfering with the documented cure conditions.
Final inspection checklist
Before releasing the floor, confirm:
- Rows and patterns remain aligned
- Seams are closed
- Cuts are neat and concealed as intended
- Required adhesive-transfer checks were completed
- All required areas were rolled
- No adhesive residue remains
- No corners or edges are loose
- Perimeter and transition details are complete
- Flooring, adhesive, and test records are saved
- Cure and traffic-release times are documented
- Cleaning and maintenance instructions have been handed over
Calculate the Real Cost and Plan for Future Repairs
The box price is not the project price. Glue-down flooring can have an attractive material cost while requiring significant spending on substrate correction, adhesive, testing, mitigation, tools, and labor.
Installed-cost worksheet
| Cost category | Quantity or basis | Estimated cost |
|---|---|---|
| Flooring for measured area | ||
| Pattern and cutting waste | ||
| Retained repair stock | ||
| Adhesive | ||
| Primer or substrate coating | ||
| Moisture and pH testing | ||
| Moisture mitigation | ||
| Patching or leveling | ||
| Grinding or surface preparation | ||
| Existing-floor removal | ||
| Disposal | ||
| Delivery and handling | ||
| Trowels, blades, and consumables | ||
| Roller purchase or rental | ||
| Transitions and trim | ||
| Installation labor | ||
| Furniture or equipment movement | ||
| Contingency |
Calculate adhesive from documented coverage rather than room area alone. The required trowel, substrate porosity, material left in containers, and working practices can affect consumption.
A low-priced dryback product can become an expensive installation if the slab requires extensive grinding, leveling, moisture mitigation, or removal of residual materials. Conversely, a substrate already within the selected system’s requirements may make the same flooring more economical.
As a limited catalog snapshot rather than a market average, Commercial Floorzz displayed Mohawk Ballard 2.0 glue-down LVP at $1.60 per square foot, Mohawk Arrington LVP at $1.75 per square foot, and Armstrong Standard Excelon VCT at $2.15 per square foot. Prices, inventory, and availability can change, and these figures do not include preparation or installation.
Compare prices only when the displayed unit is explicit. Do not convert a listing into a square-foot price if it is unclear whether the amount applies per piece, carton, square foot, roll, or another unit.
Planning for one-plank repairs
An individual bonded plank or tile may be replaceable without dismantling surrounding rows. That possibility can be particularly useful where the approved pressure-sensitive system supports targeted replacement, but repair difficulty depends on:
- Adhesive type and bond strength
- Location of the damaged piece
- Manufacturer-approved removal method
- Whether controlled heat is permitted
- Ability to remove residue without damaging the substrate
- Availability of matching retained material
- Visual change in the installed floor
- Installer skill
- Ability to reroll and protect the repair
Replacing one plank is not equivalent to removing the entire floor. A localized repair may be manageable, while complete removal of a firmly bonded installation can be labor-intensive and may leave a substrate needing substantial restoration.
Retain unopened or well-protected matching flooring in a conditioned location. Label it with the room, manufacturer, style, color, batch number, and installation date. Also retain:
- Flooring invoice and product number
- Technical data and warranty
- Adhesive manufacturer and batch information
- Primer or mitigation documentation
- Moisture and pH results
- Installer records
- Layout photographs
- Approved repair procedure
When professional installation is the better decision
Seek professional assessment when the project involves:
- Moisture results outside or near system limits
- Extensive patching, grinding, or leveling
- Moving cracks or structural concerns
- A large diagonal, bordered, or herringbone layout
- Commercial rolling loads
- Uncertain adhesive compatibility
- Mixed or contaminated substrates
- A possible asbestos hazard
- Missing technical documentation
Frequently asked questions
Can glue-down vinyl flooring be installed directly over concrete?
Yes, when the exact flooring and adhesive approve concrete and the slab satisfies their requirements. The concrete generally must be sound, clean, dry, smooth, sufficiently flat, and free of incompatible contaminants.
“Directly over concrete” does not mean “without preparation.” The slab may require moisture and pH testing, grinding, patching, leveling, priming, or an approved mitigation system. Installation should not proceed until the documented requirements of both the flooring and adhesive systems are satisfied.
Does glue-down vinyl flooring need an expansion gap?
There is no universal answer. Some bonded systems direct installers to fit the perimeter tightly, while others require defined clearance at walls, fixed objects, transitions, or other interruptions.
Use the exact flooring installation manual. Do not borrow the perimeter rule from another glue-down product, and do not automatically apply the expansion gap intended for a floating floor.
How much extra flooring should I order for waste?
Base the allowance on room shape, plank or tile dimensions, pattern, cutting losses, and desired repair stock. A simple straight installation may require less additional material than a diagonal, bordered, or herringbone layout.
Use the selected manufacturer’s allowance as a starting point, then check it against the actual layout. Calculate installation waste separately from the matching material you intend to retain for future repairs.
Is glue-down vinyl waterproof enough for a bathroom?
Possibly, but a waterproof product label is not enough to approve the installation. Confirm that the warranty permits bathroom use and review requirements for seams, perimeter treatment, fixtures, adhesive, substrate, and cleanup.
Resistance to topical water does not prove that seams or the perimeter are watertight, that the adhesive tolerates prolonged moisture, or that a concrete slab satisfies vapor limits. Evaluate water from above and moisture from below as separate risks.
Can one damaged glue-down vinyl plank be replaced?
Often, but the procedure depends on the flooring and adhesive system. A bonded plank may be removable without dismantling surrounding rows, after which the substrate is prepared and a matching replacement is installed.
Difficulty varies with adhesive type, plank location, approved heat tolerance, residue-removal method, retained stock, and installer technique. Follow the flooring and adhesive manufacturers’ repair instructions rather than improvising with heat, cleaners, or solvents.
The final decision should be a go-or-stop check.
Proceed only when you have confirmed:
- The exact flooring and product number
- The approved adhesive and primer
- Substrate eligibility
- Acceptable moisture and pH results
- Flatness and surface-preparation requirements
- Final layout and material quantity
- Correct trowel, cutting tools, and roller
- Adhesive timing and transfer-check procedures
- Perimeter and transition details
- Approved cleanup method
- Cure and traffic restrictions
Stop if any of those records are missing, or if the project involves excessive slab moisture, unstable material, unresolved cracks, a possible asbestos hazard, or substantial substrate correction beyond your experience. The next step is technical clarification or professional assessment—not spreading adhesive and hoping the floor will compensate.