
How to Install Luxury Vinyl Tile Flooring
Match click-lock, peel-and-stick or glue-down LVT to the right workflow, then verify substrate prep, layout, accessories, gaps and curing.
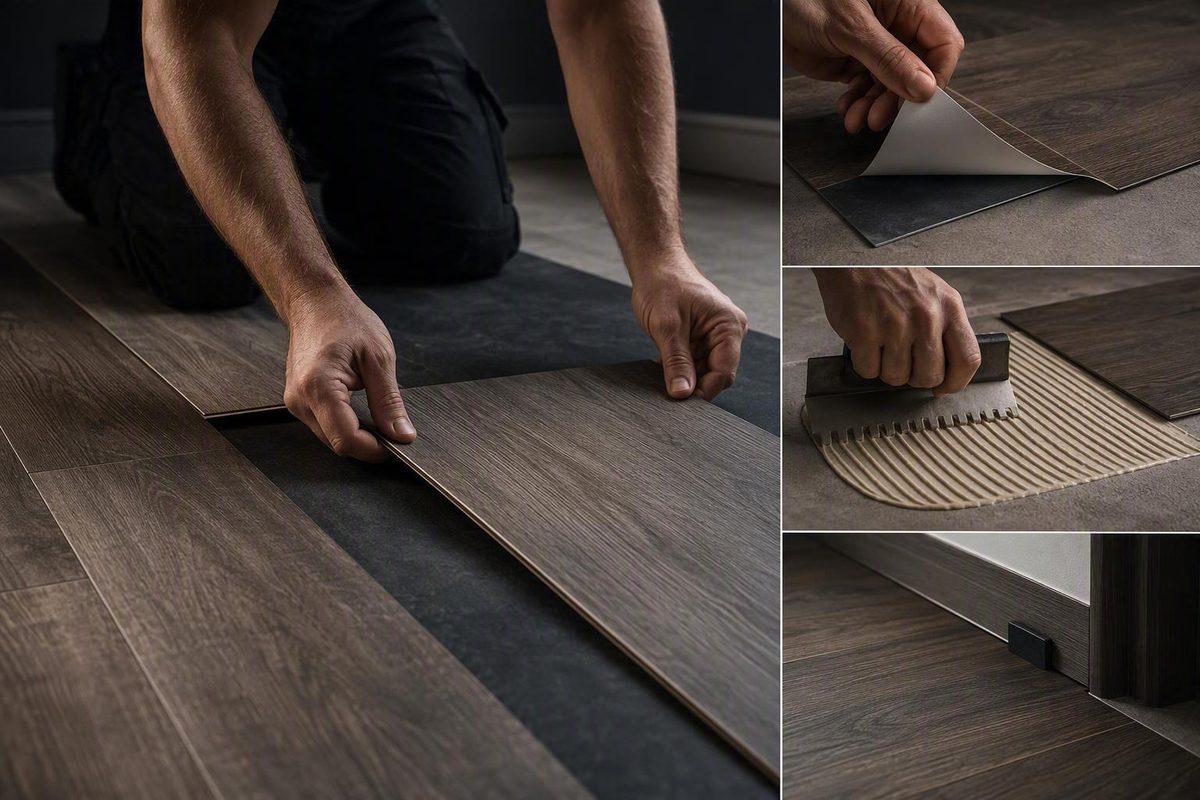
Luxury vinyl tile flooring installation is not one universal process. First identify whether your exact product is floating click-lock, peel-and-stick, full-spread glue-down, loose-lay, perimeter-glue, or groutable. Then confirm that the substrate meets that product’s requirements. The flooring, adhesive, primer, patch, underlayment, grout, and moisture-control instructions—not a generic tutorial—set the specifications for the job.
Start here: identify the LVT installation system
Find the collection name, model number, and installation guide on the carton or manufacturer’s website. Do this before buying accessories: the wrong underlayment, primer, adhesive, grout, or moisture-control product can create a compatibility problem rather than solve one. Manufacturers may publish separate instructions for individual collections, as shown by Daltile’s collection-specific luxury vinyl installation guide hub.
| Installation system | How it works | What to verify | Do not assume |
|---|---|---|---|
| Floating click-lock | Pieces lock together and generally float over the substrate | Approved substrate, pad or underlayment, moisture control, movement space, room-size limits | That the product can be glued down |
| Peel-and-stick | Factory-applied adhesive bonds each tile to the substrate | Primer, substrate compatibility, placement procedure, pressure or rolling requirements | That extra adhesive will improve the bond |
| Full-spread glue-down | Separate adhesive bonds the entire back of each tile | Exact adhesive, applicator, setup and working times, rolling, cure restrictions | That specifications transfer between adhesives |
| Loose-lay | Pieces rely on product construction and approved placement conditions | Room and layout limits, perimeter treatment, rolling-load restrictions | That any dry-back tile can be loose-laid |
| Perimeter-glue | Adhesive is applied only where the system specifies | Approved product, adhesive, room limits, perimeter procedure | That it is a shortcut for full-spread installation |
| Groutable | Approved tile is installed with compatible flexible grout | Joint size, adhesive, grout, installation sequence | That ordinary rigid tile grout is suitable |
Click-lock pieces connect to one another and are generally not attached to the substrate. Glue-down tile bonds directly to it, while peel-and-stick tile arrives with adhesive already on its back. Loose-lay, perimeter-glue, and groutable options exist only for products engineered and approved for those methods; Shaw’s installation overview assigns these methods to specific product systems.
Treat the exact flooring and accessory manuals as controlling for:
- acclimation and jobsite conditions;
- substrate flatness and moisture limits;
- perimeter or movement space;
- underlayment, primer, patch, adhesive, and grout compatibility;
- maximum continuous installation dimensions;
- locking sequence or adhesive-placement procedure;
- required rolling or placement pressure;
- foot traffic, furniture, cleaning, and cure restrictions.
Even basic directions can conflict across product lines. Some instructions require conditioning in the room, while others say particular products need none. Gap dimensions, joint staggering, substrate preparation, and approved accessories also vary. Never apply instructions written for click-lock plank automatically to glue-down or peel-and-stick tile.
Measure, inspect, and assemble the project checklist
Measure each rectangular area by multiplying its length by its width. Measure closets, alcoves, bays, and adjoining sections separately, then add those figures to the main room area. Divide an irregular room into simple rectangles instead of estimating around its perimeter.
For example:
- Room area: 200 square feet
- Common planning allowance: 10%, or 20 square feet
- Planning quantity: approximately 220 square feet
Adding 10% is a common purchasing convention, not a universal requirement. A diagonal pattern, complicated room, frequent cuts, minimum cut dimensions, carton quantities, or manufacturer guidance can change the order amount. Lowe’s uses the same 10% convention while also recommending that extra material be retained for future repairs rather than treated entirely as waste. See its LVT measuring guidance.
Before installation, inspect tile faces, edges, locking profiles, and backing for visible damage. Confirm that every carton contains the intended product and color information. Blend pieces from multiple cartons as you work so visual variation does not collect in one part of the room; Shaw also advises inspecting flooring and working from multiple cartons.
General tools
- Tape measure
- Square
- Chalk line
- Straightedge
- Utility knife with spare blades
- Safety glasses
- Pencil or non-staining marker
- Vacuum and suitable cleaning supplies
For an approved click system
- Manufacturer-specified spacers
- Tapping block or pull bar, if approved
- Cutting tools suitable for the product
- Approved underlayment or moisture-control materials, if required
For bonded tile
- Specified primer and preparation products
- Approved adhesive, where applicable
- Correct applicator, roller, or notched trowel
- Hand roller or floor roller of the specified weight
- Approved materials for cleaning fresh adhesive
- Tile spacers and compatible grout only for an approved groutable system
Build the budget around more than cartons. Account for old-floor removal and disposal, substrate repair, trim, transitions, tool purchase or rental, furniture moving, moisture work, and the time during which adhesive restrictions keep the room out of service.
Use a substrate readiness matrix before covering the floor
Every LVT system needs a substrate that is clean, dry, stable, sufficiently flat, and compatible. “Sufficiently flat” means within the tolerance stated in the exact flooring instructions—not merely smooth to the hand or apparently level.
| Substrate | Possible compatibility | Inspection and likely preparation | Stop-work conditions |
|---|---|---|---|
| Concrete | Often possible with an approved system | Check flatness, soundness, cracks, contamination, moisture, and required vapor control; prepare or patch as specified | Unresolved moisture, active cracks or movement, severe unevenness, incompatible sealer or residue |
| Plywood or OSB | Often possible if the product permits it | Secure loose panels, correct movement, remove high spots, fill low areas and seams with approved products, remove dust | Flexing or damaged panels, structural movement, persistent dampness, unapproved construction |
| Ceramic tile | Sometimes possible over sound tile | Check adhesion and flatness; clean thoroughly and fill joints or texture when required | Loose tile, movement-related cracking, excessive unevenness, contamination |
| Existing resilient flooring | Sometimes possible over one compatible, sound layer | Confirm it is firmly attached, flat, clean, undamaged, and accepted by the LVT instructions; level texture if required | Bubbling, peeling, looseness, damage, moisture, incompatible cushioning or coating, suspected hazardous material |
On wood, correct loose fasteners as appropriate for the assembly, secure moving panels, remove high spots, and fill low areas or seams with a preparation product approved for the installation. Vacuuming is the final cleaning step, not a substitute for correcting movement or unevenness.
Where required, use an approved patching compound or embossing leveler to create a uniformly smooth plane. A click-lock product may tolerate different surface conditions than thin glue-down tile, so do not transfer its preparation threshold to another system.
Existing vinyl can remain only when the flooring manufacturer permits it and the old surface is flat, firmly attached, clean, compatible, and in good condition. Bubbling, peeling, loose edges, damage, or an unsuitable coating requires correction or removal—after determining whether disturbance is safe.
Wax, paint, varnish, sealers, oil, chemicals, dust, and adhesive-remover residue can prevent a reliable bond. Do not assume that aggressive cleaning has made an unidentified surface or coating compatible with a bonded installation.
Surface water resistance also does not protect the installation from moisture originating within or below the substrate.
Stop before disturbing questionable old flooring
Pause the project if any of these conditions exist:
- Older resilient flooring or adhesive may contain asbestos.
- A slab has unexplained dampness, staining, deposits, odor, or failed moisture testing.
- Cracks are active or the structure is moving.
- The floor is severely uneven.
- Wood panels are loose, soft, damaged, or flexing.
- Paint, sealer, wax, oil, curing compound, or unknown adhesive residue cannot be identified or removed by an approved method.
- The proposed repair would conceal rather than correct an active defect.
Do not cut, sand, grind, scrape, or demolish old vinyl or adhesive when asbestos is reasonably suspected. One retailer guide specifically flags vinyl flooring manufactured before 1986 as potentially containing asbestos and recommends testing before removal; that does not mean all flooring from that period contains asbestos. Have suspect material assessed by an appropriately qualified inspector or abatement professional before disturbing it.
Use a qualified flooring, moisture, or structural professional when slab moisture or movement has not been diagnosed. Filling a stable shallow depression is routine substrate correction.
Plan the layout before fixing any tile in place
Clear the room completely. Carefully remove baseboards or shoe moulding you intend to reuse, and plan doorway transitions before installation. Where appropriate, undercut door casings so the flooring can slide beneath them. Use a scrap of the actual flooring, together with any approved underlayment, as the height guide.
Establish square reference lines and dry-lay representative rows without adhesive or irreversible locking. This reveals out-of-square walls, awkward doorway cuts, obstacles, and narrow perimeter pieces while the layout can still be adjusted.
Assess the first and last rows together:
- Measure the usable room width perpendicular to the installation direction.
- Estimate how many full tile or plank widths will fit.
- Calculate the remaining width at the final wall.
- If the last row would be impractically narrow, reduce the first row so the two edges are better balanced.
- Repeat the check for lengthwise end cuts and prominent doorways.
Installation direction, joint staggering, and minimum end-piece or perimeter-cut sizes are product-specific. As examples—not universal LVT rules—one Unilin click-lock guide calls for an eight-inch joint stagger and adjusts the first row when the last would be narrower than two inches.
Keep the reference course and first rows straight and square.
Install floating click-lock LVT without trapping the floor
Use this workflow only when the exact LVT manual approves a floating click-lock installation.
- Confirm the system. Verify the substrate, attached pad, separate underlayment, moisture control, room conditions, acclimation, installation direction, room-size limits, and movement-joint requirements.
- Complete substrate preparation. Correct flatness, stability, and contamination problems before opening the working cartons.
- Set spacers. Place the specified spacers around walls, posts, pipes, and other fixed objects. Product-specific click instructions include movement-space examples from one-quarter inch to five-sixteenths inch, demonstrating why the exact product dimension must control. Check the cited click-lock guide’s differing gap instructions.
- Assemble the first row. Orient tongues and grooves as directed. Lock ends and long edges in the required sequence; locking profiles can use different angles and tapping procedures.
- Cut the end piece. Measure while accounting for the required perimeter space. Score and snap only if the flooring instructions approve that method; otherwise use the specified cutting tool.
- Start succeeding rows. Reuse a sound offcut only if it meets the manual’s minimum dimensions and produces the required joint pattern.
- Check continuously. Confirm that joints are fully engaged, rows remain straight, and the movement space has not closed. Correct problems immediately.
- Work beneath casings and toward transitions. Follow the approved low-clearance locking and doorway procedures. Do not hammer directly on exposed flooring edges.
Underlayment is not automatic. Use only the construction approved by the flooring manufacturer.
Do not glue a floating click product merely to make it feel firmer unless its exact manual permits an adhesive installation. Do not trap the floor beneath cabinets or fixed built-ins, and do not drive trim or transition fasteners through the flooring unless the instructions expressly allow it. Baseboards, shoe moulding, and transition tracks should conceal the movement space without pinning the floor.
Follow the correct bonded-tile workflow
Peel-and-stick and full-spread glue-down tile both bond to the substrate, but their adhesive systems and placement procedures are not interchangeable.
Peel-and-stick LVT
Peel-and-stick tile needs an exceptionally clean, smooth, dry, and compatible substrate because factory-applied adhesive cannot compensate for dust, texture, movement, or low spots.
Before exposing the adhesive:
- Verify that the substrate and any existing flooring are approved.
- Complete required patching, sanding, and cleaning.
- Apply only the primer specified for that tile and substrate, if one is required.
- Snap square reference lines.
- Dry-check the layout, including doorway and perimeter cuts.
From that point, follow the exact tile instructions for removing the release liner, positioning the tile, applying pressure, rolling, cleaning, and restricting traffic or furniture. These details vary and should not be replaced by a generic sequence.
Do not add adhesive beneath self-stick tile without written product approval. An unapproved adhesive can be incompatible with the factory-applied backing rather than improve it.
Full-spread glue-down LVT
Before opening the adhesive, confirm:
- the exact approved adhesive;
- compatible substrate preparation products;
- the required applicator or trowel;
- open time and working time;
- placement procedure;
- roller requirement and schedule;
- clean-up method;
- traffic, furniture, and cleaning restrictions.
Then use this bounded sequence:
- Prepare and vacuum the substrate.
- Mark a square layout and dry-fit critical areas.
- Spread adhesive over only a manageable section.
- Allow the specified setup period; do not judge readiness from appearance alone.
- Place full tiles along the reference lines, then measure and cut perimeter pieces.
- Keep adhesive off tile faces and clean residue by the approved method.
- Roll the floor if required, using the specified roller and schedule.
- Protect the installation throughout the stated cure period.
Armstrong’s general vinyl-tile overview lists a 100-pound roller among possible tools and says heavy traffic should be avoided for 72 hours after the adhesive installation it describes. Those are examples from that guidance, not universal LVT specifications; Armstrong directs readers back to the individual vinyl-tile instructions.
Never improvise an adhesive spread rate, trowel notch, open time, roller weight, or cure period. For groutable LVT, use only grout explicitly approved as flexible and compatible with the flooring system. Ordinary grout intended for rigid ceramic assemblies should not be assumed suitable.
Finish the edges, inspect the floor, and decide whether to call a pro
Reinstall baseboards, shoe moulding, and transitions after the flooring is ready for finishing. On a floating installation, fasten trim to the wall and transition hardware to the approved substrate—not through the LVT—and preserve the required movement space.
For bonded floors, follow the flooring and adhesive instructions before allowing foot traffic, heavy traffic, furniture, cleaning, appliance movement, or rolling loads. Restrictions can differ even between adhesives approved for similar tile.
Run a final quality-control check:
- Rows, tile edges, and reference lines remain aligned.
- Click joints are fully engaged and undamaged.
- Bonded edges lie flat without loose corners.
- Adhesive residue has been removed by the approved method.
- Required perimeter space remains open beneath the trim.
- Transitions are secure but do not trap a floating floor.
- Doors clear the finished surface.
- Spare matching pieces and product records are stored safely.
Certain symptoms point back to preparation or installation errors.
Seek professional evaluation for suspected hazardous material, active moisture, severe substrate defects, structural movement, stairs, complicated wet-area penetrations, or an adhesive installation you cannot place and roll within the product’s working time.
When vetting an installer, ask:
- How much experience do you have with this installation method and product type?
- Do you hold relevant certifications?
- Are you insured, and can you provide current proof?
- Can you provide relevant references or project photos?
- What labor warranty do you provide?
- Does the quote include removal, disposal, moisture evaluation, patching, and substrate preparation?
- Is pricing itemized for transitions, trim, furniture moving, and unforeseen repairs?
- What traffic, furniture, cleaning, and curing restrictions will apply?
- What deposit, progress-payment, and final-payment terms do you require?
Flooring Corner publishes informational flooring guidance. This article does not grant product approval, determine warranty coverage, or replace the instructions for the selected flooring and accessories. Direct installation approval, service, and warranty questions to the relevant manufacturers or contracted installer.
Before starting, verify the exact installation system, resolve moisture and substrate defects, plan the layout, use only approved accessories, and observe the specified movement or curing requirements. Careful preparation usually matters more than how quickly the visible tile goes down. If a hazard or substrate condition remains uncertain, stop and resolve it before covering the floor.