
Vinyl Plank Flooring Installation: Floating Click-Lock Steps
Five checks before the first plank, a balanced-row calculator, the click-lock sequence, doorway and reverse-assembly details, and when to stop and call a pro.
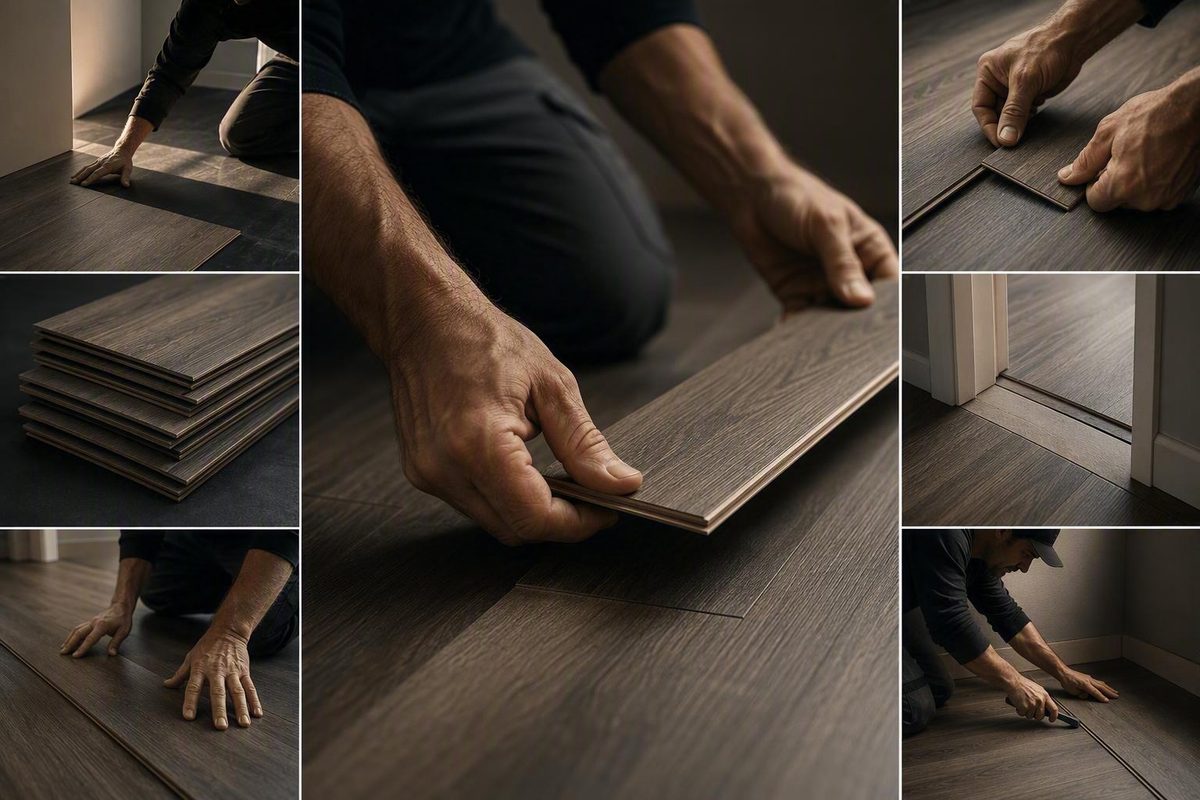
Vinyl plank flooring installation, for the floating click-lock planks most people buy, runs in a fixed order: identify the product system and copy its numbers out of the manual, stop if old resilient flooring or mastic might contain asbestos, accept the subfloor for flatness and moisture, snap a reference line that balances the first and last rows, and only then start locking planks. Nearly every floor I have been called back to fix failed at one of those gates, not at the click. The sequence below covers floating click-lock plank only; glue-down and peel-and-stick systems need different prep, placement, rolling, and cure steps.
Identify the System and Copy Its Numbers From the Manual
Start with the carton label, product number, and the current installation manual for that exact product, not a similar-looking plank.
| System | How it is secured | What controls the procedure |
|---|---|---|
| Floating click-lock | Planks lock to each other, not the substrate | Locking method, approved substrate, underlayment, clearance, run limits |
| Glue-down | Adhesive bonds each plank to the substrate | Adhesive, trowel, open time, rolling, cure |
| Peel-and-stick | Factory adhesive bonds after the liner comes off | Substrate prep, primer if specified, pressure, traffic restrictions |
The planning principles overlap; the procedures do not. Before buying accessories or touching the room, fill in this worksheet from the manual:
| Manual item | Your product’s requirement |
|---|---|
| Product, model, manual revision | |
| Approved substrates and exclusions | |
| Acclimation and room conditions | |
| Subfloor flatness tolerance | |
| Required moisture test and limit | |
| Moisture barrier or vapor retarder | |
| Attached pad or separate underlayment | |
| Perimeter and obstruction clearance | |
| Minimum plank and end-piece length | |
| Minimum end-joint offset | |
| Maximum continuous run | |
| Doorway transitions or movement breaks | |
| Cabinets, islands, fixtures | |
| Cleaning and return-to-service timing |
Do not fill the blanks from memory. Published figures vary. Lowe’s floating-floor procedure specifies an 8-inch seam offset, subject to the flooring manufacturer’s recommendation, and a 1/4-inch perimeter gap (Lowe’s installation guide). The Tile Shop describes typical end-joint offsets of 6–12 inches and expansion space of 1/4–1/2 inch, again subject to the product’s instructions (The Tile Shop tutorial). Those are examples, not specifications; use the number printed in your manual.
Acclimation is product-specific too. Some products require a stated period under stated room conditions. COREtec says its planks and tiles do not require pre-installation acclimation but must be installed in a climate-controlled environment, and it points customers to the instructions for the exact construction shown on the carton (COREtec installation guidance).
Stop Before Disturbing Flooring That May Contain Asbestos
If old resilient tile, sheet flooring, backing, or mastic will be exposed, pause before removing, sanding, leveling, scraping, drilling, sawing, sweeping, or vacuuming it. Asbestos may be present in these materials, and age, color, and appearance cannot confirm or rule it out. Handling and disposal rules also vary by jurisdiction and project (EPA asbestos-containing materials guidance).
Do not take your own sample, and do not grind a suspect floor flat or scrape unknown black mastic because it is in the way. EPA advises leaving sound suspect material undisturbed and using a trained or accredited asbestos professional when remodeling may disturb it or when inspection, sampling, repair, or removal is needed. EPA also warns that incorrect sampling can be more hazardous than leaving the material alone (EPA homeowner asbestos guidance).
Leaving the old floor in place does not automatically make it an acceptable substrate. Whether it can stay depends on its condition and stability, whether the required prep would disturb it, the rules that apply to your project and location, the new flooring manufacturer’s approval, and finished-height conflicts at doors, appliances, and fixtures. If the project needs assessment or disturbance, ordinary floor prep stops until an asbestos professional has dealt with the material.
Accept the Subfloor Before You Buy Underlayment
A floating floor needs a substrate that meets the product’s requirements for cleanliness, flatness, dryness, stability, and structural soundness. A product that is permitted over an existing surface will not hide movement, ridges, dips, or moisture.
| Existing surface | Initial decision |
|---|---|
| Concrete | Often permitted; required moisture testing and an approved moisture-control layer may apply |
| Wood subfloor or hardwood | May be permitted if sound, dry, stable, and flat enough; check construction-specific exclusions |
| Tile | May remain for some products if secure and flat, with joints or texture treated as required |
| Existing vinyl | Some procedures permit one stable layer, subject to its cushioning, adhesion, condition, and the new product’s approval (Lowe’s guide) |
| Laminate | Get written product approval; Lowe’s advises against it because laminate can be uneven |
Test moisture by the method the flooring instructions require. If readings fail, find and fix the cause before covering it. Concrete may need a compatible barrier or moisture-control system, but there is no single test, limit, or barrier that applies to every plank and slab.
Walk the whole floor and look for loose tile, boards, or flooring; deflection, cracks, or structural damage; high seams, ridges, and dips; contamination that could interfere with approved accessories; and door, appliance, and fixture clearance once the new floor height is added.
Do not add underlayment by reflex. Check whether the plank has an attached pad and whether the manufacturer permits a separate underlayment, vapor retarder, or combined product.
For a typical floating job you need a tape, pencil, square, long level or straightedge, a utility knife for planks designed to score and snap, a saw and blade suited to harder cores, manufacturer-compatible spacers, an approved tapping block and mallet, a pull bar and pry bar, an oscillating tool for wood jambs, a chalk line, and approved cleaning equipment used only after the asbestos checkpoint is cleared. Wear safety glasses; COREtec lists them among its recommended installation tools (COREtec installation guidance).
Balance the Rows and Set a Straight Reference Line
Pull reusable baseboard or quarter-round carefully and label each piece by wall. Before laying anything, check door clearance, jamb heights, vents, transition locations, posts, pipes, cabinets, islands, and other fixed obstacles.
Pick plank direction from room geometry, main sightlines, and how the room connects to adjoining spaces. Running parallel to the longest wall may reduce cuts. Running lengthwise down a hallway often gives a cleaner line and simplifies multiroom layouts. Those are layout options, not technical rules.
Then work out the last-row width before you cut anything: measure the room perpendicular to the plank direction, subtract the required clearance on both sides, divide by the exposed plank width, and look at the remainder. If the last row would be a sliver or below the product’s minimum, rip the first row narrower so the two perimeter rows match.
Enter your room width, plank width, and clearance; the last-row width and balanced rip update beside them.
Last-Row Width and Balanced Rip
Optional: minimum row width from the manual
| Layout | First row | Last row | Full rows between |
|---|---|---|---|
| Full first plank | — | — | — |
| Balanced rip | — | — | — |
Enter the three measurements; results update as you type. Worked example: a 144-in room, 7-in planks and a 1/4-in gap each side leaves 143.5 in usable, so 20 full rows plus a 3.5-in last row, or a balanced 5.25-in first and last row with 19 full rows between.
Arithmetic only: usable width = room width − 2 × clearance; rows = usable ÷ plank width. Clearance, minimum row width and end-joint offset come from your product manual, not from this tool.
Never trust the starting wall to be straight. Set a reference line where the first plank edge should fall, accounting for first-row width and clearance, then measure back to the wall at several points and scribe the first row where needed. Otherwise every later row follows the bow.
In connected rooms, a hallway is a useful reference, and a chalk line transfers alignment through openings. That is layout advice, not permission to ignore the manufacturer’s maximum-run, doorway-transition, or movement-break requirements.
Dry-lay several rows to confirm first- and last-row widths, starter and end-piece lengths, end-joint placement, doorway and vent cuts, and pattern repeats. Mix planks from several cartons as you go so normal variation spreads across the room, and set aside anything with a chipped corner or damaged locking profile.
Lock the Floating Floor Row by Row
Do not start until the substrate is accepted, moisture requirements are met, any approved barrier or underlayment is down correctly, and the worksheet is complete.
- Orient the first plank. Identify tongue and groove edges and confirm the direction the locking system assembles. If the manual says to remove the wall-facing tongue, trim it the specified way.
- Set the clearance. Place spacers at walls and every fixed vertical obstruction: posts, pipes, jamb areas, transition tracks. Not just the long walls.
- Build the first row. Engage planks in the direction and at the angle the profile requires, keep the row on the reference line, and measure the final piece individually with end-wall clearance.
- Cut the way the core allows. Mark the retained piece before cutting. Score and snap only if the construction is designed for it; use a proper saw, blade, support, and eye protection for rigid or harder cores.
- Plan the next-row starter. Reuse a cutoff only if it meets the minimum piece length and produces the specified offset from nearby end joints. Saving waste does not justify a weak or repetitive seam pattern.
- Engage long and short edges. Some profiles angle in on both edges; others use an angle-and-tap sequence. Tap only at the approved point with the approved block. Never strike an exposed locking edge or force a joint that resists.
- Inspect each connection. Confirm the joint is closed and level before adding the next plank. Clear debris from the profile. Replace a crushed or distorted locking edge instead of forcing it.
- Recheck alignment. Compare the first rows to the reference line at several points. A small error at the start compounds across the room; if rows drift, stop and fix the cause.
- Keep the floor free to move. Hold the clearances and stagger through the whole field. Do not glue, screw, or nail through a floating plank unless the instructions expressly require it for a specific detail.
At the last wall, measure the remaining space at several points, because walls taper. Rip the final row to fit while keeping the clearance, and use a pull bar only as permitted so the locking edge is not damaged.
Handle Doorways, Reverse Assembly, and Connected Rooms
To undercut a wood jamb or casing, lay a scrap plank on top of any approved underlayment or barrier to set the finished height, cut with an oscillating tool, remove the waste, and slide the plank under. The cut hides the flooring edge but must not eliminate movement clearance against framing or another fixed surface.
Choose transitions by the adjoining floor and height difference: a same-height T-molding, a reducer, an end profile, and a stair nosing solve different conditions. Confirm the track, fastener position, and movement space before cutting the surrounding planks.
Most click systems have one normal assembly direction. Closets, returns, cabinets, and connected rooms create spots where the next plank cannot be angled in conventionally. Use only the reverse-assembly method approved for that exact locking system. Do not shave a profile, hammer a reluctant joint, or add glue unless the instructions permit it.
Before running completed rows through an opening, transfer and verify the reference line on the far side, check whether the doorway needs a transition or movement break, confirm the permitted continuous run, recheck alignment against fixed features in both rooms, and plan how the locking direction will work around returns and closets. Continuous layouts through several rooms can trap you in an assembly angle that cannot be made; plan the sequence on paper first. Confirm whether the floating floor may run under cabinets, islands, or vanities rather than assuming it can.
Pull the Spacers and Inspect Before Trim Goes Back
Once the field is assembled, remove the spacers and confirm the required clearance is still open all the way around. Dried patch, trim blocks, debris, or a stray fastener bridging the gap will stop the floor moving.
Install the transitions per their instructions, then inspect under good light for open long-side or end joints, chipped locking edges, raised corners, rows out of alignment, rocking that points to an unresolved substrate problem, missing clearance at walls, pipes, jambs, or transition tracks, and trim or fasteners pinning the floor.
Remove dust with the flooring manufacturer’s approved procedure and cleaner. Follow the product-specific timing for foot traffic, cleaning, rugs, and furniture. A floating-floor schedule does not apply to glue-down or peel-and-stick, which carry their own cure and traffic restrictions.
When the Job Has Left DIY Territory
Stop and bring in the right professional if any of these remains unresolved: suspected asbestos-containing flooring, backing, or mastic will be disturbed; moisture readings exceed the product limit or the source is unknown; the substrate moves, flexes, or cracks actively; flattening would need extensive grinding, patching, or leveling; the manufacturer does not clearly approve the substrate or assembly; the job includes complex stairs or fixed-object details; a continuous multiroom layout forces difficult reverse-locking work; or required specs for moisture, underlayment, clearance, or transitions are missing.
Use an accredited asbestos professional for suspect materials. For moisture or substrate problems, consult a flooring, concrete-moisture, or building professional suited to the issue.
When you request proposals, ask which moisture tests will be performed and which product limits apply; what floor prep is included and who accepts the substrate; who handles asbestos assessment if suspect material turns up; where transitions and movement breaks go; how cabinets, islands, toilets, and stairs will be treated; who handles dust control, debris, and lawful disposal; what is excluded; what the workmanship warranty covers and for how long; and what happens if conditions make the floor unsuitable. Sometimes the right call is to delay until the underlying condition is fixed.
Quick Answers on Tile, Acclimation, Barriers, and Mastic
Installing Over Existing Tile or Vinyl
Sometimes. Some floating products allow installation over secure tile or one existing vinyl layer, but the surface still has to be clean, dry, flat enough, stable, and expressly approved by the new flooring manufacturer.
Acclimation Before Installation
Depends on the product. Some require a stated period and temperature range. COREtec states its flooring needs no acclimation, but installers must still follow the product-specific instructions and prescribed installation conditions (COREtec guidance).
Moisture Barrier Under Plank on Concrete
Possibly, not by default. Follow the flooring instructions for the required concrete moisture test, the acceptable result, and the specified barrier or moisture-control system.
Finding Old Black Mastic or Resilient Tile
Stop before scraping, sanding, drilling, sawing, sweeping, or vacuuming it. Black color or age does not prove asbestos, but appearance cannot rule it out. If the work will disturb the material, have an asbestos professional assess it before prep resumes (EPA guidance).
Proceed only after the system is identified, the worksheet is filled, the asbestos checkpoint is cleared, the substrate and moisture are accepted, and the layout is balanced. If any check is still open, pause rather than cover the problem.