
Tile Underlayment Membrane Selection by Function
A membrane follows the surface beneath it, so it will not flatten a wavy floor. The job determines whether uncoupling, crack isolation or waterproofing fits.
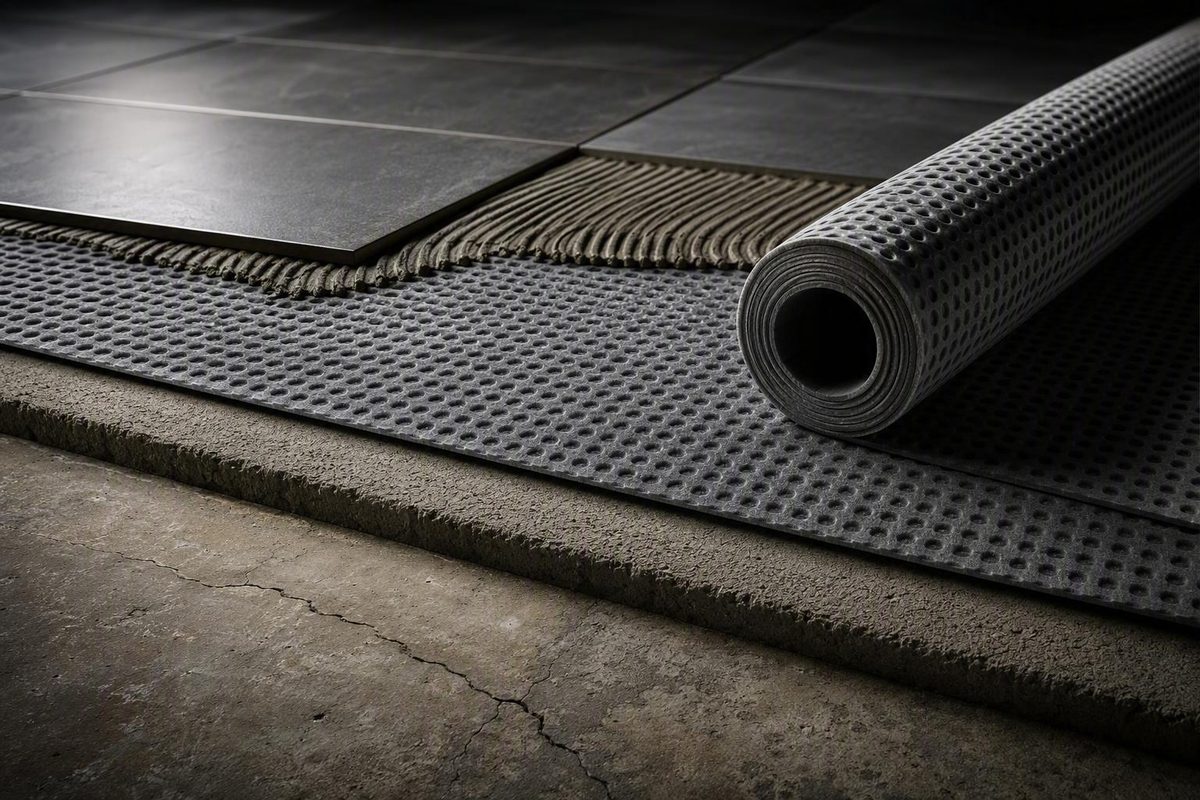
A tile underlayment membrane is not a universal cure for whatever lies beneath a tile floor. It is one component in an assembly, and different membranes solve different problems. One may manage stress from substrate movement, another may isolate specified minor in-plane cracks, and another may control water. Some combine functions, but the word membrane alone proves none of them.
Use a function-first selection process:
- Verify that the floor structure and substrate are suitable for tile.
- Correct flatness, slope, contamination, moisture, or crack conditions that a membrane cannot fix.
- Name the function the project requires.
- Confirm that function, substrate approval, and complete installation method in current product documentation.
- Compare total materials, labor, detailing, and installed height—not merely roll price.
This guide explains the terminology, diagnostic questions, and product-document checks that support that process. It does not replace project-specific structural evaluation, moisture testing, applicable requirements, or the selected manufacturer’s current installation manual.
What a tile underlayment membrane is—and why the label is not enough
A tile underlayment membrane is a layer installed between tile and its supporting substrate. Depending on the product, that substrate might be concrete, plywood, OSB, a mortar bed, an approved patching or leveling material, or another surface specifically listed by the manufacturer.
Membranes are only one branch of the broader tile-underlayment category. Tile underlayment can also include:
- Cement and other backer boards
- Traditional mortar beds
- Trowel-applied patching compounds
- Pourable or self-leveling underlayments
- Additional plywood in an approved wood-floor assembly
- Liquid-applied preparation or protection products
- Reinforcing and drainage systems
These materials are not interchangeable. A patch may correct a localized depression but provide no waterproofing. Backer board may create a consistent tile-bonding surface without isolating cracks. A waterproof sheet may manage water but do nothing to correct a wavy floor.
The most common membrane functions are:
- Uncoupling: Textured, dimpled, or otherwise engineered systems intended to reduce stress transfer between the substrate and tile layer.
- Crack isolation: Products with documented performance for isolating tile from specified minor, in-plane substrate cracking.
- Waterproofing: Products used to manage water when installed as part of a complete, approved assembly.
Retail categories may place several other functions beside these products. Reinforcement, vapor management, acoustic control, drainage, and adhesive tile-setting mats can all appear under a broad “tile membrane” label. A sound-control membrane, however, is not automatically waterproof. A tile-setting mat is not necessarily an uncoupling membrane. A reinforcing underlayment does not necessarily meet a crack-isolation standard.
Some products legitimately perform more than one job. An uncoupling mat might also have documented waterproofing performance, or a waterproofing system might carry a separate crack-isolation claim. Treat those as distinct capabilities requiring separate confirmation in the current technical data sheet and installation manual.
Promotional terms can be broader than tested performance. Phrases such as “prevents cracks,” “waterproof,” “mold resistant,” “vapor management,” and “sound reducing” should lead to specific questions:
- What test or standard supports the claim?
- Does the claim apply to the product alone or to a completed assembly?
- What seams, accessories, mortars, primers, or drains are required?
- Which substrates and service environments are permitted?
- What limitations or exclusions apply?
Not every tile floor needs a membrane. The suitable assembly depends on the substrate, structural conditions, surface preparation, water exposure, tile dimensions, heating system, applicable requirements, and installation method. Begin with the problem—not the brand, roll size, review score, or shelf label.
Inspect the floor before choosing any underlayment
A membrane selection made before a floor inspection is mostly guesswork. Record the following conditions before buying a product.
Substrate and structure
- Is the supporting surface concrete, plywood, OSB, a mortar bed, existing tile, or something else?
- What do the project documents and selected system require for joists, panels, fastening, thickness, and spacing?
- Does the floor flex, bounce, squeak, or move at panel joints?
- Is there water damage, rot, delamination, swelling, or deterioration?
Surface condition
- Is the surface clean and capable of accepting the specified mortar, primer, or adhesive?
- Are paint, curing compounds, sealers, wax, oil, gypsum residue, old adhesive, or loose material present?
- Is the floor sufficiently flat for the selected tile?
- Does it need to be level, or merely flat?
- Are there ridges, curled panel edges, depressions, abrupt transitions, or high seams?
Water and moisture
- Is the area normally dry, intermittently wet, or designed for direct water exposure?
- Does a wet-area floor have an appropriate drainage design and slope?
- Is there persistent moisture, vapor transmission, leakage, or an unidentified source of dampness?
- Where are the drains, walls, curbs, pipes, and other waterproofing transitions?
Cracks and movement
- Are cracks in-plane, or is one side higher than the other?
- Are they widening, branching, or associated with settlement?
- Are control, construction, or expansion joints present?
- How does the proposed assembly address existing movement provisions?
Finish and system constraints
- What are the tile dimensions and material?
- How much finished-floor height is available at doors, cabinets, stairs, fixtures, and neighboring floors?
- Is radiant heating present?
- What environmental exposure and service conditions will the floor receive?
Flatness deserves particular attention. For tile with every edge shorter than 15 inches, the cited surface tolerance is no more than 1/4 inch of variation in 10 feet and 1/16 inch in 1 foot. For tile with at least one edge 15 inches or longer, it is no more than 1/8 inch in 10 feet and 1/16 inch in 2 feet, according to the Ceramic Tile Education Foundation’s discussion of ANSI A108.02.
These are flatness measurements, not blanket instructions to make every floor perfectly level. A floor can be flat while intentionally sloped toward a drain. It can also be level but wavy enough to create tile-setting problems.
Large-format tile makes surface variation especially consequential. Installing a membrane over those waves generally reproduces the surface; it does not flatten it.
Depending on the substrate and specified assembly, preparation may require:
- Mechanically removing high spots or incompatible surface material
- Filling isolated depressions with an approved patch
- Installing a properly designed mortar bed
- Applying an approved pourable underlayment
- Replacing damaged panels
- Correcting panel fastening or joints
- Evaluating cracks
- Rebuilding a wet-area surface to provide the required drainage geometry
“Self-leveling” can be misleading shorthand. These products can improve flatness without necessarily making the finished surface level, especially where elevation is intentionally controlled. Drying and covering times vary by formulation, depth, temperature, humidity, and site conditions, so category-level guidance cannot replace the product instructions.
A membrane should not be used as a substitute for correcting inadequate framing, excessive flexing, vertical crack displacement, poor drainage geometry, contamination, or an uneven surface.
Who should check what?
| Condition | Reasonable owner or installer check | Documentation or testing needed | When to seek specialist evaluation |
|---|---|---|---|
| Substrate identity | Identify concrete, plywood, OSB, mortar bed, or existing finish | Confirm the product lists that exact substrate | When layers or condition cannot be identified |
| Surface flatness | Check with an appropriate straightedge | Compare results with the tile and assembly requirements | When correction would affect structure, drainage, or adjoining construction |
| Visible contamination | Look for coatings, residue, oil, adhesive, or loose material | Confirm the approved removal and preparation method | When the material is unknown or potentially hazardous |
| Cracks | Note location, direction, and visible displacement | Compare with the membrane’s documented crack limits | When cracks are vertically displaced, changing, or associated with settlement |
| Moisture | Look for staining, dampness, leakage, or recurring efflorescence | Use the tests and acceptance criteria required by the selected system | When moisture persists or its source is unknown |
| Wood-floor movement | Observe bounce, squeaks, loose panels, and joint movement | Verify the complete structural and underlayment assembly | When structural adequacy is uncertain |
| Wet-area drainage | Observe the intended drainage path and transitions | Confirm the approved slope, drain, and waterproofing details | When water can pond or the drainage design is incomplete |
| Radiant heating | Identify the system and layout | Obtain heating and tile-system instructions | When components, temperature limits, or startup procedures are unclear |
As a conservative stop-and-check rule, pause the project when structural support is uncertain, a crack has pronounced vertical displacement, moisture persists without a diagnosed source, a wet area lacks a documented drainage design, or substrate movement remains unexplained. Those conditions require evaluation rather than concealment beneath a membrane.
Uncoupling, crack isolation, and waterproofing are different jobs
The three most frequently confused membrane functions address different risks.
| Function | Principal purpose | Applicable cited standard | What the function does not establish | Questions to ask before purchase |
|---|---|---|---|---|
| Uncoupling | Manages stress transfer between a substrate and tile layer, commonly through a textured or dimpled configuration | Do not infer an ANSI A118.12 classification from “uncoupling” | Waterproofing, tested crack isolation, structural reinforcement, or approval over every substrate | What movement-management function is documented? Are waterproofing or crack-isolation capabilities stated separately? |
| Crack isolation | Isolates tile from specified minor, in-plane substrate cracking | ANSI A118.12 | Repair of structural instability, vertical displacement, excessive deflection, or unlimited crack movement | Is A118.12 compliance documented? What crack, coverage, and joint limitations apply? |
| Waterproofing | Manages water within a completed tile assembly | ANSI A118.10 | Watertight untreated seams, corners, drains, transitions, or penetrations | Which bands, corners, seals, drains, overlaps, and bonding materials complete the system? |
The Ceramic Tile Education Foundation identifies ANSI A118.10 with waterproof membranes and ANSI A118.12 with crack-isolation membranes, describing the latter in relation to minor in-plane substrate cracking. These classifications should not be extended beyond their stated function or treated as proof that a product is suitable for a particular project without current assembly documentation. See the foundation’s underlayment overview and standards summary.
Uncoupling is a movement-management concept. A textured mat may allow stresses in the substrate and tile layer to be managed differently, but the generic uncoupling label is not the same as documented ANSI A118.12 performance.
Crack isolation is the relevant function when an assembly must address a qualifying existing or anticipated in-plane crack. The crack still must fall within the system’s documented limitations. Covering a crack does not correct vertical displacement, continuing settlement, or structural movement.
Waterproofing applies when water exposure requires an approved water-management assembly. Product compliance does not make untreated seams, corners, transitions, drains, or penetrations watertight.
Some products combine functions, but every capability must be verified individually. For example, Polyguard states that its peel-and-stick Tileguard product meets ANSI A118.12. That is a manufacturer’s crack-isolation claim, not independent comparative verification and not evidence that the product supplies every other membrane function.
Apply this concise decision rule:
- Concern about stress from substrate movement: Evaluate an uncoupling system.
- Existing or anticipated minor in-plane cracking: Require documented crack-isolation performance.
- Water exposure: Specify a complete approved waterproof assembly.
- More than one condition: Find a documented combination assembly rather than assuming one benefit implies the others.
Generic promises deserve specific follow-up. “Prevents cracks” should identify the crack type and performance limit. “Waterproof” should identify the seam and penetration details. “Sound reducing” should be supported by acoustic documentation applicable to the complete assembly. “Mold resistant” does not eliminate the need to control water, drainage, and drying.
Choose by substrate and room conditions
Membrane selection changes with the surface below, the room above, and the tile being installed.
| Scenario | Diagnose first | Product or assembly path to evaluate | Do not assume |
|---|---|---|---|
| Sound concrete | Flatness, cracks, contamination, moisture, surface condition | Direct bonding where expressly suitable, or a compatible membrane where a required function justifies it | That concrete always needs a membrane—or never does |
| Cracked concrete | Crack direction, activity, displacement, and moisture | Documented crack-isolation system for qualifying minor in-plane cracks | That a generic uncoupling mat repairs structural cracking |
| Plywood | Joists, panel grade and thickness, fastening, seams, movement, and condition | Complete tile assembly expressly approved for the floor structure and plywood substrate | That the membrane strengthens framing or subfloor |
| OSB | Panel condition, edge swelling, fastening, and material compatibility | Only a system in which the membrane and bonding material expressly permit OSB | That plywood approval automatically includes OSB |
| Wet room | Drainage design, transitions, penetrations, and exposure | Complete waterproof assembly, plus uncoupling or crack isolation if independently required | That field membrane completes every detail |
| Radiant-heated floor | Heating type, temperature limits, layout, movement, and startup requirements | Heating-compatible assembly with prescribed materials and procedures | That heat compatibility proves waterproofing or crack isolation |
| Large-format tile | Stricter flatness tolerance, tile warpage, elevation, and setting requirements | Correct the surface first, then select any membrane function needed | That a membrane compensates for a wavy floor |
Sound concrete. Concrete does not lead automatically to either direct bonding or membrane installation. A sound, clean, sufficiently flat surface may fit an approved direct-bond assembly. Cracks, moisture, contamination, surface treatments, poor flatness, or a separate waterproofing requirement can change the decision.
Cracked concrete. First distinguish minor in-plane cracking from active or vertically displaced movement. A qualifying crack may call for an ANSI A118.12 system. Pronounced displacement, continuing movement, or suspected structural failure requires evaluation or repair before tile-system selection.
Plywood. Verify the complete floor, not just the top panel. Joist conditions, panel thickness and grade, fastening, layout, added layers, and the intended tile all matter. Use an assembly expressly approved for the specific wood substrate. A membrane may provide movement management, but it does not strengthen inadequate framing.
OSB. Do not translate “approved over plywood” into “approved over wood products.” Both the membrane and the material bonding it to the substrate must expressly permit OSB. DIYTileGuy’s underlayment guide also cautions that product and mortar suitability over OSB varies.
Wet rooms. Separate waterproofing from movement management. A directly exposed area needs a documented water-management design, including drain and transition details. If the substrate also creates movement or crack concerns, the project may require a documented combination system.
Radiant heat. Confirm compatibility with both the heating system and tile assembly. Check the prescribed bonding materials, movement provisions, tile restrictions, temperature limits, treatment of heating components, cure requirements, and startup schedule. Do not transfer instructions from one heating or membrane system to another.
Large-format tile. Prepare to the stricter flatness tolerance first. Then choose a membrane only if the substrate, exposure, or installation design calls for one. Large tile does not turn uncoupling into a substitute for patching, grinding, or an approved leveling method.
Before buying, find written answers to these questions:
- Which substrates are approved?
- Are plywood and OSB listed separately?
- What crack types and limitations are documented?
- What concrete moisture, age, or surface conditions apply?
- Is the assembly approved for the intended wet or dry environment?
- Is there a minimum tile size?
- Which mortar, adhesive, or primer is required below the membrane?
- Which setting material is allowed above it?
- Is radiant heat permitted, and what startup procedure applies?
- Is curing required before tile setting?
- What perimeter and movement provisions are shown?
- Which accessories are required to complete the documented assembly?
- What conditions must be met for warranty eligibility?
If those answers are absent, the product has not yet been verified for the project.
Membrane vs. backer board—and when floor preparation is the real answer
A membrane and cement backer board can both sit between a subfloor and tile, but they should be compared by function rather than ranked as universal winners.
Cement backer board provides a dimensionally consistent, tile-ready bonding surface. It generally is not inherently waterproof, and it should not be presumed to provide ANSI A118.12 crack-isolation performance. Where waterproofing is required, an approved surface-waterproofing system or another documented assembly is still needed.
Backer-board installation commonly includes supporting mortar beneath the panels, manufacturer-specified mechanical fasteners, and treated seams. Many sheet membranes instead use a product-specified mortar, adhesive, or primer. The exact procedure remains product-specific.
Membranes are generally lighter and easier to cut than cement board. That can simplify handling, particularly upstairs or in occupied remodeling work. It does not prove that every membrane installation will be faster or less expensive.
| Comparison point | Membrane systems | Cement backer board |
|---|---|---|
| Principal function | Varies: uncoupling, crack isolation, waterproofing, or documented combinations | Consistent tile-ready bonding surface |
| Floors versus walls | Product-specific; many uncoupling mats are floor-focused | Commonly used on floors and walls where approved |
| Weight and handling | Generally lighter; supplied as rolls or sheets | Heavier rigid panels |
| Attachment | Product-specific mortar, adhesive, or primer | Commonly set in supporting mortar and mechanically fastened |
| Seam work | Depends on function; waterproof assemblies require approved detailing | Board seams commonly receive specified tape and mortar |
| Waterproofing | Only documented waterproof products in completed assemblies qualify | Generally moisture-resistant rather than waterproof |
| Movement management | Available through documented uncoupling or crack-isolation products | Not inherently an ANSI A118.12 crack-isolation layer |
| Surface correction | Generally follows the prepared surface | Generally follows rather than corrects substrate irregularity |
| Cutting safety | Follow the membrane and bonding-material safety documentation | Cementitious cutting can create silica-containing dust |
| Assembly height | Product- and system-specific | Includes board, supporting mortar, setting mortar, and tile |
Neither option repairs an underbuilt or excessively flexible floor. Describing backer board as rigid does not mean it can correct inadequate joists or subfloor panels. Similarly, calling a membrane reinforcing does not establish structural capacity unless a complete documented assembly supports that claim.
Backer board also is not a floor-flattening product. Correct irregularities with a compatible preparation method at the stage specified by the assembly.
Cutting cement board can release silica-containing dust. Use the board manufacturer’s approved cutting method and current safety instructions, including its directions for dust control and protective equipment. Tile ProSource’s comparison also notes the silica-dust concern associated with cement-board cutting, although the product manufacturer’s safety documents should control the work.
Backer board may remain practical when:
- A stable, dry substrate needs a tile-ready bonding surface
- The specified tile assembly calls for it
- New work must match an existing backer-board installation
- An approved wall application is involved
- Local availability or project logistics favor panels
- Any separately required waterproofing can be integrated correctly
The right comparison may not be “membrane or board.” It may be “what preparation must occur before either one?” If the actual defect is a depression, ridge, failed subfloor, poor drainage geometry, or unexplained movement, solve that condition first.
Waterproofing requires a complete assembly, not just a roll of membrane
A waterproof membrane field is the broad surface covered by the membrane. A waterproof assembly includes that field and every route water could take around or through it.
Depending on the selected system, that can include:
- Sheet-to-sheet seams
- Inside and outside corners
- Floor-to-wall transitions
- Perimeters and curbs
- Changes of plane
- Drains and drain flanges
- Pipe penetrations
- Valve openings
- Fastener or anchor penetrations
- Niches, benches, and other interruptions
The required method may involve overlaps, bands, sealants, mortars, reinforcing fabric, preformed corners, collars, gaskets, or proprietary drain connections. Use only the components, dimensions, and methods specified for the chosen assembly.
Retail inventories illustrate why the field roll is not the whole installation. Lowe’s lists waterproofing strips, preformed corners, pipe seals, valve seals, and reinforcing materials alongside field membranes. That assortment shows the kinds of detailing components sold for membrane systems; it does not establish that accessories from different systems are compatible.
Some uncoupling mats have a plastic field that does not allow water through the center of the sheet. That alone does not make the tiled area waterproof. Seams and perimeter transitions still require the approved treatment before the overall assembly can be described as waterproof.
Cement backer board presents a similar misunderstanding. It may tolerate moisture without rapidly deteriorating, but moisture resistance is not the same as waterproofing. Where water management is required, add the approved waterproofing treatment and detail it continuously.
Not every bathroom floor needs the same solution. A powder-room floor, a conventional bathroom outside direct spray, and a curbless wet room do not have identical exposure. Design, expected water contact, applicable requirements, and the selected system determine the assembly.
Avoid combining a membrane from one system with unrelated banding, sealant, mortar, drain, or pipe collars unless compatibility is documented.
A useful waterproofing drawing should show the full membrane field together with labeled seam bands, inside and outside corners, perimeter transitions, drain connections, pipe collars, and valve seals. The important concept is continuity: every field and detail must connect through the documented system.
How to compare products, coverage, cost, and installed height
Product comparison should begin only after the required function and substrate have been identified.
Buying checklist
- Required function: uncoupling, crack isolation, waterproofing, or a documented combination
- Applicable standard or test documentation
- Approved substrate
- Wet-area and service-environment approval
- Approved materials above and below
- Installation format
- Minimum tile size
- Radiant-heating compatibility
- Cure requirements before covering or loading
- Usable coverage per package
- Required seam and penetration accessories
- Warranty conditions
- Complete installed assembly height
Mortar-bonded sheet or roll. These products are embedded in specified mortar.
Peel-and-stick sheet. These products depend heavily on surface preparation. Butt-joint, overlap, rolling, seam, and perimeter requirements are product-specific.
Liquid-applied membrane. The required number of coats, reinforcement, sequencing, and cure conditions must come from the product documentation.
Multipurpose system. A system may combine waterproofing and crack isolation, reinforcement and uncoupling, or other functions. Verify each claim separately and confirm that the combination applies to the actual substrate and environment.
Retail filters, stock labels, ratings, and promotional descriptions are useful for finding candidates, not proving suitability. Product collections commonly place waterproofing compounds, crack-isolation sheets, uncoupling mats, reinforcement, detailing tape, and corners together.
Do not compare roll prices without normalizing coverage. A meaningful estimate includes:
- Usable full-field square footage
- Layout waste
- Overlap or seam allowances
- Primer
- Mortar or adhesive below
- Setting material above
- Seam bands or reinforcing fabric
- Inside and outside corners
- Pipe and valve seals
- Drain components
- Transition profiles
- Fasteners and seam tape where applicable
- Preparation products
- Labor and tools
Retail catalogs show why package labels can mislead. Tile ProSource’s underlayment and membrane collection groups narrow tapes, small sheets, liquid products, detailing components, and large field rolls in one category. Those products must be sorted by function, format, and coverage before prices are compared.
Installed height also requires an assembly calculation. Include:
- Any patch, mortar bed, or leveling layer
- Bonding mortar, adhesive, or primer
- The membrane or board
- Tile-setting mortar
- Tile
- Profiles or transitions affecting adjoining surfaces
Do not rely on one universal membrane-thickness figure. Category-level descriptions can conflict, and nominal product thickness is not the complete floor-height increase. Product-specific assembly data—and, where appropriate, a jobsite mock-up—are more useful.
A simple worksheet can contain:
| Cost or height input | Project entry |
|---|---|
| Measured project area | ___ sq. ft. |
| Waste allowance | ___% |
| Usable coverage per roll or package | ___ sq. ft. |
| Rolls or packages required | ___ |
| Mortar or adhesive below | ___ |
| Primer | ___ |
| Total seam length | ___ |
| Inside and outside corners | ___ |
| Pipes, valves, and drains | ___ |
| Transition profiles | ___ |
| Preparation materials | ___ |
| Labor estimate | ___ |
| Finished elevation at transitions | ___ |
This exposes hidden differences. A lower-priced roll can become the more expensive system after primer, detailing, waste, and labor. A higher material price may be justified when the documented system combines functions the project genuinely needs.
A product-neutral installation sequence and quality-control checklist
There is no universal membrane-installation procedure. Mortar-bonded sheets, peel-and-stick products, liquids, and uncoupling mats differ in bonding materials, overlaps, cure times, seam details, tile restrictions, and loading requirements.
The sequence below is therefore a planning framework, not a substitute for a product manual:
- Confirm the assembly. Verify the substrate, membrane, bonding materials, tile, accessories, environment, and required function.
- Repair and prepare the substrate. Address structure, cracks, moisture, flatness, drainage, and contamination.
- Plan the layout. Dry-fit and cut sheet material where applicable; locate seams and details according to the system instructions.
- Apply the specified bonding material. Use the required primer, adhesive, mortar, or liquid under permitted site conditions.
- Place or apply the membrane. Follow the documented orientation, coverage, thickness, embedding, and joint method.
- Inspect the field. Check transfer, thickness, bond, continuity, and damage using the product’s stated method.
- Complete required details. Treat seams, corners, transitions, drains, and penetrations.
- Observe cure requirements. Do not assume immediate tile setting is permitted.
- Set the tile. Use the approved setting material and preserve the assembly’s movement provisions.
- Grout and load only when allowed. Follow the setting-material and membrane-system timing requirements.
For a mortar-bonded sheet, use a mortar approved for both the substrate and membrane. Work within the stated open time, maintain the prescribed trowel profile, and check that the backing or fleece has transferred into the mortar as required. Tile Pro Depot’s general installation overview likewise emphasizes limiting mortar spread to what can be covered within open time and bedding the membrane, but the selected product manual must determine the actual method.
For a peel-and-stick product, remove incompatible residue, apply primer where specified, align the sheet carefully, and remove the release backing gradually. Follow the product’s rules for rolling, butt joints, overlaps, seams, and perimeter treatment.
For a liquid product, appearance alone does not verify coverage. Apply the documented number of coats and required wet- or dry-film thickness, using the specified reinforcement at cracks, corners, seams, drains, or changes of plane. Observe the product’s temperature, humidity, substrate, and curing limits.
Immediate tile setting is product-specific. Some general instructions describe tile placement immediately after a particular membrane installation, while other methods require an initial adhesive, mortar, or liquid layer to set. HomeTips’ overview of adhesive and thinset installation methods illustrates why timing and procedures from one format should not be transferred to another.
Always confirm the current requirements for:
- Bonding material below and setting material above
- Primer and substrate preparation
- Trowel size, application rate, or film thickness
- Open time
- Backing or fleece transfer
- Sheet orientation
- Butt joints or overlaps
- Seams and penetrations
- Perimeters and movement provisions
- Minimum tile dimensions
- Temperature and moisture conditions
- Cure time before covering
- Foot-traffic and loading restrictions
Quality-control checklist
Before setting tile, inspect for:
- Mortar that skinned over before membrane placement
- Poor or intermittent transfer to the backing
- Trapped air or unsupported areas
- Wrinkles, curled edges, or displaced sheets
- Liquid coverage below the documented thickness
- Pinholes or missed areas
- Untreated seams, corners, or penetrations
- Tears, punctures, or other damage
- Unapproved bands, sealants, primers, or mortars
- Incorrect overlap or joint configuration
- Tile setting before the required cure
- Foot traffic or loading before permission
- Missing perimeter or field movement provisions
If the substrate moves, a crack has vertical displacement, moisture persists, a wet-area floor lacks a documented drainage design, or the surface falls outside the approved assembly, stop and check the condition. Do not use the membrane as a workaround.
The final selection sequence is straightforward: verify that the floor is structurally adequate and sufficiently flat; correct defects no membrane can solve; identify the required function; confirm that function and the complete assembly in current documentation; then compare total materials, labor, height, and detailing. The safest choice is not the membrane with the longest benefit list. It is the documented system that addresses the actual substrate and exposure without being asked to compensate for an unsuitable floor.
Does every tile floor need an underlayment membrane?
No. The correct assembly depends on the substrate, structural adequacy, flatness, cracks, moisture exposure, tile, heating conditions, and applicable installation requirements. Some suitable concrete assemblies may permit direct bonding, while wood floors need a tile assembly approved for the complete floor structure and substrate. Include a membrane because its documented function is needed—not because every tile floor supposedly requires one.
Is an uncoupling membrane the same as an ANSI A118.12 crack-isolation membrane?
No. Uncoupling describes a movement-management concept commonly associated with textured or dimpled systems. ANSI A118.12 addresses crack-isolation membranes for minor in-plane substrate cracking. An uncoupling product may separately document A118.12 performance, but that capability cannot be inferred from the uncoupling label.
Can a tile membrane make an uneven or flexible floor suitable for tile?
No. A membrane generally follows the surface beneath it and does not flatten a wavy floor. It also does not repair inadequate framing, excessive flexing, loose subfloor panels, or structural movement. Correct the structure and surface conditions first using an appropriate, compatible repair or preparation method.
Can an uncoupling membrane replace cement backer board?
It can serve as an alternative tile underlayment in an assembly that expressly permits it, but it is not a universal one-for-one replacement. Backer board principally supplies a consistent bonding surface; an uncoupling membrane is selected for movement management and may offer separately documented functions. Compare substrate approval, waterproofing needs, tile restrictions, installation details, height, cost, and service environment.
Can tile be installed immediately after the membrane is laid?
Sometimes, but not always. Timing depends on the membrane format, bonding material, substrate, cure conditions, and manufacturer’s instructions. Some systems permit tile setting immediately after membrane installation; others require primer, adhesive, mortar, or liquid layers to cure first. Verify both tile-setting and foot-traffic times in the current product documentation.