
How to Fix Chipped Tile: Repair Steps and Replacement Signs
Learn when chipped ceramic or porcelain tile can be patched, how to match and level the repair, and which damage needs assessment before replacement.
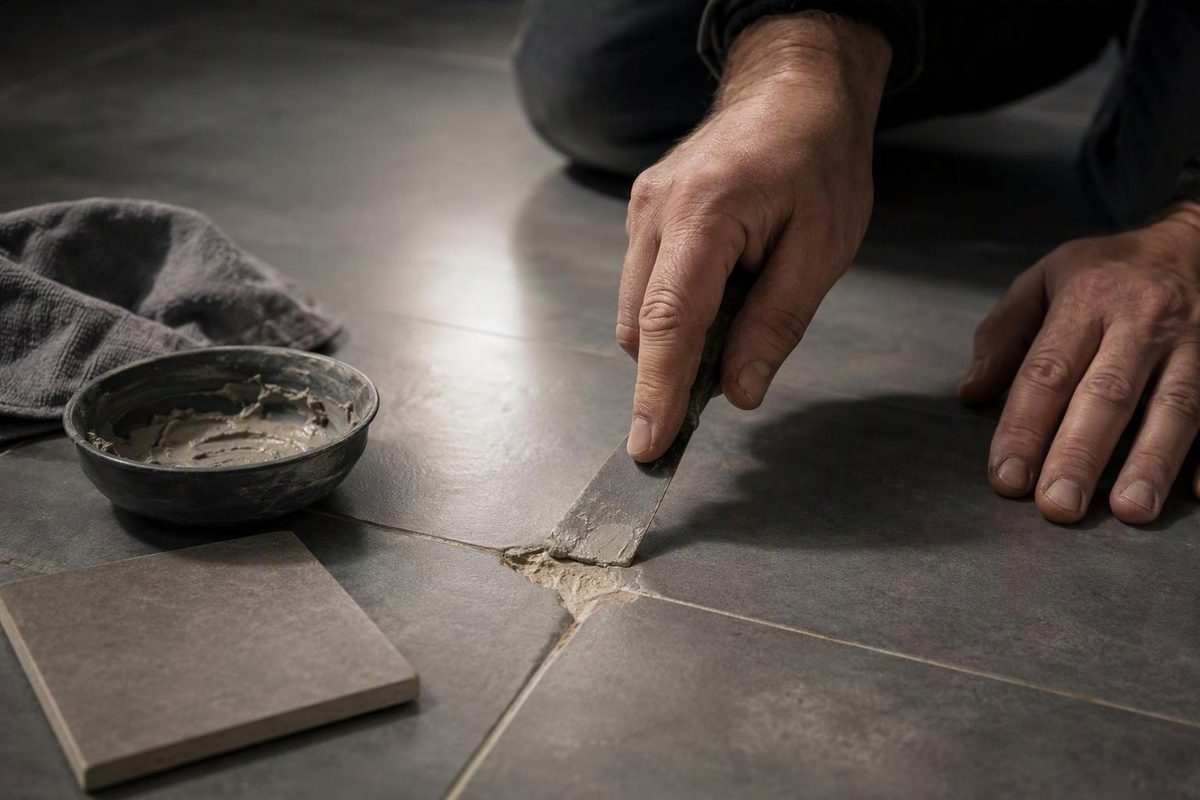
A small chip in a firmly installed ceramic or porcelain floor tile can often be repaired without removing the tile. Use a repair system compatible with the material and floor use, clean and dry the recess, fill it flush, and keep traffic off until it has cured. Two-part epoxy is one established option for localized chips, described in The Tile Shop’s repair guide. If the tile moves or a crack extends beyond the chip, assess the installation before patching.
Select the tile material, damage and location to check whether a surface repair is appropriate.
Chip Repair Check
A Localized Repair Is an Option
Choose a system explicitly suitable for ceramic or porcelain floors and the chip’s depth. Clean, dry, color-test and fill according to its instructions.
A matched patch may remain visible. Mixing ratios, finishing methods and return-to-service times depend on the product.
Sources: The Tile Shop repair guide, TCNA cracked-tile FAQ, Schluter waterproofing guidance and Coconix kit instructions cited in the article. This check does not diagnose the installation.
Check Tile Stability Before Buying Filler
Identify the material from a spare tile, carton, receipt or manufacturer’s information. Note whether the surface is glazed, polished, matte or textured. These repair steps cover ceramic and porcelain, not vinyl tile, natural stone or unglazed terracotta, which need material- and finish-specific advice.
Inspect the damaged tile and nearby joints:
| What You Find | Next Step |
|---|---|
| An isolated chip, with no extending crack or tile movement | Consider a localized fill-and-color repair. |
| A missing corner or deeper recess, but a stable tile | Check the kit’s depth limits and whether it needs rebuilding putty. |
| A rocking tile, loose fragments or a crack extending beyond the chip | Assess support and whether replacement is needed. |
| Cracks across several tiles or recurring after repairs | Investigate the installation before patching again. |
Filler does not correct movement below the tile. The Tile Council of North America explains that cracks in a concrete slab can reflect through bonded tile, and that determining the exact cause requires inspection. For broader damage, use the tile subfloor checklist.
In a shower, distinguish a surface chip from a leak. Tile coverings are not inherently waterproof; they rely on the assembly beneath them. A visible patch cannot replace failed waterproofing, as Schluter’s shower-system guidance explains.
Choose Filler for the Material, Depth and Exposure
Look for instructions that explicitly cover your tile material, chip depth and floor application. For a shower floor or exterior tile, confirm suitability for that exposure too. “Porcelain repair” on a label does not establish suitability for every use.
| Repair System | How It Repairs the Chip |
|---|---|
| Tintable two-part epoxy | Fills the recess and provides a matched visible surface. |
| Kit with separate putty and color compounds | Rebuilds missing depth first, then restores surface color in thin layers. |
Do not transfer mixing ratios, thickness limits or curing times between products. The Coconix Tile & Stone kit manual, for example, specifies rebuilding putty for damage deeper than ¼ inch (6 mm), while shallow damage uses its color compound alone. That is a product-specific instruction, not a universal tile-repair threshold.
Gather the chosen kit, a compatible cleaner, lint-free cloths, painter’s tape, a small mixing surface and a plastic applicator. Follow the product’s ventilation and protective-equipment instructions, and avoid skin contact with uncured epoxy.
Repair the Chip Without Damaging the Finish
Clean Without Enlarging the Chip
Remove only fragments already loose. Clean dust, grease, soap residue or floor polish from the recess with a tile-compatible cleaner. Remove cleaner residue as directed and let the area dry completely.
Do not pry at sound edges to make a neater hole. The Coconix porcelain-chip guide emphasizes preserving surrounding edges and starting with a clean, dry, stable surface.
Mask the Tile and Preserve the Grout Joint
Mask nearby tile and grout without covering the recess. At a chipped edge, preserve the original grout joint: the patch should rebuild the tile, not spread across the joint onto its neighbor.
Test the Color Before Filling
Match the nearby tile face, not the exposed body inside the chip. Use only colorants allowed by the repair system, adding small amounts gradually.
Make a small test sample and let it dry or cure before judging it under the room’s normal lighting. Follow the required resin-to-hardener ratio for every epoxy batch; do not alter it to change the shade.
Color, pattern and sheen all affect visibility. Aim for a less noticeable repair rather than assuming the patch will disappear.
Fill and Level According to the Kit
Prepare a small batch according to the package directions. Press the filler into the recess and shape it with the applicator while workable.
For a one-stage epoxy repair, aim for a surface flush with the surrounding tile. For a two-stage kit, leave the rebuilding putty slightly recessed if instructed, allowing room for the colored finish. Follow the product’s timing between putty and finish, and between successive color layers.
Remove excess promptly using the approved cleanup method. Follow the kit’s tape-removal timing; The Tile Shop’s epoxy procedure removes tape while the mixture is still wet.
Let the Repair Cure Before Checking It
Keep shoes, pets, water and cleaning equipment off the patch for the specified return-to-service period. Surface dryness does not necessarily mean a repair is ready for traffic. There is no single curing time supplied here that applies to every repair system.
Once cured, check for a raised ridge, low spot or sharp edge. Do not automatically sand across the surrounding glaze or polished finish. Use only the repair system’s finishing method; Coconix cautions against aggressive scraping, grinding or sanding when the safe method is uncertain.
Replace Tiles That Cannot Hold a Stable Repair
Replacement may be necessary when the damaged tile cannot support a stable localized repair. It is also an option when the patch’s appearance is unacceptable and a matching spare is available. Correct underlying support, movement or moisture problems before setting the replacement; a new tile alone will not resolve them.
If waterproofing or underfloor heating lies beneath the tile—or you cannot identify what is underneath—have an installer assess removal before starting demolition.
The basic sequence is to protect adjacent tiles, remove surrounding grout, break and lift the damaged tile from the center outward, and clear old mortar without damaging the substrate. Then set and grout the replacement using materials appropriate to the existing assembly and follow their curing instructions.
The Tile Shop’s replacement instructions explain why prying from the outer edge risks cracking neighboring tiles and call for appropriate eye and face protection during demolition. Wear gloves when handling sharp fragments.