
Terracotta Tile: Choose, Install and Maintain It
Identify real terracotta, check room suitability, then plan the substrate, sealing, grouting and cleaning sequence before installation.
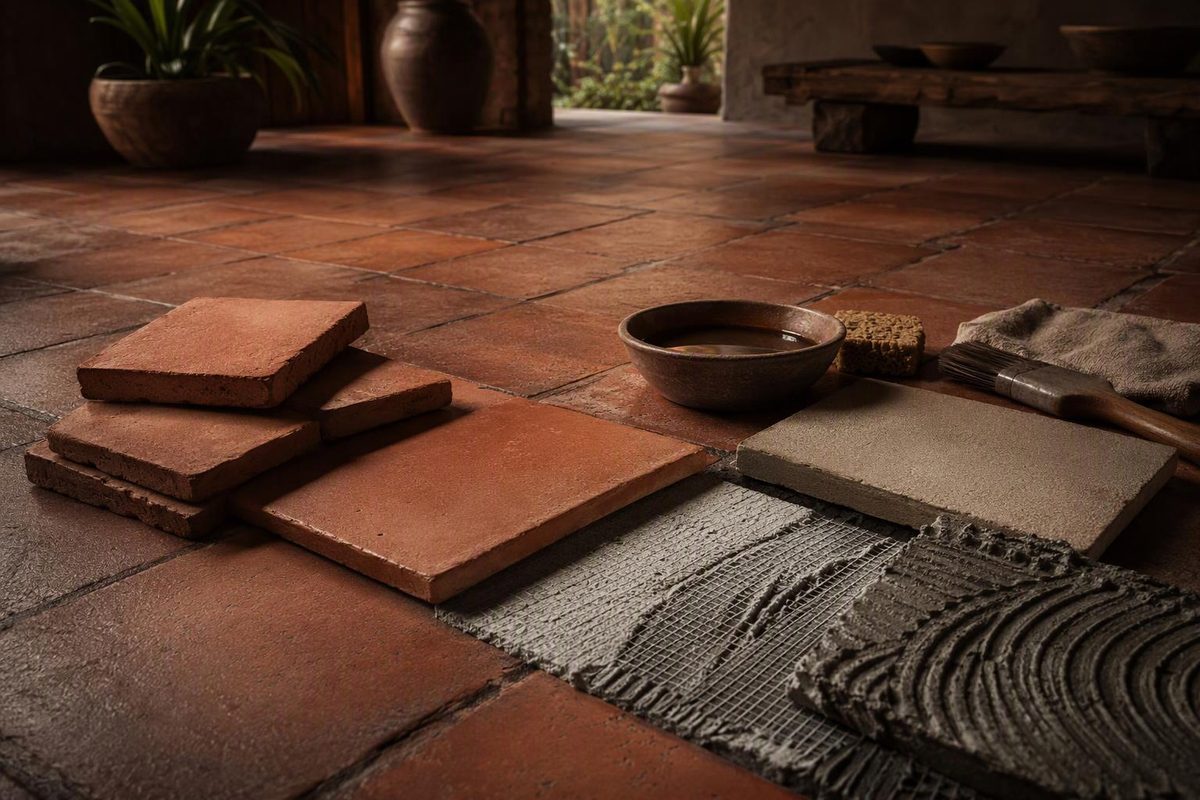
Terracotta tile can make a long-lasting floor, but the name alone does not establish where a product can be used or how it should be installed. Some tiles are handmade and highly absorbent; others arrive factory-sealed. A “terracotta” listing may even be porcelain that only reproduces the color and texture.
Before choosing mortar, grout or sealer, identify the actual product and obtain its technical and installation instructions. Real, unglazed terracotta requires a different installation and maintenance plan from terracotta-look porcelain.
First, identify the tile
| Product | What to expect | What to confirm |
|---|---|---|
| Handmade, unglazed terracotta or cotto | Variation in color, dimensions, thickness, edges and texture | Approved uses, joint width and sealing sequence |
| Saltillo tile | Porous, usually unglazed terracotta | Whether it is raw, presealed or finished |
| Glazed terracotta | Clay body with a fired glaze | Whether both the body and glaze are rated for the intended floor or wall |
| Terracotta-look porcelain | Porcelain with a printed or textured clay appearance | The porcelain product’s specifications; do not assume it needs terracotta sealer |
Handmade variation affects more than appearance. New Terracotta documents expected differences in color, size, texture and moisture absorption, as well as bowing and surface undulation in its natural cotto (New Terracotta installation guide). Inspect the shipment before installation, blend pieces from multiple boxes and dry-lay enough tile to judge the mix and workable joint width.
Decide whether it fits the room
Real terracotta can suit living rooms, dining rooms, entries and kitchens when the exact product is approved for the location and the household accepts tonal variation, wider joints and periodic finish care. Prompt spill cleanup matters around cooking oil, wine and pet bowls.
Bathrooms, showers, commercial rooms, fireplace surrounds, radiant-heated floors and exterior installations are product- and assembly-dependent. A sealer may reduce staining, but it is not a waterproofing system. Showers and other areas requiring waterproofing still need a complete approved assembly behind or beneath the tile.
Stop and select another product if:
- the seller cannot provide intended-use or installation information;
- you require nearly uniform color, edges and joints;
- the recommended sealing and maintenance schedule is unacceptable;
- the floor will encounter water, oils or grease but lacks a suitable use classification;
- exterior tile has no documented approval for the climate and exposure.
For a patio or walkway, use the outdoor terracotta tile checklist. Indoor approval does not establish exterior or freeze-thaw suitability.
Check wet-floor suitability after sealing
Ask for the product’s ANSI A326.3 classification where relevant. Its five categories are Interior Dry, Interior Wet, Interior Wet Plus, Exterior Wet and Oils/Greases. A DCOF number alone does not predict whether someone will slip: contaminants, footwear, drainage, traffic, maintenance and wear also matter (TCNA’s A326.3 and DCOF explanation).
The finished system matters, too. TCNA quotes ANSI A326.3 as limiting hard flooring coated after installation to areas kept dry unless the coating manufacturer declares otherwise. Confirm that the tile and the proposed sealer or topical finish are suitable for the room.
Specify the whole assembly before ordering
Record these decisions together:
- Tile and finish: raw, factory-sealed, glazed or terracotta-look porcelain.
- Approved location: floor or wall; dry or wet; interior or exterior; residential or commercial.
- Dimensions and thickness range: especially important at doorways and transitions.
- Joint width: variable handmade pieces may not support a narrow porcelain-style joint.
- Substrate and underlayment: concrete, wood panel subfloor, backer board or membrane system.
- Compatible mortar and grout: matched to the tile, substrate, joint width and exposure.
- Sealing sequence: before setting, before grouting, after grouting—or another product-specific sequence.
- Movement accommodation: perimeter gaps, existing structural joints and any required field joints.
- Wet-use or freeze-thaw documentation: where applicable.
- Overage: enough for layout, cuts, sorting, breakage and future repairs. Use the supplier’s figure and increase it for complex patterns rather than assuming one percentage fits every project.
An uncoupling membrane cannot correct an unsuitable structure or uneven floor. Schluter requires the substrate beneath DITRA to be clean, even and load-bearing. DITRA can form part of a waterproof assembly only when seams and floor-to-wall transitions are treated as specified, and it does not eliminate movement joints (Schluter DITRA instructions). Start with the tile subfloor decision guide, then choose a tile underlayment membrane by function.
Installation sequence for unsealed terracotta
The tile, mortar, grout and sealer instructions control. The following is a planning sequence, not a substitute for those documents.
1. Prepare and lay out
Correct substrate movement, contamination, cracks and flatness problems before setting tile. Confirm finished height at doors, cabinets and adjacent floors. Dry-lay pieces from several cartons and establish the joint width with the actual tiles.
Preserve movement accommodation at walls and other specified locations. TCNA says every tile installation needs expansion and contraction accommodation; a perimeter gap may be sufficient in a small room, while larger, damp or sun-exposed areas can require field joints (TCNA movement-joint guidance). Do not bridge a designated movement joint with mortar or grout.
2. Make a complete finish sample
On spare tiles, test mortar cleanup, the proposed sealer, grout color, grout removal and the final finish. A non-enhancing penetrating sealer generally changes the appearance less than an enhancing product, while a topical finish can alter sheen and maintenance. Follow the tile and sealer manufacturers’ directions; coating tile backs or edges without approval can interfere with bonding or grouting.
3. Set and verify mortar contact
Use mortar approved for the substrate, tile and exposure. Comb it consistently, press the tile across the ridges and lift occasional pieces to check transfer. MAPEI’s general tile instructions call for at least 80% mortar coverage in dry interiors and 95% in wet or exterior work, including attention to edges and corners (MAPEI tiling and grouting guide). Irregular tile backs may need back-buttering to reach the specified contact.
Remove mortar from the face and joints promptly. Residue that dries on porous clay can be difficult to remove without affecting its appearance. Let the setting material cure for the period its manufacturer requires.
4. Preseal only as the tile system directs
Many raw terracotta products require a compatible treatment before grouting to reduce pigment staining and grout haze. Presealing does not waterproof the installation. The tile must be clean and dry; apply the specified amount, remove excess within the stated time and observe the required cure period.
Instructions differ substantially. Zia Tile, for example, directs installers of its cotto to let thinset cure for at least 48 hours, seal before grouting and avoid excess sealer that could leave a waxy film (Zia Cotto installation guide). That timing and product sequence should not be transferred automatically to another brand.
5. Test grout, then work in small areas
Confirm that the grout suits the joint width. Contrasting pigments can lodge in pits and edges, so test the actual grout on sealed samples. MAPEI advises testing porous or rough tile with colored or sanded grout and notes that these surfaces may need presealing to prevent staining (MAPEI tiling and grouting guide).
Keep joints clean to the required depth, fill them completely and remove residue before it hardens. Use the specified flexible sealant—not hard grout—at movement joints and changes of plane. Apply any final compatible sealer only after the grout has cured and the floor has dried as directed.
Clean and reseal according to the finish
Sweep or vacuum grit regularly, wipe spills promptly and damp-mop with a cleaner approved by the tile and sealer manufacturers. Riad Tile recommends mild soap or a pH-neutral cleaner for its terracotta and warns against harsh chemicals and abrasives (Riad terracotta guide). Do not assume that vinegar, acid-based haze remover or a generic stone cleaner is safe for the installed finish.
Reseal according to the tile and sealer manufacturers’ condition checks and instructions rather than an arbitrary calendar. First identify whether the floor has a penetrating sealer, wax or topical coating. Clean and dry a test area before adding another product: a penetrating treatment may not absorb through an intact coating, while an incompatible topcoat may haze or peel.
Choose real terracotta when its natural variation, joints and developing patina are part of the desired result. If tighter dimensions and simpler maintenance matter more than authentic clay variation, terracotta-look porcelain is the more direct comparison.