
Can You Refinish Gray Hardwood Floors to Natural?
See which gray hardwood floors can be sanded back to natural wood, which need a tinted recoat, and which gray-look floors must be replaced instead.
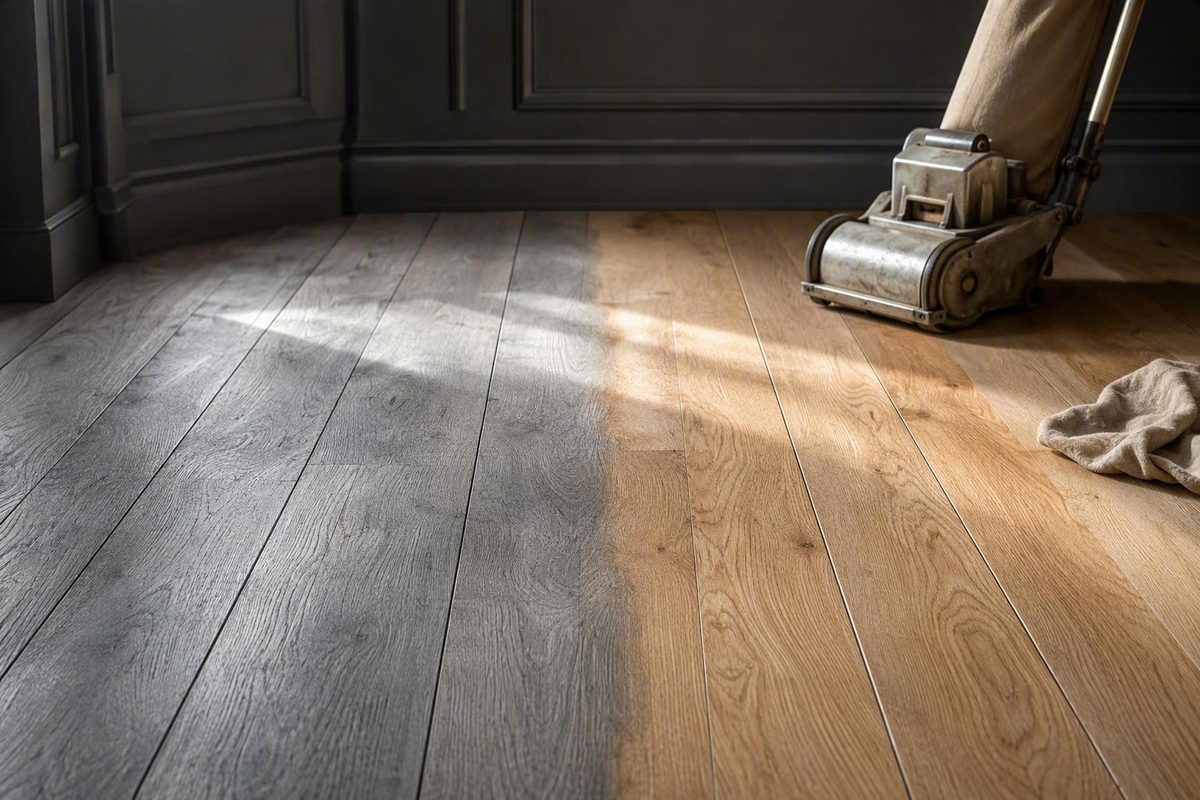
Yes—gray solid hardwood and some thick-wear-layer engineered hardwood can be refinished to a natural or honey tone if sanding safely removes enough gray. Thin-veneer engineered wood may only tolerate a tinted recoat, while gray LVP, laminate, and wood-look tile cannot be refinished and must be replaced to change their underlying color.
Two tests control the decision: whether enough real wood remains for sanding and whether the gray treatment can be removed within that allowance. Passing one test is not enough. A thick floor can retain gray in pores or bevels, while an attractive test patch on engineered wood does not prove the entire floor has a safe wear layer.
Choose your floor, gray treatment, and condition; then enter your room size and local bid rates.
Select what is installed and how the gray was created. The result distinguishes a true color-changing refinish from a warming recoat or replacement.
Solid hardwood with conventional stain is usually the strongest candidate, subject to a safe test sanding and acceptable residual gray.
Estimated project cost: —
Enter room area and rates from local bids to calculate a range. No national rate is assumed.
Decision Matrix
| Floor | Gray Method | Likely Path | Approval Gate |
|---|---|---|---|
| Solid hardwood | Conventional stain | Refinish | Safe depth and test patch |
| Solid hardwood | Gray wash | Recoat / Test | Gray may remain in grain |
| Solid hardwood | Reactive treatment | Recoat / Test | Color may extend into wood |
| Solid hardwood | Bleached | Tint / Test | Original aged color will not simply return |
| Engineered, verified layer | Conventional stain | Refinish | Product and sanding plan verified |
| Engineered, thin layer | Any wood treatment | Recoat | Finish sound and tint compatible |
| Engineered, unknown layer | Any wood treatment | Inspect | Measure before sanding |
| Any hardwood | Any method | Repair First | Resolve moisture or movement |
| LVP | Printed design | Replace | Not sandable wood |
| Laminate | Printed design | Replace | Not sandable wood |
| Wood-look tile | Printed or glazed | Replace | No wood surface to expose |
| Unknown floor | Unknown | Identify | Inspect edge or product records |
Source note: Decision criteria are drawn from the article’s floor-construction and test-patch guidance; trend context is USA TODAY. Cost rates are entered by the reader because no sourced national ranges were provided.
No sourced national cost-per-square-foot ranges were supplied for this comparison. The tool therefore does not invent them: enter the low and high rates from local bids to calculate a project range for your room.
Solid Hardwood Is Usually the Best Refinishing Candidate
Site-finished solid hardwood generally provides the most latitude for changing gray back to natural. If the boards are structurally sound and have not lost too much material during previous sandings, a refinisher can remove the coating and enough treated surface wood to expose the underlying species.
That exposed wood determines the result. “Natural” does not necessarily mean pale beige or neutral. Red oak can reveal pink, red, honey, and brown undertones. Other species may look yellow, orange, dark, or strongly varied once the cool gray is gone.
Solid construction is not automatic approval. Every full refinishing removes wood. Investigation is warranted when there are exposed or nearly exposed fasteners, fragile edges at gaps, unusually shallow joints, deep marks from earlier sanding, splitting, movement, buckling, or significant moisture damage.
Previous sanding history matters as well. When records are unavailable, a professional may examine board edges at vents or thresholds and inspect multiple locations. The National Wood Flooring Association provides standards, education, and certified-professional resources, although its general site cannot determine the sanding limit of a particular floor.
Full refinishing differs from a coating renewal because it removes the existing finish and some surface wood, allowing the color to change (JP Flooring’s refinishing overview). A documented renovation shows cool-gray hardwood being sanded to a natural-looking mid-tone, but that single result cannot establish the construction, pigment depth, or sanding capacity of another floor (the gray-to-natural project).
Engineered Hardwood Depends on Its Remaining Wear Layer
Engineered hardwood has a real-wood face over a constructed core. Some products can be sanded; others cannot withstand the material removal needed to strip a gray treatment evenly. Solid hardwood generally offers more refinishing latitude than engineered hardwood.
A thick, verified wear layer with no excessive prior sanding may support full refinishing. A thin veneer, unknown wear layer, or gouge reaching the core usually rules it out. There is no universal safe thickness in the supplied research because the answer also depends on product construction, flatness, damage, equipment, factory texture, prior work, and pigment depth.
Useful evidence includes the manufacturer’s specifications, purchase records, a leftover plank, installer documents, or a visible board edge at a vent or threshold. If none is available, have the floor inspected rather than assuming it is sandable. Some engineered floors can be sanded while others cannot.
A promising test color does not justify sanding into the backing. If the face layer cannot tolerate full removal, the practical choices are a compatible tinted recoat that merely warms the existing appearance or replacement if the gray must disappear.
The Gray Treatment Changes What Sanding Can Achieve
A conventional gray stain beneath a surface finish offers the clearest route to a color change. Sanding may remove the coating and stained surface fibers, subject to the floor’s structural limit. Open oak grain, scratches, low spots, edges, corners, bevels, and distressed texture can retain pigment after flatter areas look clean.
A gray wash may remain concentrated in grain and texture. Reactive treatments can alter color within the wood instead of leaving a simple surface film. Bleaching changes the wood itself, so removing a topcoat does not restore the board’s original aged color. These floors may be safer to warm with a compatible tinted system than to sand aggressively in pursuit of an uncertain original tone.
Residual gray is a stopping decision, not permission to keep cutting. Once the safe sanding allowance has been reached, the options are to accept some variation, integrate it with a lightly toned finish, repair isolated boards, revise the target color, or replace the floor.
Gray created by a printed image is different. The design layer on LVP and laminate is the visible floor, not stain over sandable hardwood. Wood-look tile also has no wood surface to uncover. Screening, sanding, or applying a clear wood finish cannot turn any of these materials into natural oak.
A Recoat Can Warm Gray but Cannot Reveal Bare Natural Wood
A screen-and-recoat lightly abrades an intact finish so a compatible new coat can bond. It does not remove the underlying gray stain and expose fresh wood. A tinted maintenance coat may shift the overall cast warmer, but the existing gray remains part of the appearance.
This is most relevant for thin-veneer engineered floors and gray treatments that cannot be removed safely. It is not a substitute for refinishing when the goal is bare natural wood. Compatibility, adhesion, wear, contamination, and color all need to be tested because a transparent tint can emphasize rather than conceal uneven areas.
Do not recoat over peeling finish, widespread coating failure, unresolved moisture damage, deep gouges, or unstable boards. Those conditions require repair, further diagnosis, or replacement before a cosmetic color adjustment.
Full Refinishing Requires an On-Floor Test Patch
A gray-to-natural refinish normally follows this sequence:
- Identify the flooring as solid or engineered.
- Verify the remaining sandable material.
- Investigate movement, moisture, damage, repairs, and prior sanding.
- Test-sand a representative area within the verified allowance.
- Evaluate the exposed species, undertones, repairs, and residual gray.
- Sample complete compatible finish systems on the floor.
- Approve an acceptable range of variation before proceeding.
- Sand and blend the field, perimeter, corners, and transitions.
- Remove dust and protect the bare wood from contamination.
- Apply the selected system according to its current instructions.
This is a planning sequence, not a universal grit schedule. Abrasives, machinery, depth of cut, and progression must suit the coating, floor construction, flatness, damage, and available wood.
The test patch is the approval gate. Unrelated sample boards cannot reproduce the installed floor’s age, oxidation, treatments, contamination, repairs, or lighting. When practical, test a normal field board, a traffic-worn section, and an edge or textured area.
The patch should establish whether gray remains in pores or low features, whether repairs become more visible, and whether the surface can be prepared evenly without unsafe material removal. Inspect the bare wood before applying samples. Product chips and online photographs cannot show how the installed floor will respond.
The Finish Determines How Warm the Exposed Wood Looks
“No stain” does not mean “no finish.” Sanded wood still needs a protective system compatible with the species, preparation, site conditions, and intended use.
| Finish Strategy | Likely Visual Effect | Main Limitation |
|---|---|---|
| Unstained clear system | Shows exposed wood directly | Can still deepen warmth and grain |
| Raw- or natural-look system | Keeps a freshly sanded effect | Still a protective coating |
| Lightly tinted system | Moderates undertones or residual gray | Absorption may vary |
| Pale or whitewashed effect | Creates a muted light appearance | Uniformity can be difficult |
Choose after seeing the final-sanded floor. If its raw color is attractive, compare unstained and raw-look systems. If it is too pink, yellow, orange, or varied for the room, test compatible light tones instead of trusting a product name such as “natural.”
Review the complete build under daylight and artificial light, alongside cabinetry, walls, stone, rugs, and adjoining floors. Approve the intended preparation, sealer or tint, topcoats, coat count, and sheen together. A first color coat alone does not show the finished result.
Freshly sanded wood also exposes preparation errors. Dust, glue around repairs, footprints, skin oils, moisture, edge-sander swirls, cross-grain scratches, chatter, and uneven filler can become more obvious after coating.
Refinishing, Recoating, and Replacement Need Separate Bids
The supplied research does not contain defensible typical per-square-foot prices for refinishing, tinted recoating, or replacement. Local labor, repairs, floor area, connected rooms, access, finish system, removal, disposal, and replacement material can change the quote substantially.
Ask bidders to separate the applicable scope:
| Action | Quote Should Include | Common Extra Scope |
|---|---|---|
| Refinish | Sanding, samples, finish system | Repairs and difficult edges |
| Tinted recoat | Cleaning, abrasion, compatibility test | Coating repairs |
| Replace | Removal and new installation | Subfloor and transitions |
Use the calculator above with rates from comparable written bids. For replacement, confirm whether the quoted rate includes demolition, disposal, subfloor correction, trim, transitions, and the new flooring. For refinishing, confirm whether repairs, dust containment, samples, and all finish coats are included.
A broad planning allowance for refinishing is several days to a week or longer, depending on area, connected rooms, repairs, pigment depth, sampling, coat count, drying conditions, and finish system (Floorika’s timeline overview). Workdays are not the same as return-to-use milestones. Walking, furniture, rugs, cleaning, and full cure may have different restrictions under the selected product instructions.
Replace Floors That Have No Sandable Wood or Safe Allowance
Replacement is the direct color-change route for gray LVP, laminate, and wood-look tile. It is also appropriate when engineered hardwood has an inadequate face layer or when any wood floor has suffered excessive material loss, severe water damage, buckling, substantial warping, insect damage, unstable boards, or widespread gouges that cannot be repaired safely.
Localized board replacement can preserve an otherwise suitable hardwood floor. It may help with split boards, isolated deep gouges, permanent discoloration, or damage through an engineered face. New boards can differ in age, oxidation, and color, so the repair still needs sampling and integration with the surrounding floor.
Sanding and coating cannot correct an active moisture source or structural movement. Resolve those causes before comparing cosmetic options.
Use Seven Checks for the Final Decision
Proceed with full refinishing only when the floor passes all seven checks:
- Construction: The material is confirmed as solid or sandable engineered hardwood.
- Thickness: Remaining sandable wood has been verified.
- Condition: There is no unresolved moisture, movement, or insect damage.
- Pigment: Enough gray can be removed without exceeding the floor’s limit.
- Test patch: Safely exposed wood has acceptable undertones and residual color.
- Finish sample: The complete coating system works under the room’s lighting.
- Logistics: Repairs, dust control, access, furniture, rugs, and cure restrictions are planned.
If all seven pass, a natural or honey-toned refinish is a reasonable goal. If the wood layer is too thin but the coating is sound, test a compatible tinted recoat and accept that it will warm rather than erase the gray. If there is no sandable wood, unsafe damage, or an unacceptable result after safe test sanding, replace the floor instead.
The move toward warmer oak, honey, golden, and medium wood tones reported by USA TODAY explains the renewed interest in changing gray floors. It does not change what a particular floor can tolerate. Construction, remaining wood, pigment depth, and the on-floor sample determine the answer.