
How to Refinish Hardwood Floors: Recoat or Sand
Use floor condition to choose cleaning, recoating, or full sanding, then plan progressive grits, finish compatibility, cure times, cost, and downtime.
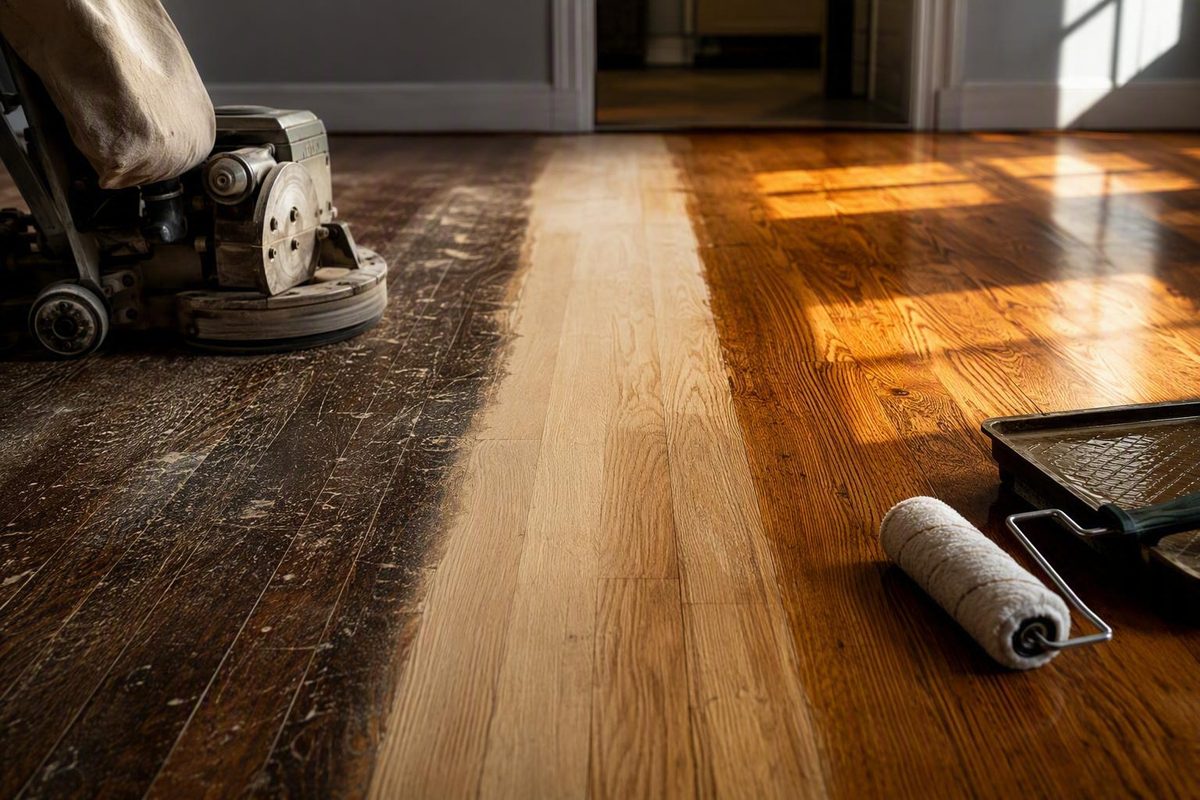
Refinish hardwood floors when wear has reached through the finish, deeper defects need correction, or you want a substantial color change. If the floor is sound but merely dull or lightly scratched, cleaning and recoating may be enough.
Choose the right treatment before renting a sander
Start by identifying the problem rather than choosing equipment.
| Floor condition | Likely treatment | What it accomplishes |
|---|---|---|
| Dirt, ordinary traffic marks, intact finish | Routine cleaning | Removes surface contamination without altering the finish |
| Dullness or light wear confined to a sound finish | Screen or buff, then recoat | Prepares the existing finish so a compatible new coat can bond |
| Worn-through finish, deep scratches, dents, substantial discoloration, or unwanted color | Full refinishing | Exposes bare wood for optional staining and new protective coats |
| Active moisture, rot, mold, severe warping or movement, or insufficient wood thickness | Repair, assessment, or replacement | Addresses conditions that sanding and coating cannot correct |
Full refinishing removes the existing finish by sanding to bare wood. Stain may then be applied, followed by several protective finish coats. Recoating preserves the existing finish: the surface is cleaned and mechanically scuffed before a compatible new coat is applied. It generally cannot remove dents, deep scratches, stains within the wood, or other defects below the finish. Lowe’s comparison of refinishing and recoating explains the practical distinction.
Chemical abrasion is an alternative surface-preparation method used by some recoat systems. In either case, abrasion prepares the old finish; recoating is the separate step of applying the new coat.
Stop before sanding if you cannot identify the floor construction or determine how much sandable wood remains. Unexplained movement, widespread loose boards, active leaks, serious water damage, mold, rot, and severe unevenness also require diagnosis first. Sanding may remove a visible symptom without correcting its cause, while making the floor thinner.
Some engineered hardwood can be refinished, but not every product has enough wood remaining above its core. Check the exact product documentation or have a qualified flooring professional inspect the floor, particularly when its sanding history is unknown.
Laminate is different. Damaged laminate generally requires a maintenance method intended for laminate or replacement of the affected plank.
Plan the job, cost, and downtime
Before requesting quotes or renting equipment:
- Measure the actual floor area.
- Identify whether the floor is solid hardwood, engineered hardwood, or another material.
- Identify the existing coating if possible.
- Inspect for leaks, moisture damage, movement, loose boards, rot, and mold.
- Decide whether to retain the current color or expose and restain the wood.
- Plan complete removal of furniture and rugs.
- Decide how to isolate the room while maintaining product-appropriate ventilation.
- Account for shoe molding, baseboards, transitions, vents, stairs, and thresholds.
- Plan how occupants and pets will avoid the area through the required cure milestones.
- Coordinate the work with future changes to cabinets, islands, hearths, walls, or room layouts.
That final step can prevent an expensive repeat project. Moving an island, cabinet run, hearth, or wall after refinishing may reveal an unfinished footprint or flooring that no longer matches the exposed area.
For professional work, a reasonable 2026 planning estimate is approximately $3–$8 per square foot, not a guaranteed quote. Area, location, wood type, floor condition, layout, labor, stain choice, and finish system can change the total. Quotes may also exclude repairs, furniture moving, old floor-covering removal, molding, stairs, vents, and dust cleanup. NerdWallet’s 2026 cost overview provides the cited range.
Full refinishing commonly keeps a room out of normal service for several days. Published planning estimates include roughly three to five days with a water-based finish and five to seven days with an oil-based finish. These are estimates, not promises; room size, repairs, humidity, stain color, coat count, and the selected products can extend the schedule. Lowe’s refinishing guide provides those finish-dependent ranges.
Drying and curing are not interchangeable. A coating may be ready for another coat before it can tolerate light foot traffic. It may permit careful walking well before furniture, pets, or rugs can return. Build the schedule around the selected stain, sealer, and finish instructions rather than a generic day count.
Prepare the room and floor
Remove furniture, rugs, floor-length curtains, and other dust-catching items. Clean the floor and set protruding fasteners below the sanding path without damaging the boards. Remove or protect shoe molding as the project requires.
Unexplained, widespread, moisture-related, or structural movement remains a stop-work condition.
Isolate doorways and other openings to limit dust migration. Protect HVAC vents where appropriate, but reconcile containment with the ventilation requirements for the selected coating. Use eye and hearing protection, operate rented machinery according to its instructions, and follow product-specific requirements for dust protection, ventilation, and other PPE. Vacuum-connected sanding equipment can reduce dust substantially, but it does not make refinishing dust-free. These precautions are included in Home Depot’s hardwood-floor refinishing guidance.
Inspect defects before hiding them cosmetically. Address those causes first.
Product instructions vary, and some fillers are unsuitable for large cracks, moving floors, beveled edges, or particular floor constructions.
Before recoating, determine whether wax, polish, cleaner residue, or an incompatible treatment is present. Contamination can prevent the new coating from bonding. Clean and test a small, inconspicuous area instead of assuming compatibility.
Test the complete color and finish system on the actual floor. Wood species, undertones, previous treatments, sanding quality, and filled areas can all affect the result.
Sand progressively without damaging the floor
The core equipment is task-specific:
- Drum or belt sander: open floor areas
- Floor edger: perimeters and areas the main machine cannot reach
- Scraper and hand-sanding tools: corners and tight details
- Vacuum or dust collection: connected and serviced as the equipment requires
- Inspection lighting: reveals scratches, ridges, and missed coating
A common sequence is approximately 36–40, 60, then 100 grit, but it is not a universal prescription. Coating hardness, floor flatness, wood species, machine type, and damage determine the correct starting point and progression. Bona’s guide describes 40, 60, and 100 grit as a typical sequence while noting that uneven floors or tough coatings may require a different start. It also directs users to raise and lower the drum only while the machine is moving. See Bona’s wood-floor sanding guide.
Each pass has a different purpose. Coarse sanding removes the old coating and begins flattening the surface. Medium and fine sanding remove the scratch pattern left by the previous abrasive and prepare the wood for stain or finish. Bona also reports an NWFA rule not to skip more than one abrasive grit between sanding cuts, reducing the chance that deep scratches survive into the finished floor. Bona’s professional sanding FAQ describes that spacing rule.
Follow the rental machine’s operating manual. In general:
- Work with the grain unless the floor and equipment instructions call for a corrective pass in another direction.
- Start the machine with the drum raised.
- Keep moving whenever lowering or raising the drum.
- Use controlled passes without stopping in place.
- Overlap adjacent paths consistently.
- Empty or service dust collection as directed.
Overlap recommendations vary by machine, so the rental manual should control. The objective is even coverage without ridges, missed strips, or unnecessary wood removal.
Sand the edges through an appropriate abrasive progression rather than leaving scratches from one aggressive pass. Scrape and hand-sand corners the edger cannot reach, then blend the perimeter into the main field so the transition does not become obvious after staining.
Inspect the dry floor under strong light from several angles. Look for remaining finish, drum marks, edger swirls, chatter, waves, coarse scratches, and uneven transitions.
Stop the DIY project if you create visible gouges, chatter, or waves; cannot blend the field and edge sanding; become uncertain about the remaining wood thickness; or discover that the floor requires aggressive flattening.
Remove dust, then stain or seal
Vacuum the floor methodically, including edges, corners, thresholds, ledges, and adjacent surfaces from which debris could fall onto a wet coating. Remove residual fine dust using a method approved for the selected finish system. Hair, abrasive particles, and airborne debris can become visible defects.
Inspect once more before opening stain or sealer. Liquid products do not conceal coarse scratches, edge marks, leftover finish, or poorly feathered repairs. Stain may make sanding inconsistencies more noticeable.
Stain is optional. If you want to change the color:
- Test the stain on the actual floor, including a repaired area when applicable.
- Follow the manufacturer’s surface-preparation requirements.
- Work with the grain in manageable sections.
- Maintain a wet edge where directed.
- Remove excess stain at the specified time and by the specified method.
- Allow the required drying time before applying the next product.
Do not promise an exact match from a small retail sample. Species, grain, natural undertone, previous treatment, sun exposure, and filler can alter the appearance.
If you omit stain, do not automatically add a generic sanding sealer. Treat stain, sealer, and topcoat as one compatible system and follow its technical instructions.
Apply the finish and respect every curing milestone
Water-based and oil-based finishes have different working and appearance characteristics. Neither is universally better.
| Consideration | Water-based finish | Oil-based finish |
|---|---|---|
| Drying | Generally faster | Generally slower |
| Color shift | Usually ambers less | May add or develop amber tones |
| Odor | Often less persistent | May be stronger or linger longer |
| Scheduling | May permit shorter intervals | Often requires longer intervals |
These are broad tendencies rather than product specifications. One multi-project homeowner account describes faster drying, lower odor, and reduced ambering as reasons for choosing a water-based system, while also noting that application and cost can differ. The selected product’s label and technical data remain controlling. See the finish comparison and project account.
Manufacturer instructions determine the applicator, spread rate, coat count, ventilation, recoat interval, abrasion between coats, temperature and humidity limits, and cure schedule.
Keep these milestones separate:
- Recoat time: when another coat may be applied
- Light foot traffic: when limited walking is allowed
- Furniture return: when furniture may be replaced, often with precautions
- Rug placement: when the coating can safely be covered
- Full cure: when the coating has developed its specified final properties
A generic timeline cannot override the label or technical data sheet. If the floor feels dry but the specified furniture or rug interval has not elapsed, wait.
Handle oil-soaked rags exactly as the coating manufacturer directs and comply with applicable local fire and waste rules.
Decide whether DIY refinishing is worth the risk
Full refinishing is a substantially larger DIY commitment than recoating. It combines heavy equipment, noise, fine dust, perimeter work, close surface inspection, coating application, and days of restricted access.
| Factor | DIY | Professional |
|---|---|---|
| Equipment and skill | Requires quick familiarity with rented machines | Brings specialized equipment and established technique |
| Dust and cleanup | Depends heavily on preparation and collection | May offer stronger containment, but not zero dust |
| Schedule and coating | Can expand after errors or delays | Usually coordinated as one sequence |
| Floor-damage risk | Gouges and uneven sanding may be permanent | Generally lower with a qualified crew, though scope and warranty matter |
Full refinishing carries more floor-damage risk than recoating because it intentionally removes the existing finish and some wood.
Arrange professional assessment for:
- Engineered flooring or any floor with uncertain sandable thickness
- An unknown history of previous sanding
- Active moisture, rot, mold, or structural movement
- Severe unevenness requiring aggressive correction
- Extensive or deeply penetrated stains
- Loose or unstable flooring with an undiagnosed cause
- Any project where you are not confident operating a drum sander
When comparing quotes, ask each contractor to state:
- Which repairs are included
- The planned sanding stages
- The exact stain, sealer, and finish products
- The number of coats
- Dust-containment measures
- Molding, vent, threshold, and stair work
- Cleanup responsibilities
- Estimated walking, furniture, pet, rug, and full-cure milestones
- Warranty terms and exclusions
This is a practical comparison checklist, not a universal contract standard. Treat “dustless” as a description of reduced dust, not a literal guarantee. Vacuum-connected equipment can reduce airborne dust and cleanup, but some residual dust may still escape or settle.
Control dust and address pre-1978 lead risks
A home built before 1978 does not automatically have lead in its hardwood floor finish. The relevant concern is whether refinishing or related preparation will disturb lead-based paint on baseboards, trim, thresholds, doors, or other painted components. Renovation in a pre-1978 home with lead-based paint can create hazardous lead dust, according to the EPA’s lead-safe renovation guidance for DIYers.
EPA recommends determining whether lead-based paint is present before disturbing painted surfaces. If the building’s age cannot be established, EPA says the safest approach is to assume the renovation area has lead-based paint and use lead-safe practices.
Lead control is broader than wearing a respirator or attaching a vacuum. Depending on the work, it may include testing, isolating the area, controlling HVAC and vents, using HEPA-equipped collection, wet cleaning, wearing appropriate protective equipment, and containing waste. Follow applicable federal, state, Tribal, territorial, and local requirements.
For covered paid work, the federal rule generally requires a certified renovation firm using appropriately trained workers when painted surfaces are disturbed in pre-1978 homes, childcare facilities, or preschools. Homeowners working on their own homes are generally outside the federal rule, but coverage can extend to rentals, in-home childcare operations, and homes being renovated for resale. Authorized state, Tribal, or territorial programs may differ. The EPA Renovation, Repair and Painting Program explains the federal framework.
Pause and consult a lead-safe certified contractor when you are uncertain whether painted surfaces will be disturbed, whether the rule applies, or whether you can contain and clean the work safely.
Protect the renewed finish
Once the finish system permits normal use, prevent abrasive grit from accumulating. Sweep, dust mop, or vacuum with a bare-floor setting. Clean spills promptly with a dry or slightly damp cloth, and use protective pads where furniture contacts the floor.
Avoid flooding the floor, wet mops, and steam mops. The National Wood Flooring Association states that prolonged wet or steam mopping can damage the finish and wood. It also recommends a cleaner made for the installed finish rather than a generic product that may leave incompatible residue. See the NWFA’s wood-floor maintenance guidance.
Do not replace furniture or rugs simply because light walking is allowed. Follow the finish manufacturer’s separate return-to-service milestones.
Maintenance frequency should reflect household traffic, pets, footwear, grit exposure, and visible wear rather than a fixed calendar. When a sound finish begins to look dull, recoating it before wear reaches bare wood may postpone the need for another full refinish.
The diagnosis-first decision is:
- Choose cleaning for dirt and ordinary maintenance.
- Choose recoating for a sound floor with superficial finish wear.
- Choose full refinishing for worn-through finish, deeper defects, or a major color change.
- Stop and investigate moisture, structural movement, rot, mold, severe unevenness, or uncertain sanding thickness.
- If proceeding, use progressive sanding, rigorous dust removal, compatible products, product-specific cure times, and lead-safe precautions wherever older painted surfaces may be disturbed.
Can engineered hardwood floors be refinished?
Sometimes. The answer depends on the product’s construction, remaining wood wear layer, previous sanding, and current condition. Do not rely on a universal veneer-thickness rule or assume every engineered floor can tolerate another sanding. Identify the product where possible and ask its manufacturer or a qualified flooring professional to assess it.
Can hardwood floors be refinished without sanding to bare wood?
A sound floor with dullness or wear confined to the existing finish may be mechanically screened or buffed and then recoated. Some compatible systems instead use approved chemical abrasion before recoating. These methods can renew sheen and protection but generally cannot remove deep scratches, dents, discoloration within the wood, or a worn-through finish.
How much does it cost to refinish hardwood floors professionally?
A supported 2026 planning estimate is approximately $3–$8 per square foot, although actual quotes vary with location, floor condition, wood type, layout, repairs, finish choices, stairs, molding, furniture moving, old-covering removal, vents, and cleanup. Compare written scopes rather than selecting a contractor from the per-square-foot figure alone. NerdWallet provides the cited 2026 range.
How long does hardwood-floor refinishing take?
Plan for several days. One published estimate allows approximately three to five days for water-based finishing and five to seven days for oil-based finishing, with room size, repairs, humidity, stain, coat count, and product choice affecting the result. Lowe’s provides those planning estimates. Walking, furniture return, rug placement, and full cure may each occur on different dates.
Does a pre-1978 home automatically mean the hardwood finish contains lead?
No. The construction date does not prove that the hardwood finish contains lead. Lead precautions become relevant when the project may disturb lead-based paint on trim, baseboards, thresholds, doors, or other painted surfaces. Determine which surfaces will be affected and pause for qualified lead-safe help if containment or regulatory coverage is uncertain.