
How to Repair Deep Scratches in Hardwood Floors
Identify finish damage, wood-deep cuts, gouges or exposed core, then fill, level, color-match and spot-finish—or know when to refinish or replace.
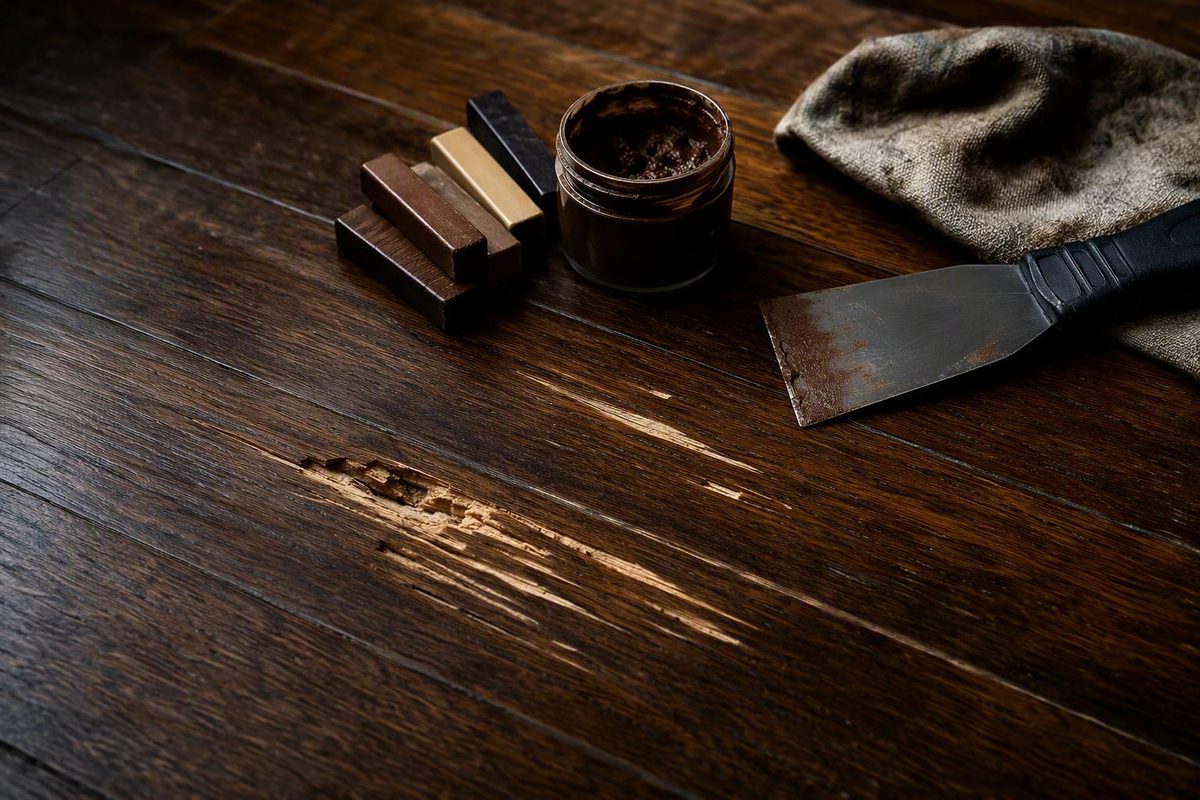
To repair deep scratches in a hardwood floor, first identify whether the damage is confined to the finish, cuts into sound wood, removes material, or exposes the core of an engineered board. One isolated gouge in a dry, stable board can often be filled, leveled, color-matched, and spot-finished. Widespread wood-deep scratches may require refinishing, while exposed core, moisture damage, movement, softness, or delamination usually calls for board replacement or underlying repairs.
Set a realistic goal: a good spot repair should be stable, protected, and unobtrusive from standing height. It may not be invisible close up or under angled light.
Choose the repair by depth, area, and floor construction
Choose the scope from the condition of the floor—not from the claims on a repair-kit label.
| Condition | Best starting point | Likely result |
|---|---|---|
| Finish-only scratching or dull wear | Assess for a compatible screen and recoat | Renews an abraded coating without removing wood |
| One or a few scratches into sound wood | Localized color repair and spot finish | Reduces contrast and protects exposed wood |
| Isolated gouge with material missing | Filler, controlled leveling, color matching, and compatible finish | Rebuilds and seals the void |
| Engineered core exposed | Board replacement or professional assessment | Avoids sanding farther through the veneer |
A screen and recoat lightly abrades the existing coating so a compatible new coat can bond. It can address superficial wear, but it cannot remove a scratch that has passed through the finish and into the wood.
One or a few stable scratches are usually better candidates for a controlled spot repair than for sanding an entire room. If wood-deep scratches cover broad traffic lanes or several connected areas, full refinishing may produce a more consistent result—but only if enough sound, sandable wood remains.
Stop treating the damage as cosmetic if you can see an engineered floor’s plywood or fiberboard core. Delamination, warping, soft or loose boards, active moisture damage, and subfloor trouble also shift the job toward board replacement or underlying repairs. Recoating, refinishing, targeted repair, and replacement are different scopes, and choosing among them starts with separating cosmetic wear from floor failure.
Confirm what is scratched before sanding
Inspect the mark under direct and angled light:
- Surface scratch: The coating is scuffed or scored, but no raw wood is visible.
- Wood-deep scratch: The finish is broken and lighter bare wood, crushed grain, or a distinct cut is visible.
- Gouge: Wood is missing, torn, or splintered, leaving a void that must be rebuilt rather than merely colored.
- Core exposure: An engineered board shows a contrasting plywood or fiberboard layer beneath its real-wood surface.
Solid hardwood is wood through its usable thickness, although prior sanding, fasteners, and the tongue-and-groove profile still limit how much material can safely be removed. Engineered hardwood has a real-wood veneer over a layered plywood or fiberboard core. Sanding through that veneer exposes the core and permanently damages the board.
Check the flooring invoice, carton label, manufacturer documentation, or a known spare plank to identify the construction and veneer thickness. Previous sanding and uneven wear also matter.
Published veneer ranges are only preliminary guidance. Thin veneers may not tolerate traditional sanding, while thicker veneers may permit limited refinishing. Neither statement guarantees that a particular installed floor can be sanded safely. Manufacturer guidance for engineered-floor refinishing begins with confirming the veneer and checking for deep damage or delamination. If the construction, remaining veneer, or sanding history is unknown, stop before DIY sanding and have the floor assessed.
Press gently around the damage and inspect nearby seams. Movement, cupping, softness, separated veneer, dark staining, musty odor, recurring gaps, or other moisture symptoms indicate a larger problem. Correct the cause before repairing the surface; filler cannot stabilize a moving board or repair a wet subfloor.
Gather materials and run a compatibility check
For a conventional filler repair, gather:
- Vacuum with a soft-floor attachment or a soft brush
- Cleaner approved for the existing floor
- Sharp craft knife or small chisel for loose fibers only
- Painter’s tape
- Color-matched, sandable filler approved for the flooring and void
- Small flexible applicator
- Small, firm sanding block
- 180–220-grit abrasive, as used in this deep-scratch repair method
- Compatible stain, touch-up colorant, or fine artist’s marker if needed
- Compatible spot finish
- Eye and respiratory protection specified for the work and products
- Plastic sheeting or another practical means of containing sanding dust
The filler label should approve the product for the flooring material, required fill depth, sanding, intended colorant, topcoat, and floor-service conditions. Do not use a filler that is unsuitable for the depth of the void or the planned finishing sequence.
Vacuum first, then clean the area without flooding the board. Let it dry fully before filling.
Compatibility applies to the complete repair stack: filler, stain or colorant, topcoat, and existing floor finish. There is no dependable universal shortcut for identifying every existing finish. Polyurethane-finished floors generally require a polyurethane-compatible repair system, while oil-finished floors require products approved for that oil system. Those broad descriptions are not enough to confirm an exact combination, especially on factory-finished boards.
Test the complete sequence on a spare plank or inconspicuous area. Follow the relevant product instructions when assessing adhesion, color, and sheen. The filler, colorant, and topcoat manufacturers control application, ventilation, handling, drying, recoating, cleanup, disposal, and return-to-service requirements.
During sanding, use the protective equipment and dust-control measures specified for the products and task. Engineered-floor manufacturer guidance calls for eye and respiratory protection, dust containment, and meticulous residue removal before finishing.
Do not improvise a heated-wax repair. The available instructions do not establish that heated wax is compatible with every floor or finish, so this guide is limited to non-heated cosmetic products expressly approved by their manufacturer.
Repair an isolated deep scratch with filler
Use this method for a material-missing scratch or gouge in a dry, stable board. If the defect is only a narrow line with no void, localized color and a compatible spot finish may be less intrusive.
- Vacuum the defect. Remove grit from the bottom and edges without digging into sound wood.
- Clean and dry the area. Use a cleaner approved for the floor, control the moisture, and wait until the repair area is fully dry.
- Remove only loose fibers. Trim splinters that are detached or standing above the surface. Do not enlarge the gouge merely to make its shape uniform.
- Mask the surrounding finish. Place painter’s tape close to the damage while leaving the void accessible. Follow the repair-system instructions for when tape should be removed, replaced, or omitted during later steps.
- Pack in the filler. Press the selected filler firmly into the void with a small applicator. Keep it concentrated in the damage instead of smearing it over intact finish.
- Build a deep repair gradually. If the filler manufacturer permits layered application, use thin layers and let each dry as directed. Do not exceed the product’s approved fill depth.
- Let the final fill cure. A dry-feeling surface is not proof of a complete cure. Follow the label before sanding.
- Level with control. Wrap 180–220-grit abrasive around a small, firm block. Work with the grain in short strokes until the patch is flush.
- Remove the sanding residue. Use the cleanup method approved for the filler and finishing system.
- Adjust the color if needed. Apply restrained color to the cured patch according to the colorant and topcoat instructions.
- Prepare and finish the boundary. Follow the finish manufacturer’s directions for masking, required abrasion, overlap, and blending. Do not coat intact surrounding finish unless it has received the adhesion preparation required by that system.
A sanding block helps keep the repair flat. Keep the abrasive centered over the patch, then stop frequently to check the result by touch and reflected light.
Worked example: Consider one narrow gouge in a dry, stable solid-oak board. After vacuuming, cleaning, and drying it, trim only the raised loose fibers. Mask as directed for the selected repair system, then press an approved color-matched filler into the cut. If the product permits layered filling and the void exceeds the recommended single-pass depth, build it in separate applications. After the final layer has cured according to its label, handle the tape as the system directs and level the patch with a small block and fine abrasive along the grain. Remove all dust, test any grain color on the sample, make only the necessary adjustment, prepare the finish boundary, and apply the confirmed compatible finish. Each product controls its own timing; there is no universal drying schedule.
Match the color, grain, texture, and sheen
Natural flooring rarely reads as one flat color. Earlywood, latewood, pores, mineral streaks, stain absorption, sunlight, and age all create variation. A filler that matches the board’s average color may still stand out as a solid line or oval.
Start with the base color, then add one or two nearby tones if needed. Add restrained grain accents in the direction of the surrounding grain, then step back before making another adjustment.
Test the planned filler, color, and finish sequence—not just the unfinished filler—on a spare plank or hidden location.
Texture matters as well. A flush, glass-smooth patch can remain obvious on wire-brushed, distressed, or hand-scraped flooring. After leveling, reproduce only the shallow character immediately around the repair and only with a method approved for the filler. Do not cut deep grooves into the patch or adjacent finish.
Match the existing sheen as closely as possible. Use the finish manufacturer’s preparation and blending method rather than feathering an unknown coating across a wide area.
Inspect the repair from normal standing height, close range, and several lighting angles. Success means the patch is stable, sealed, and substantially less conspicuous—not guaranteed to disappear under close or raking-light inspection.
Use wax only when cosmetic concealment is the goal
Choose the material according to the job it must perform.
| Option | Best use | What it does | Main limitation |
|---|---|---|---|
| Sandable filler and finish | Missing material in a stable gouge | Rebuilds, levels, colors, and protects the void | Requires approved depth and finish compatibility |
| Non-heated wax or fill stick | Cosmetic concealment approved for the floor | Occupies some visual depth and reduces contrast | Does not restore missing wood |
| Touch-up marker | Exposed light line or grain accent | Adds localized color | Does not rebuild a void |
| Several wax or marker tones | Varied grain or aged color | Imitates tonal variation | May need adjustment or reapplication |
Wax, fill sticks, and markers can make a scratch less obvious, but they are not structurally equivalent to a cured filler-and-finish repair. Markers add color, and cosmetic sticks may occupy some space; neither corrects board movement, splintering, moisture damage, or exposed core.
Using several nearby tones may look more natural than applying one color across the entire mark. Start with a light base, add limited darker grain detail, and inspect the result between adjustments.
Before using wax or a fill stick, confirm that its manufacturer approves it for the floor and existing finish. Use only non-heated products according to their instructions.
Cosmetic concealment is reasonable when the goal is reduced contrast rather than restoration—for example, on a stable dark line with no meaningful void. The treatment may remain visible from some angles and may need later adjustment or reapplication.
Know when to stop and escalate the repair
A spot repair is the wrong approach when the damage is widespread, the board is unstable, or the floor lacks a safe repair layer.
Screening and recoating renews superficial finish wear. It does not reach the bottom of a scratch that extends into wood. Repeated screening will not convert a coating-level treatment into a deep-scratch repair.
For widespread wood-deep scratching, consider professional refinishing when the boards are dry, stable, and thick enough to sand. Refinishing lowers the surrounding surface toward the depth of the damage before the floor is stained, if desired, and protected with a new finish system. It is a different scope from filling one gouge.
Engineered flooring has tighter limits because its real-wood veneer may be thin, previously sanded, or unevenly worn. General thickness ranges are screening guidelines, not permission to sand a particular floor. Thin veneers may not tolerate traditional sanding, while thicker veneers may allow limited refinishing depending on the model, prior work, damage depth, bevels, and sanding method. Confirm the installed product and remaining veneer rather than relying on a generic measurement.
Replace the affected board, or have it assessed for replacement, when:
- Plywood or fiberboard core is exposed
- The veneer is delaminating
- The board is warped, cupped, soft, or loose
- Significant moisture damage is present
- The defect extends beyond the remaining sandable layer
- The subfloor or fastening system is failing
Correct leaks, excess moisture, subfloor movement, and loose fastening before cosmetic work.
Professional assessment is also sensible when the construction, finish type, or remaining veneer is unknown; when a factory finish is difficult to identify or match; when the repair is in a highly visible area; or when damage extends beyond a few isolated spots.
Replacement is not automatically the better-looking option.
Use a diagnosis-first rule: fill and spot-finish one stable gouge; use compatible cosmetic concealment only when appearance rather than material restoration is the goal; refinish widespread wood-deep damage only when a safe sanding layer remains; and replace or professionally assess boards with exposed engineered core, moisture damage, movement, or uncertain construction.